

Hello everyone, I am very excited to tell you that I was successfully installed the latest macOS Catalina 10.15.4 on my AMD FX 8350 processor with OpenCore. Well, it wasn’t that smooth but it is doable. If you have identical hardware as mine, you can simply copy my EFI folder and use it straight away with minimal efforts. It feels so slow when I run Windows 10 on this build but it runs pretty fast on macOS Catalina 10.15.4. So, I think it is worthy of my time.

So I have two old processors AMD FX-4300 and FX-8350 at home and nobody uses it. Then I bought a cheap, used, Asrock 970 Pro 3 motherboard that works very well with the processors. This particular motherboard supports UEFI which is great for Hackintosh. In this article, I will guide you on how to install macOS Catalina on this AMD FX and Asrock 970 Pro 3 motherboard build.

Hardware Specifications on this build:
- AMD FX-4300
- Asrock 970 Pro 3
- Sapphire Nitro+ Radeon RX580 8 GB
- Kingston Hyper-X Fury DDR3 8 GB
- 256 GB SSD
I tried to install the latest OpenCore 0.5.7 on this build but I always had a problem with my USB keyboard. It stuck during the boot menu selection. After trying so many times, finally I can get it up and running with keyboard support, audio, mouse, and everything.
Steps to Install macOS Catalina 10.15.4 Hackintosh on AMD FX-4300 and AMD FX-8350
I use the OpenCore boot loader on this setup. I will not explain every single step to configure the config.plist. It is important for you to learn how this OpenCore Hackintosh works. So, it is better to read the most comprehensive OpenCore Guide below.
https://dortania.github.io/OpenCore-Desktop-Guide/
Spend some times to read and learn the guide. All you need to build a successful Hackintosh is there. This article will only show some main steps.
Step 1. Create macOS USB installation disk
You can create the macOS Catalina USB installation disk from another computer running Windows 10 or macOS. Please read the step below based on your OS.
Step 2. Copy the EFI folder
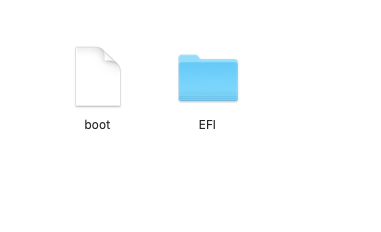
If you have the same or identical system, you can easily copy the EFI folder to your USB installation disk. This EFI folder contains all the drivers, kexts, and a working config.plist for the particular motherboard and processor. You will need to copy this EFI folder as well as the boot file.
Download my EFI folder for this build
On a Windows 10
If you created your USB install disk from a Windows machine, you should see the BOOT partition mounted in the Windows Explorer. Now copy and paste the EFI folder to that partition. Simply as that. But please note that if you create the USB installation disk using gibmacOS from a Windows 10, you must be connected to the internet during the macOS installation.
On a Mac
If you are on a Mac, you will need a special software to mount the EFI partition on your USB flash disk. You can use Clover Configurator which is easier and has GUI. Download the Clover Configurator from the link below and then run it.
Open Clover Configurator and then click Mount EFI. Click Mount partition on your USB flash disk and then click Open partition. Copy my EFI folder and then paste it into your EFI partition. Done.
Step 3. Configure the BIOS
Basically, there are some basic BIOS settings that we have to change. In this particular motherboard Asrock 970 Pro 3, I do change the following in the BIOS.
- Storage ==>AHCI
- Enable UEFI
- Disable CSM
I think that’s all for now and good luck. We have some interesting articles about Hackintosh in the following link. Don’t forget to check them out.
Hi
I was trying with a similar build but I keep getting stuck in the installer. Your EFI folder link isn’t working is there any way you can upload it again? I want to see what I am doing wrong.
Hi, sorry…I have updated the link. It should works now.
Thanks
Hi you can help me for.create USB bootable with all instructions please help…
Hello, i have a problem my graphic card R9 270X. Please help me.
What kind of problem…give some explanation pls
Sorry, I find the solution with Folder EFI of that page. Thank you
https://app.box.com/s/5v8hna16x9acdzu72t7xqyryiiz3dhbq
https://ibb.co/pZr8Fh5
I used your files and everything works perfectly except audio I have alc887, any suggestion would be really helpful.