Hello everyone, I was so excited to write this article because I have successfully installed macOS Big Sur Hackintosh on my AMD Ryzen PC using OpenCore. So this article is the continuation of my previous article How to create a macOS Big Sur USB Installer for Hackintosh. After we created the USB installation for Big Sur, we still need to create and configure the OpenCore boot loader for our system. And in this article, I will guide you on how to configure the OpenCore boot loader for Big Sur on AMD Ryzen. If you don’t want to use Big Sur and pretty satisfied with macOS Catalina, you can follow my other guide to install macOS Catalina on AMD Ryzen using OpenCore boot loader.
In the following article, I use macOS Catalina to work on. If you are running Windows, the steps are a little bit different but mainly it’s the same.
AMD FX users? You can follow my guide below to install macOS Big Sur on AMD FX system.
My system specification:
- Processor: AMD Ryzen 3 3200G
- Motherboard: MSI B450 Pro M2 Max
- VGA card: Sapphire Radeon RX580 8 GB
- RAM: 16 GB
- Western Digital 256 GB SSD drive
Steps to Install macOS Big Sur Hackintosh on AMD Ryzen Using OpenCore
Generally, here are the steps to install macOS Big Sur Hackintosh:
- Create macOS Big Sur USB Installation
- Configure EFI
- Boot and Install macOS Big Sur
- Post Install Configuration
- Troubleshooting (If needed)
Step 1. Create macOS Big Sur USB Installation
Mac users
If you are running macOS or Hackintosh, you can follow my guide below
Create macOS Big Sur USB installation disk from macOS
Windows users
Create macOS Big Sur USB Installer from Windows 10
Step 2. Obtain the latest OpenCore
When I wrote this article, the latest OpenCore 0.6.3 is available and can be downloaded from the link below.
https://github.com/acidanthera/OpenCorePkg/releases/tag/0.6.3
You can choose to use the DEBUG version or RELEASE version. In this case, I use the RELEASE version.
Step 2. Copy the EFI folder
Once you download it, you will get a zip file called OpenCore-0.6.3-RELEASE.zip. Extract the file and then copy the EFI folder to your EFI partition in the USB installation drive. You can use Clover Configurator software to mount the EFI partition on the USB installation drive.
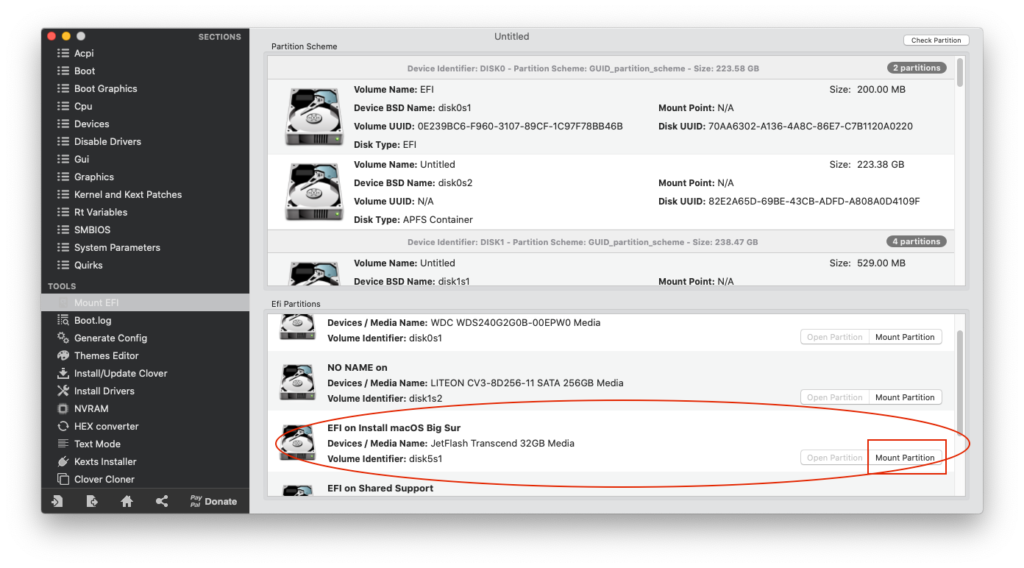
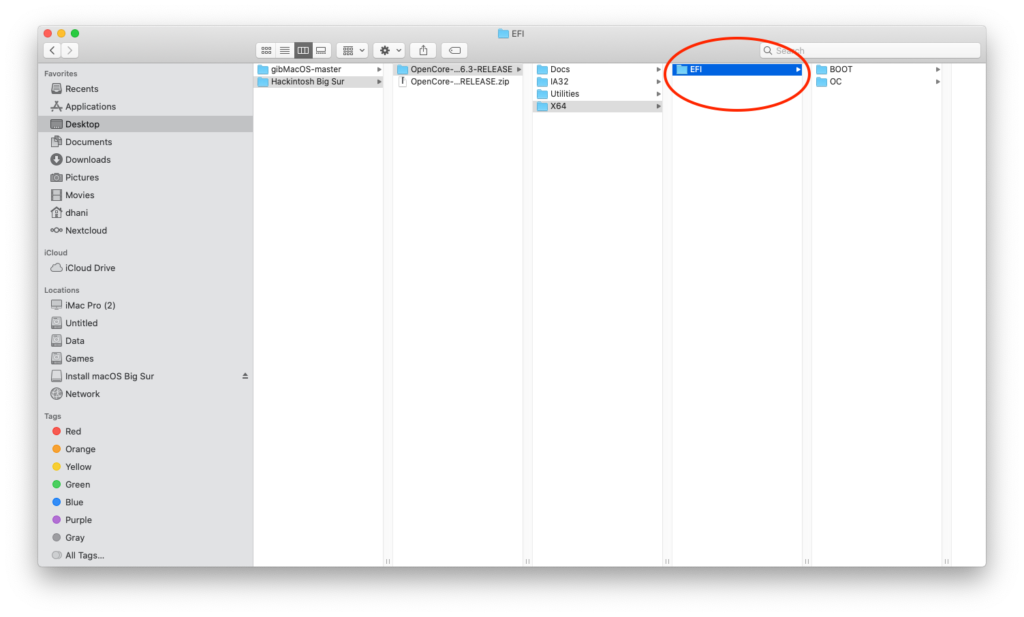
Copy the EFI folder from the OpenCore folder, and then paste directly to the EFI partition.
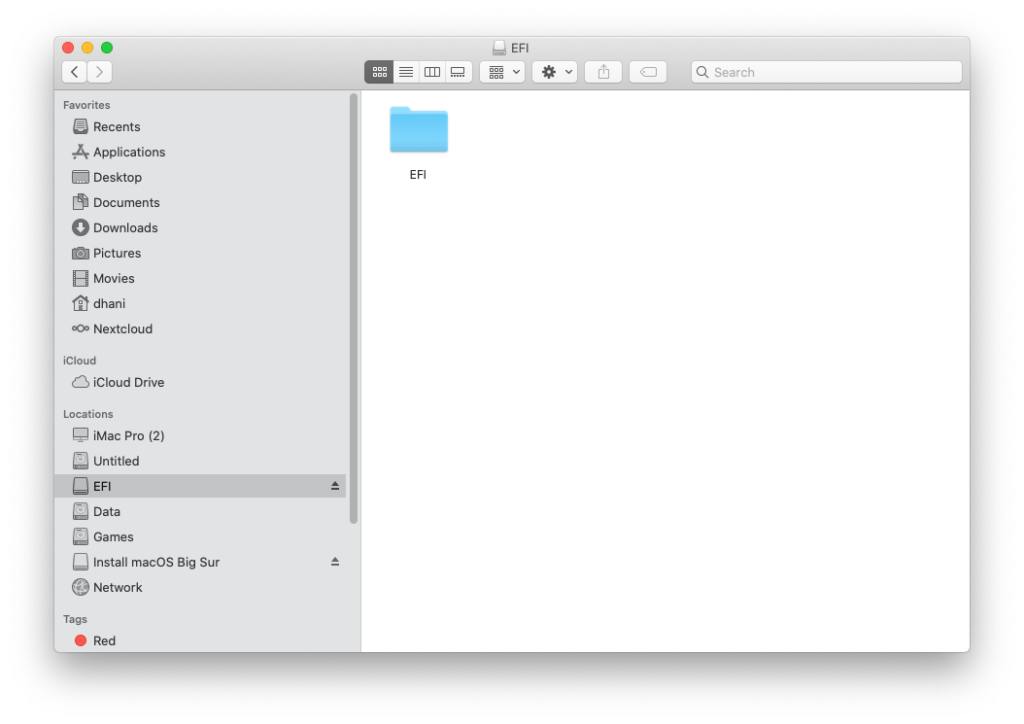
So now your EFI partition will looks like this
Step 3. Clean up the EFI folder
EFI>>OC>>Drivers
Now, open the EFI folder in the EFI partition of your USB installation drive. Open the OC>>Driver folder. We need to delete some files from the Drivers folder. The following files need to be removed:
- AudioDxe.efi
- CrScreenshotDxe.efi
- HiiDatabase.efi
- NvmExpressDxi.efi
- OpenCanopi.efi
- OpenUsbKbDxe.efi
- Ps2KeyboardDxe.efi
- Ps2MouseDxe.efi
- UsbMouseDxe.efi
- XhciDxe.efi
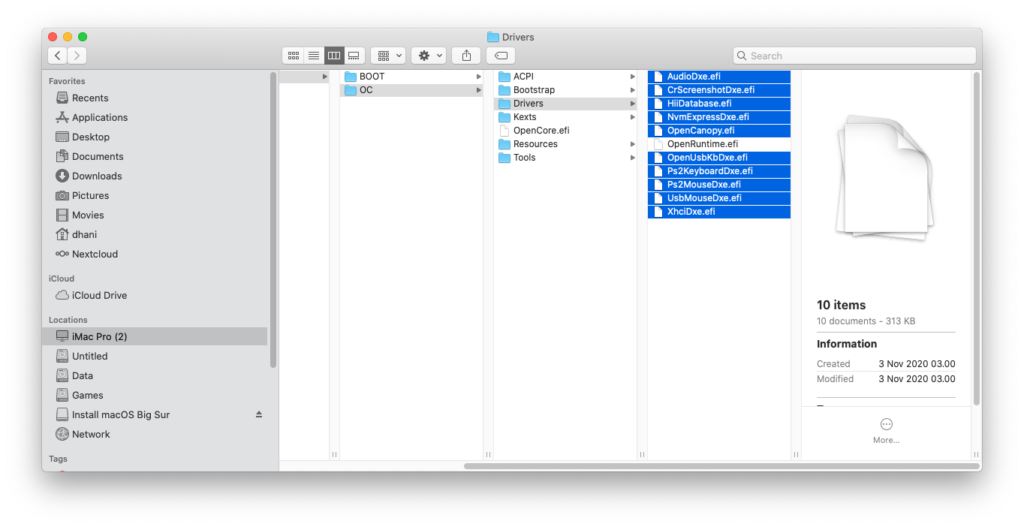
So now only one file which is OpenRuntime.efi file should remain in the Drivers folder.
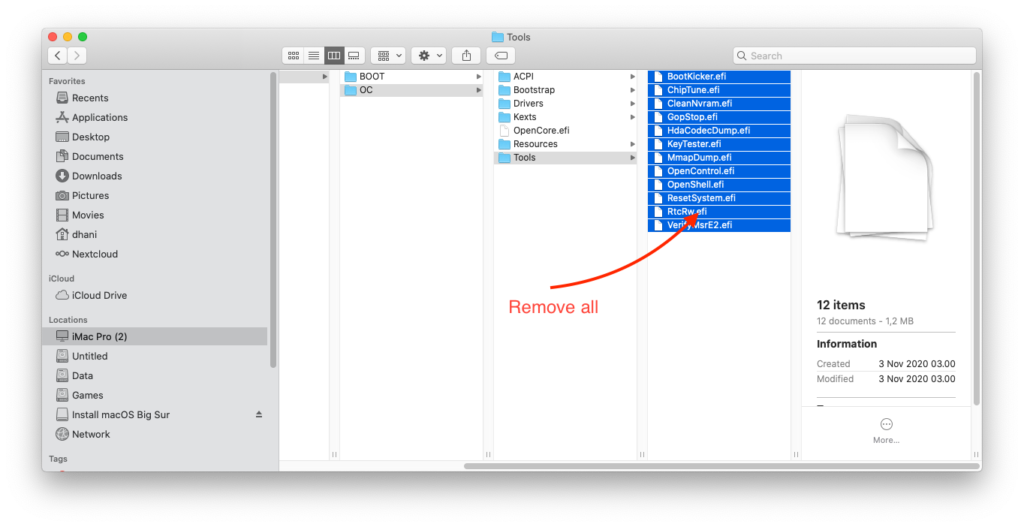
EFI>>OC>>Tools
Remove all files inside the Tools folder.
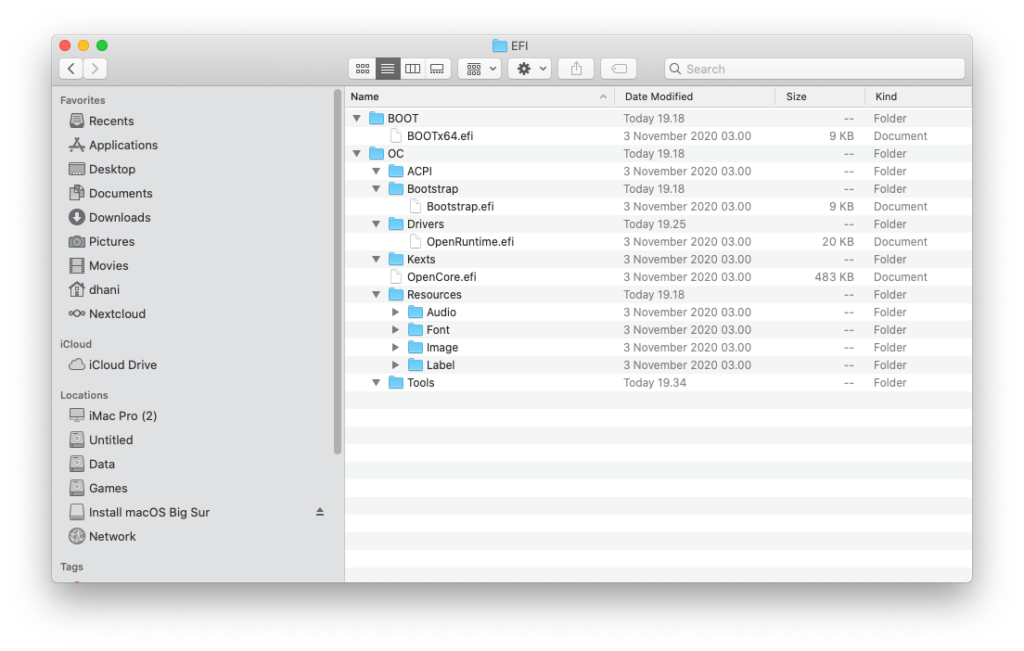
Now the cleaned EFI folder will looks like this
Step 3. Gathering Files for Big Sur Hackintosh on AMD Ryzen
Now we are ready to put some files into our EFI folder. Please note that if you have a different system, the files you need to download and put in the EFI folder will be different. Here are the files needed for this AMD Ryzen Big Sur Hackintosh.
A. Firmware Drivers
The following files are required by OpenCore to boot. No matter if you are running AMD or Intel, you must have the following driver.
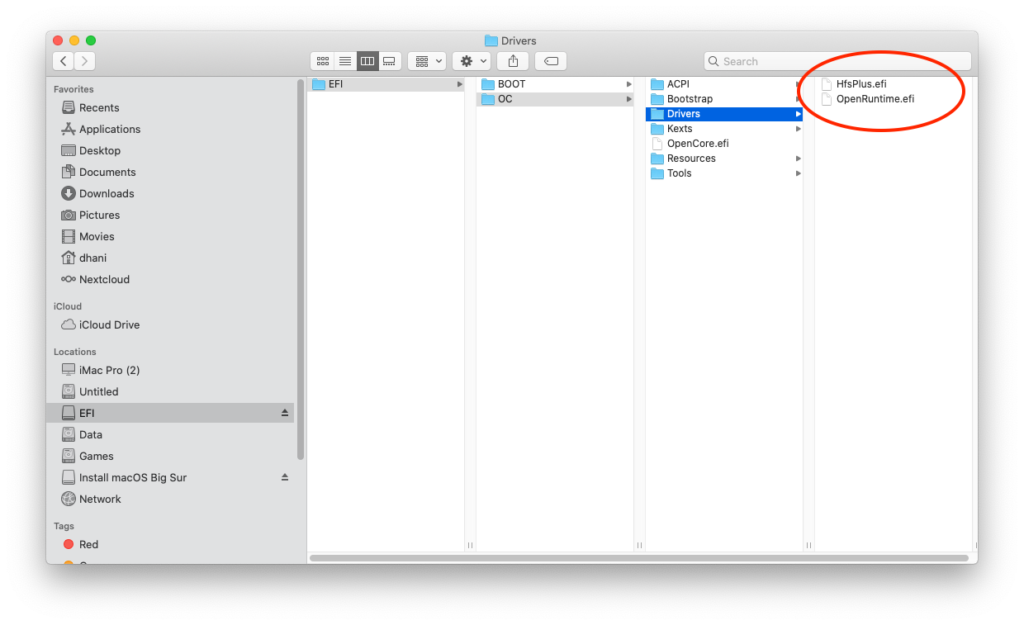
HfsPlus.efi
Download the HfsPlus.efi and then save it in the EFI>>OC>>Drivers folder. So now, the Drivers folder will looks like this
But, in my case, this HfsPlus.efi does not work. My system cannot boot to OpenCore. So, the solution is to use the VBoxHfs.efi instead of HfsPlus.efi
B. Kexts
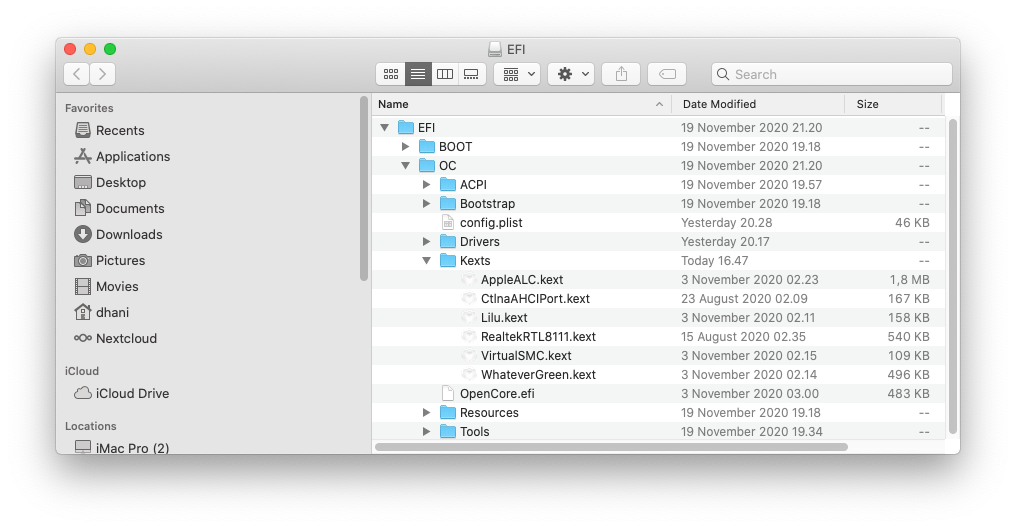
Now let’s move to the Kexts folder. For my particular build, I would have the following kexts:
- VirtualSMC
- Lilu
- WhateverGreen
- AppleALC
- RealtekRTL811 (Check your motherboard to know the network card you may have)
- CtlnaAHCIPort (Without this, my M.2 Western Digital SSD will not visible during installation)
Now, my Kexts folder will looks like this
C. SSDT’s
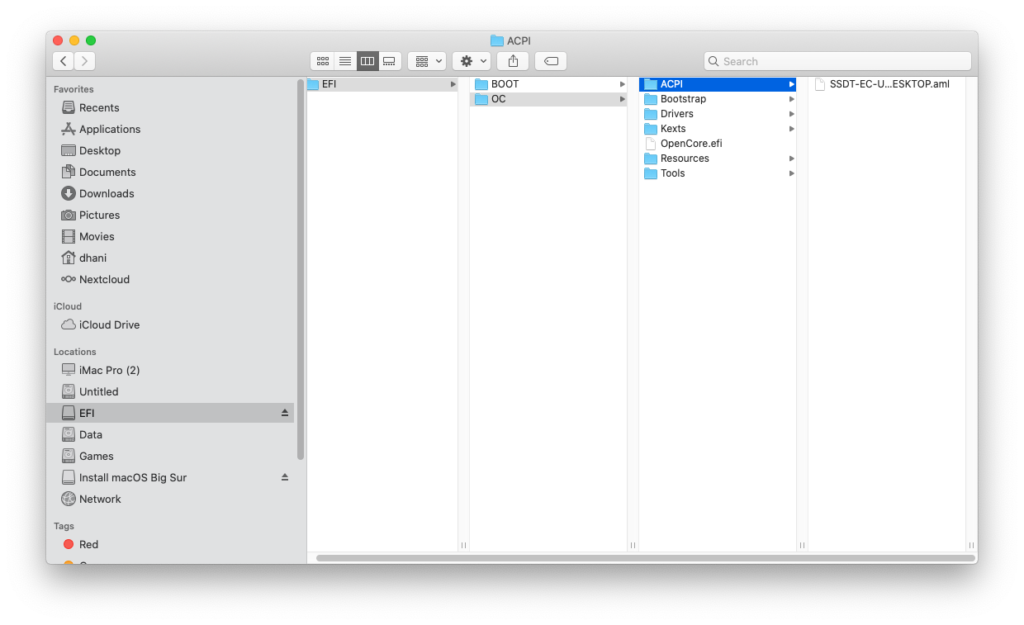
For my particular built and other AMD Ryzen desktop, we need the following SSDT.
Place the .aml file under EFI>>OC>>ACPI
Step 4. Configure Config.plist
After collecting files, now we are ready to configure the config.plist. First, copy the sample.plist from the OpenCore-0.6.3-RELEASE folder under the Docs subfolder.
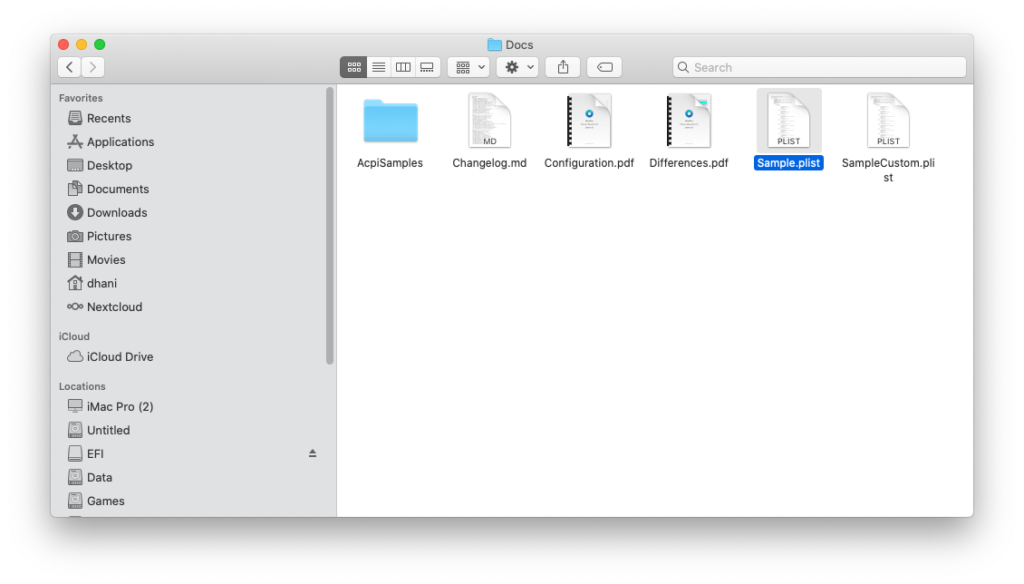
Copy the sample.plist to the EFI>>OC folder. Rename it to config.plist
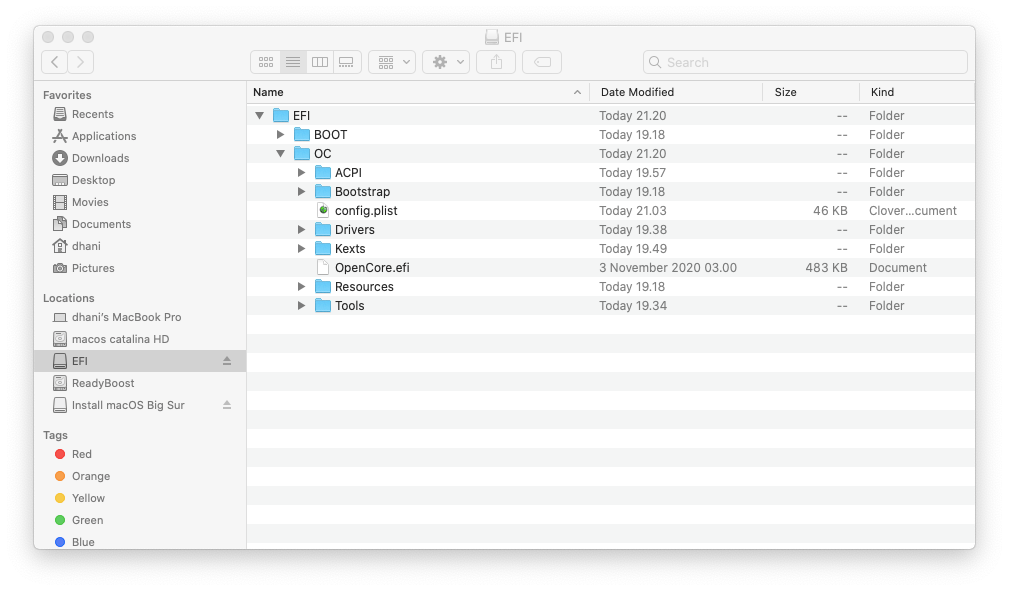
Now we need to edit this config.plist file. If you are running macOS, you can use the ProperTree software to edit the config.plist file. Run the ProperTree.command. And then open the config.plist from the EFI partition in the USB installation drive.
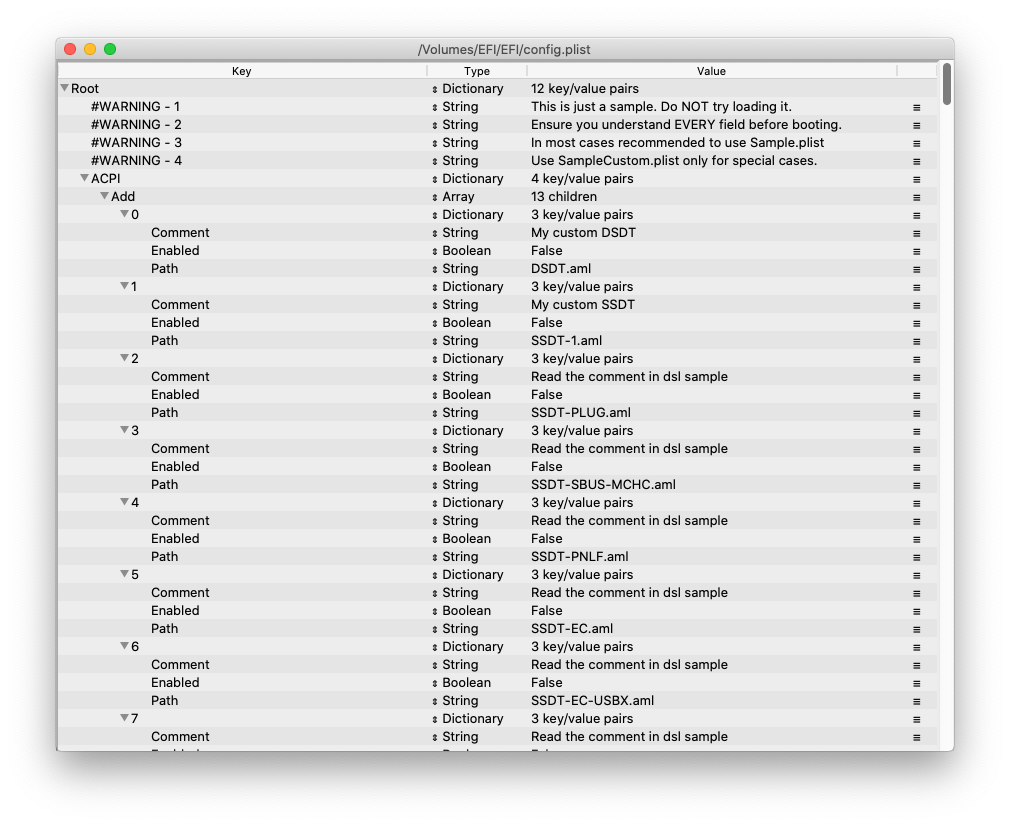
Now we will go through this file for each section. It will take time and do not skip any lines.
OC Clean Snapshot
From the ProperTree, go to File >> OC Clean Snapshot to read our OC files and merge the information in the OC folder to out config.plist file automatically.
In the following config.plist configuration, I will skip the sections that are not required to be modified or double-checked.
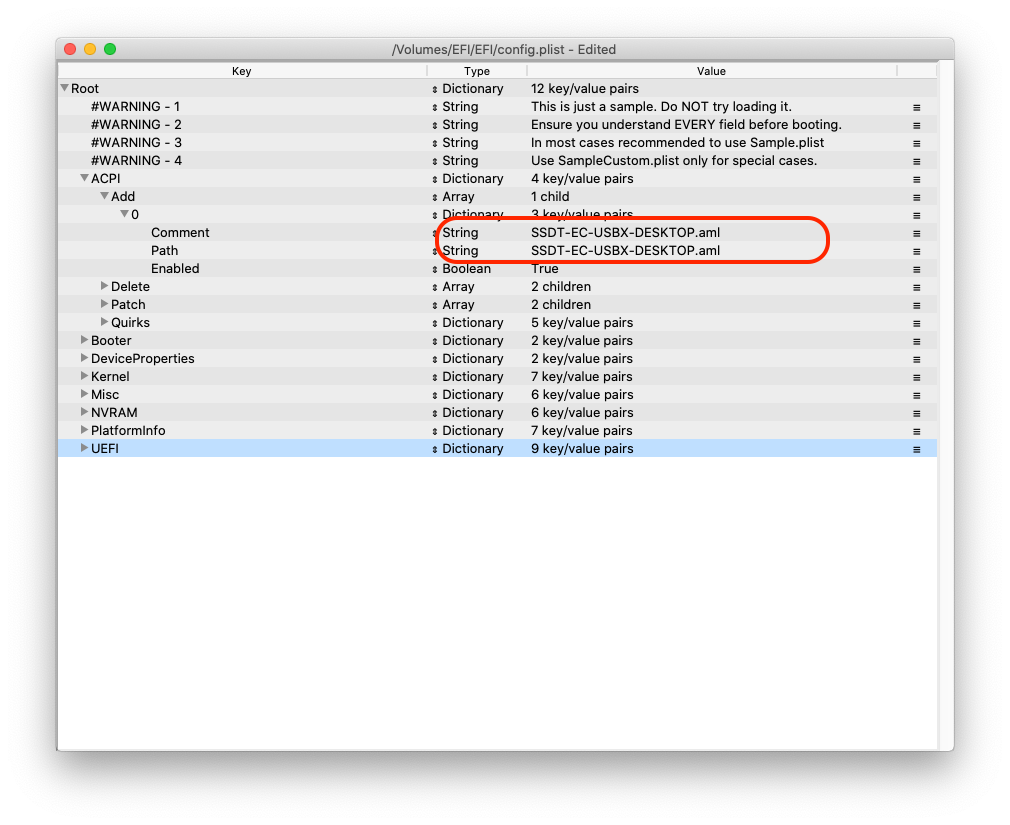
ACPI
In the ACPI section, make sure the .aml file is loaded here.
Booter
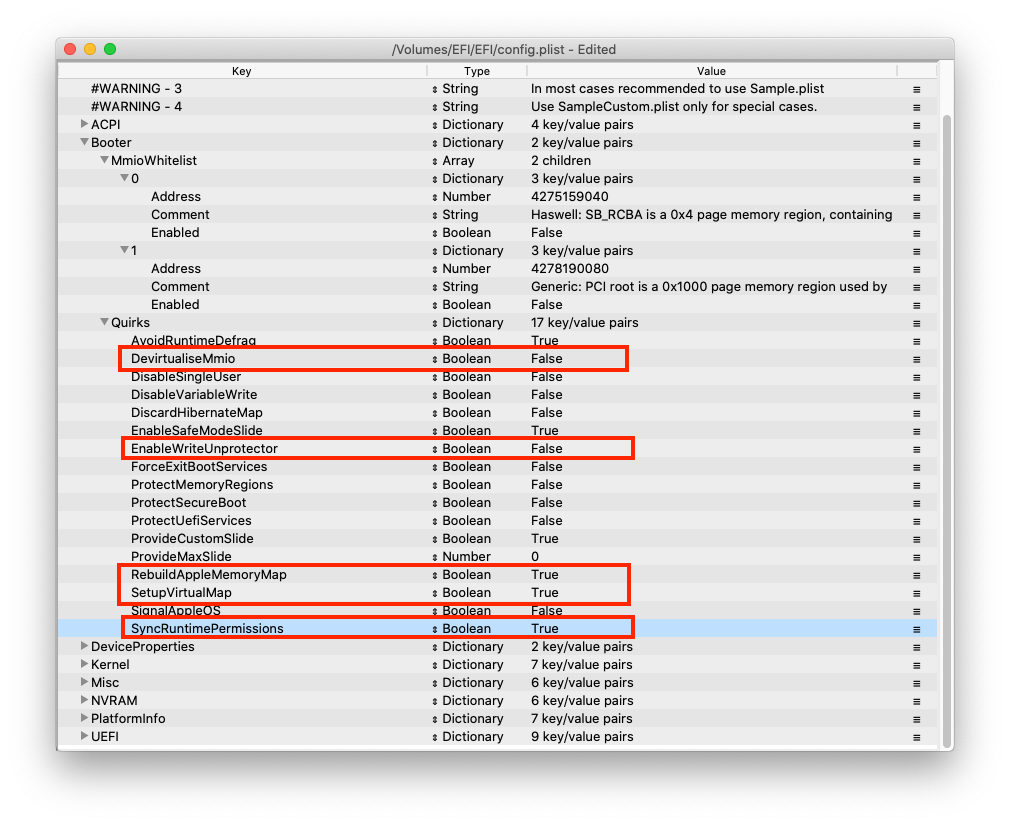
Quirk
Change the items in red
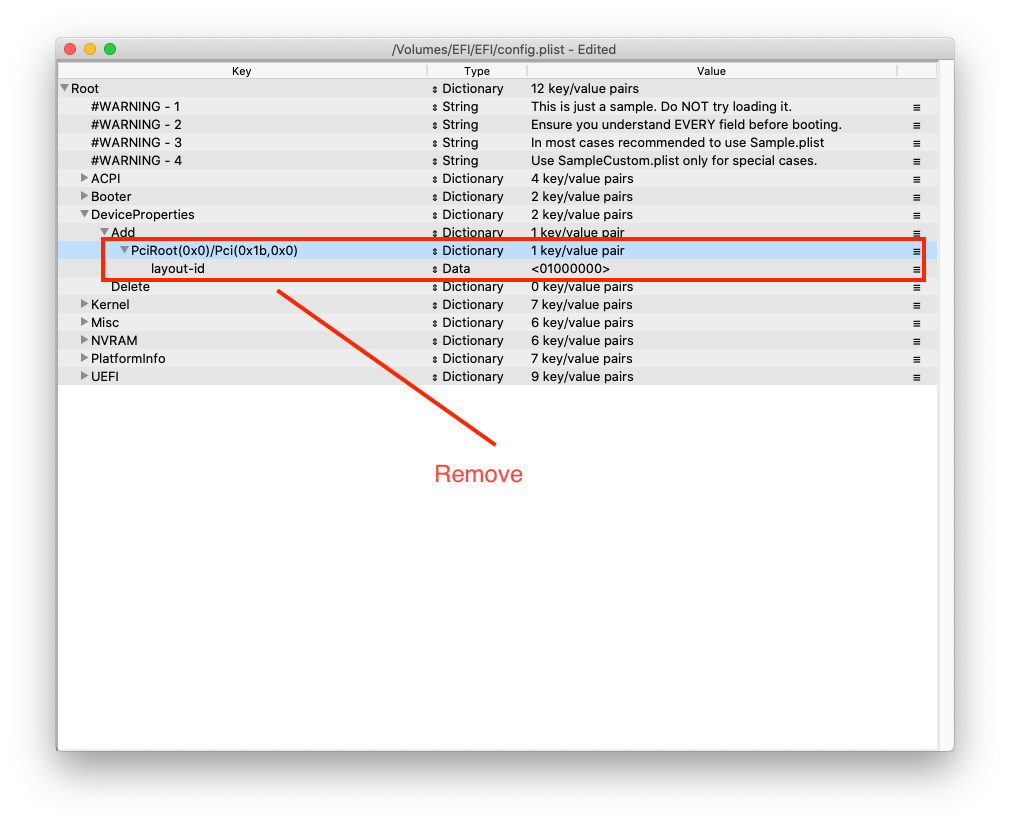
Device Properties
Remove the PciRoot(0x0)/Pci(0x1b,0x0) from the list
Kernel
Now we need to remove the Patch from the Kernel section and then replace it with the Kernel patch for AMD Ryzen.
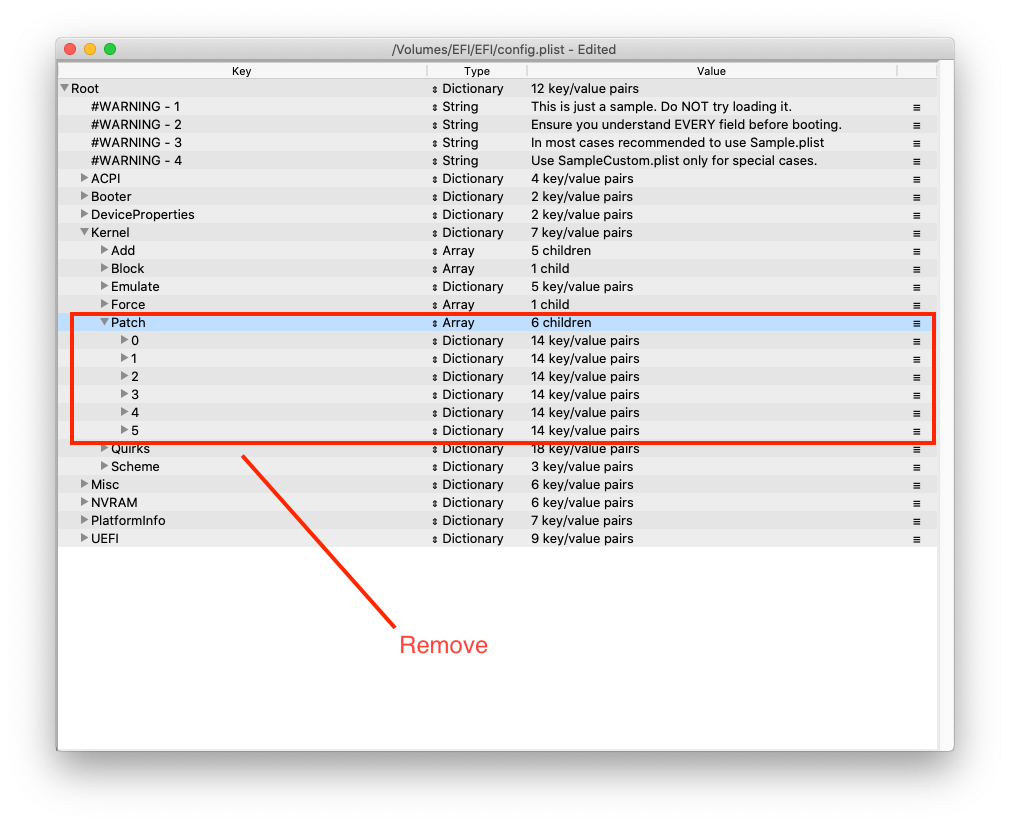
Download the Kernel patch for AMD Ryzen family using the link below
https://github.com/AMD-OSX/AMD_Vanilla/tree/experimental-opencore/17h
Copy the content of the patches.plist on the website and then paste into a new text editor and save it as patch.plist. And then open the patch.plist file using ProperTree. Delete the patch section on the config.plist and then replace it with the patch section from the patch.plist.
Emulate >> Power Management
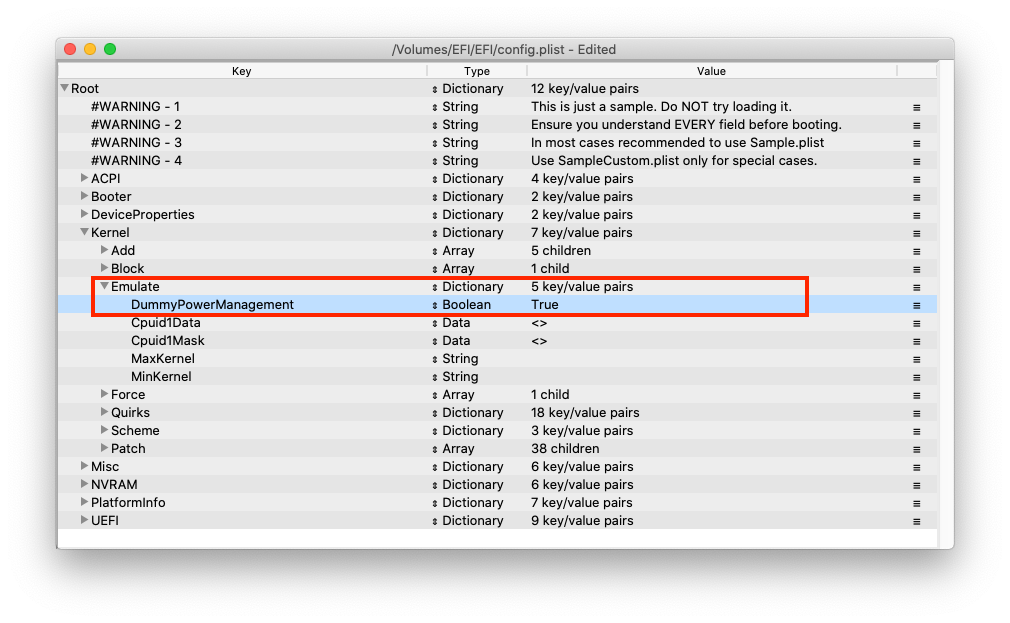
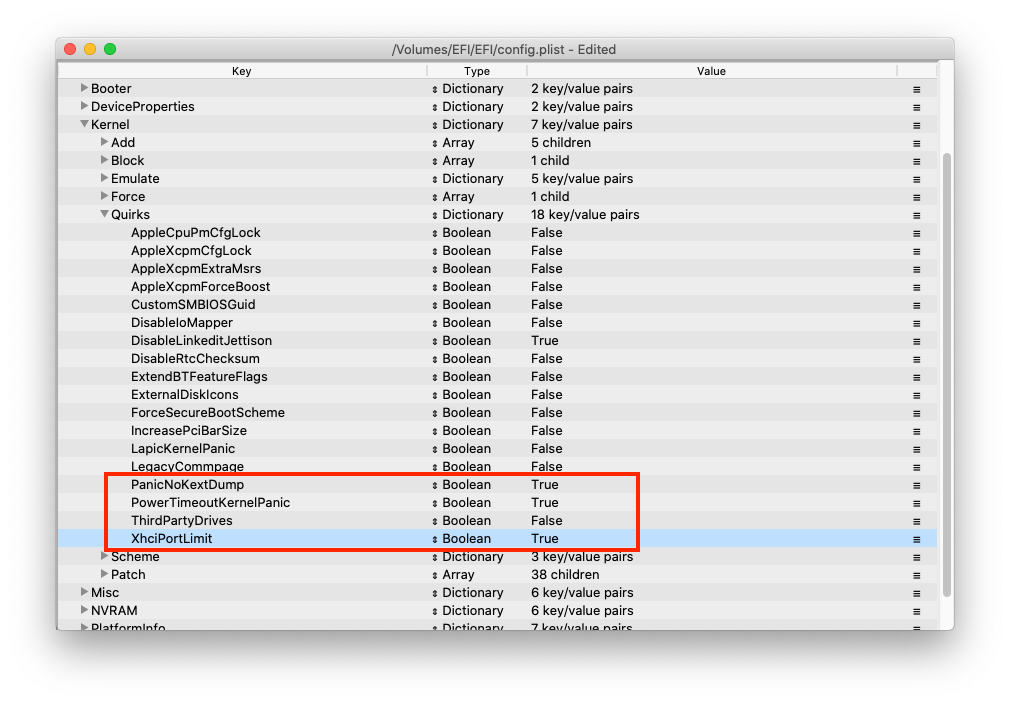
Quirks
Change the following settings on the Kernel>>Quirks
Misc
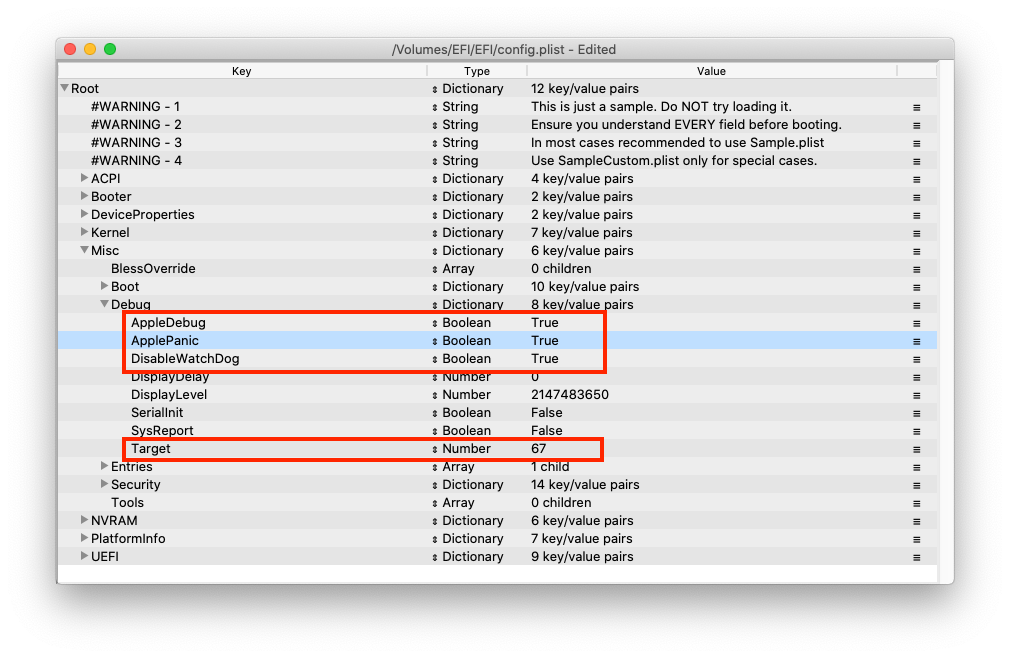
Now we are moving to the Misc section. There are some items we need to take care of.
Debug
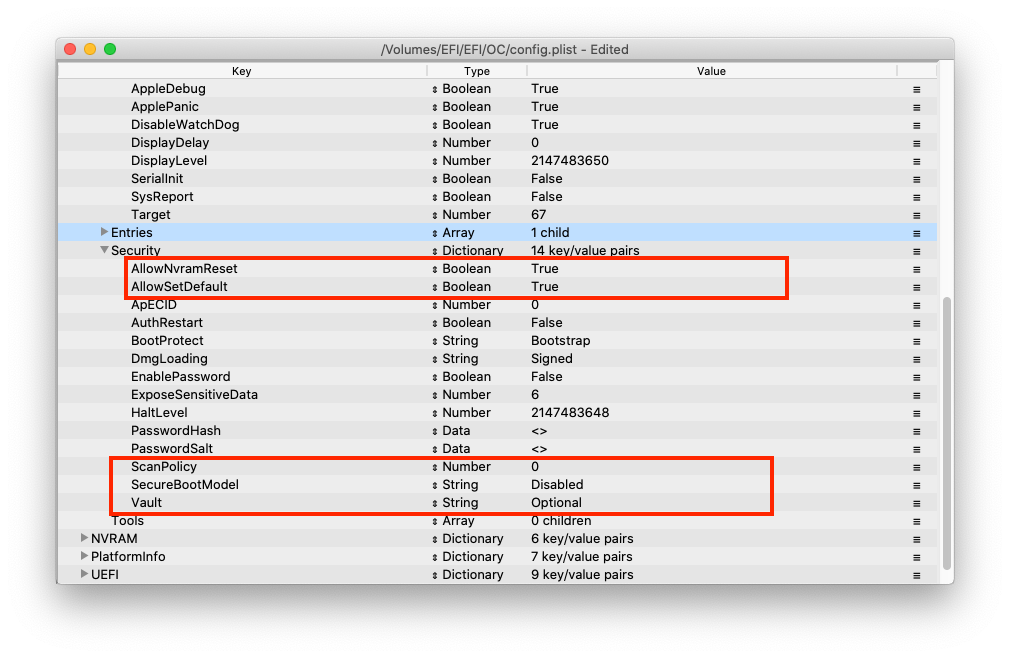
Security
I got the SecureBoot problem during boot. So, I need to set the SecureBootModel to Disabled as shown below. After setting this to Disabled, I can boot the OpenCore correctly.
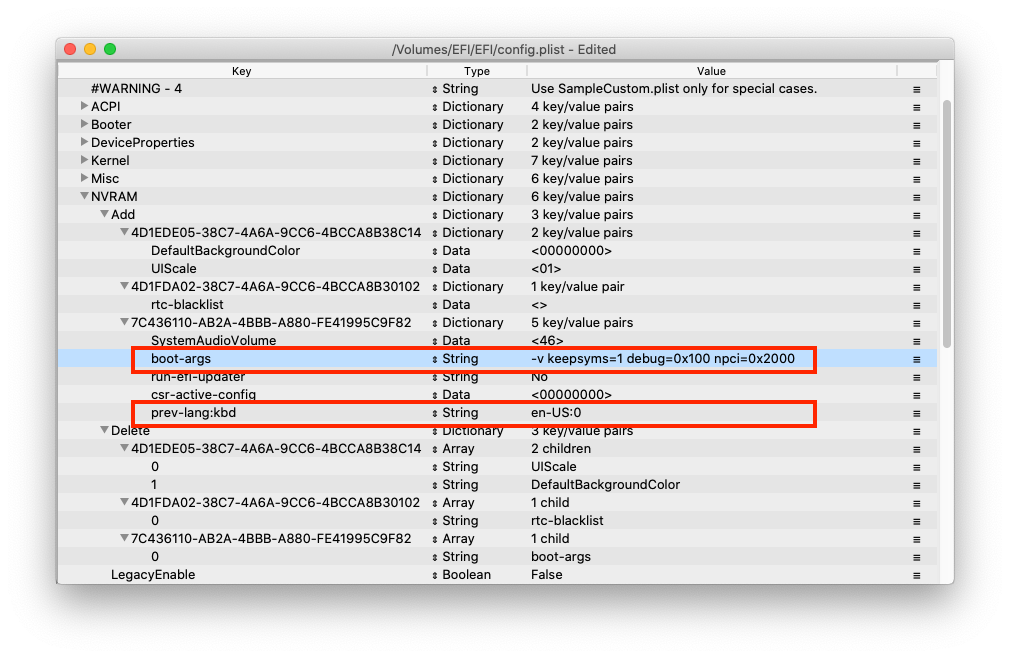
NVRAM
In the NVRAM section, there are some items to configure.
PlatformInfo
In the PatformInfo section, we are going to configure the SMBios. To do this, we will use the GenSMBIOS software. You can download the latest GenSMBIOS from the link below.
https://github.com/corpnewt/GenSMBIOS
Run the GenSMBIOS.command and then follow these steps
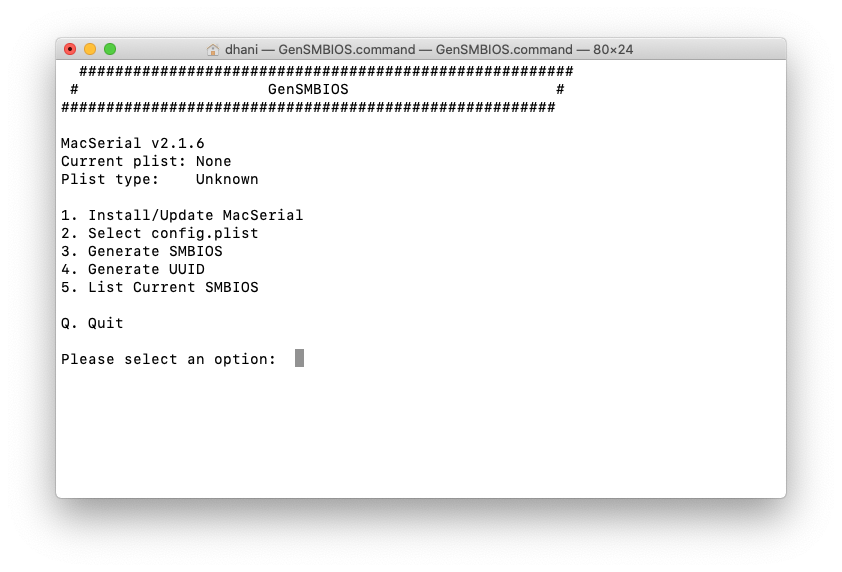
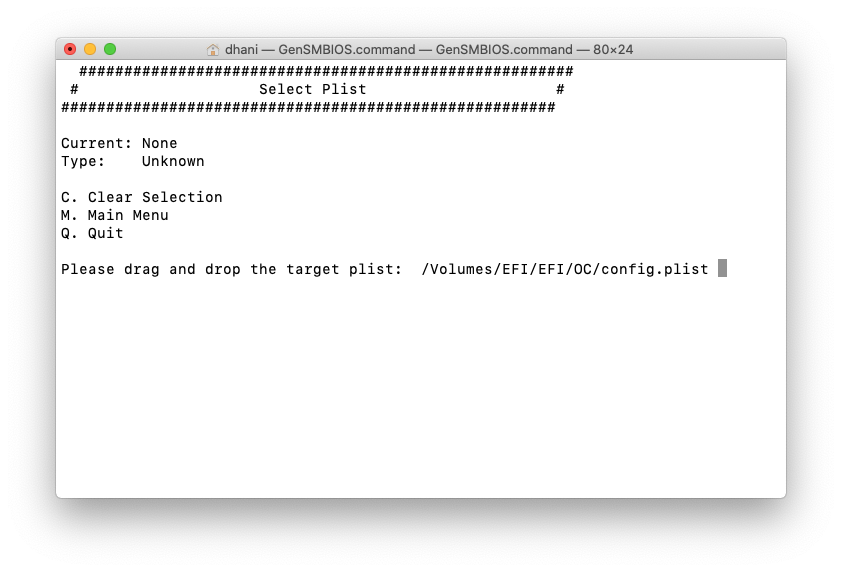
First, type 1 and then press Enter. This will download and update the MacSerial. Next, type 2 and press Enter. We need to provide the config.plist path.
Next, type 3 and press Enter to generate SMBIOS
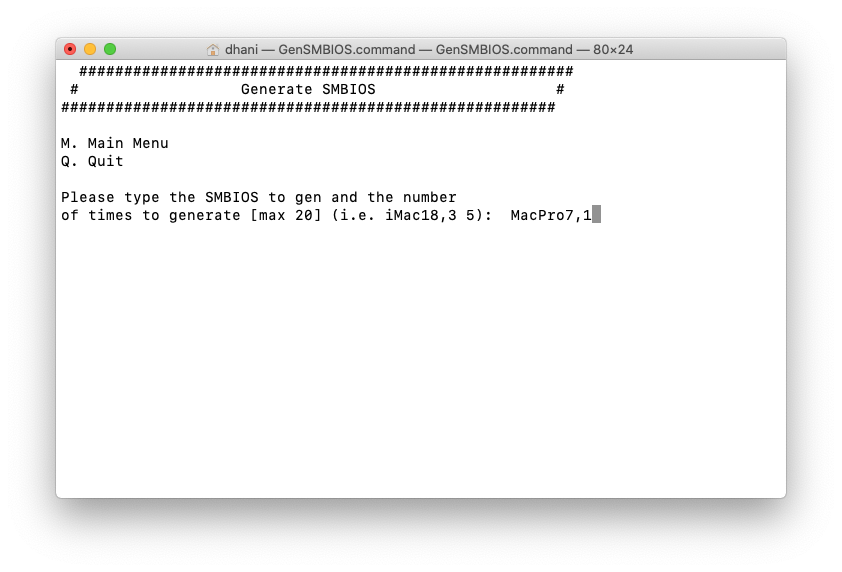
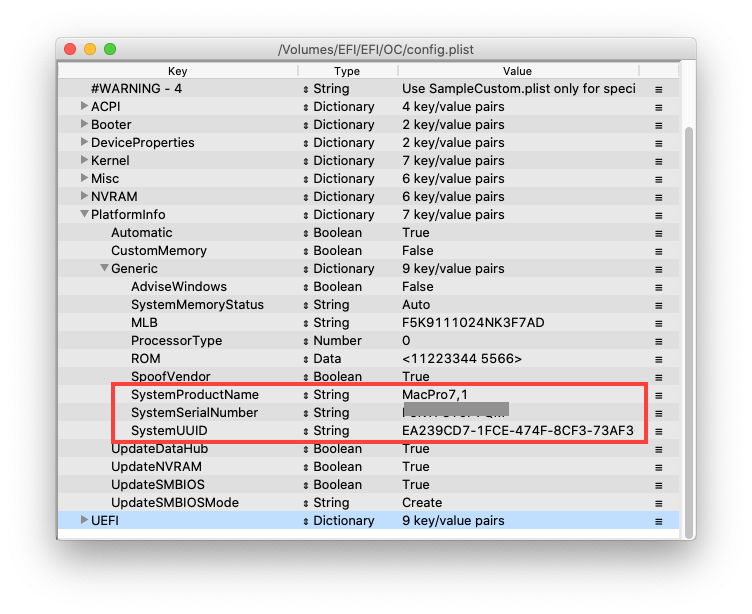
In this case I use MacPro7,1 for my SMBIOS. Next, type 4 and press Enter to generate the UUID. Done.
These information will be added to config.plist automatically.
UEFI
Not many items to configure in the UEFI section. Just make sure these drivers are listed.
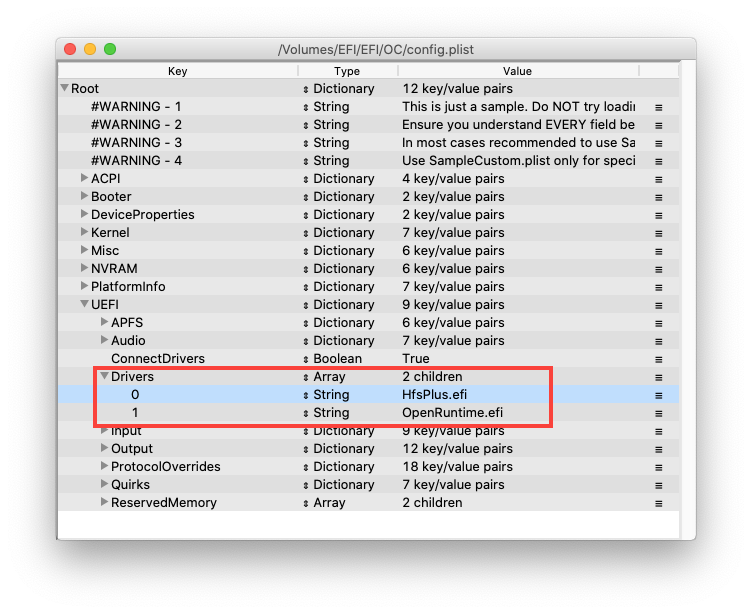
At this point, we have finished configuring the config.plist. It is a good idea to check it with Sanity Checker. Make sure there is no error.
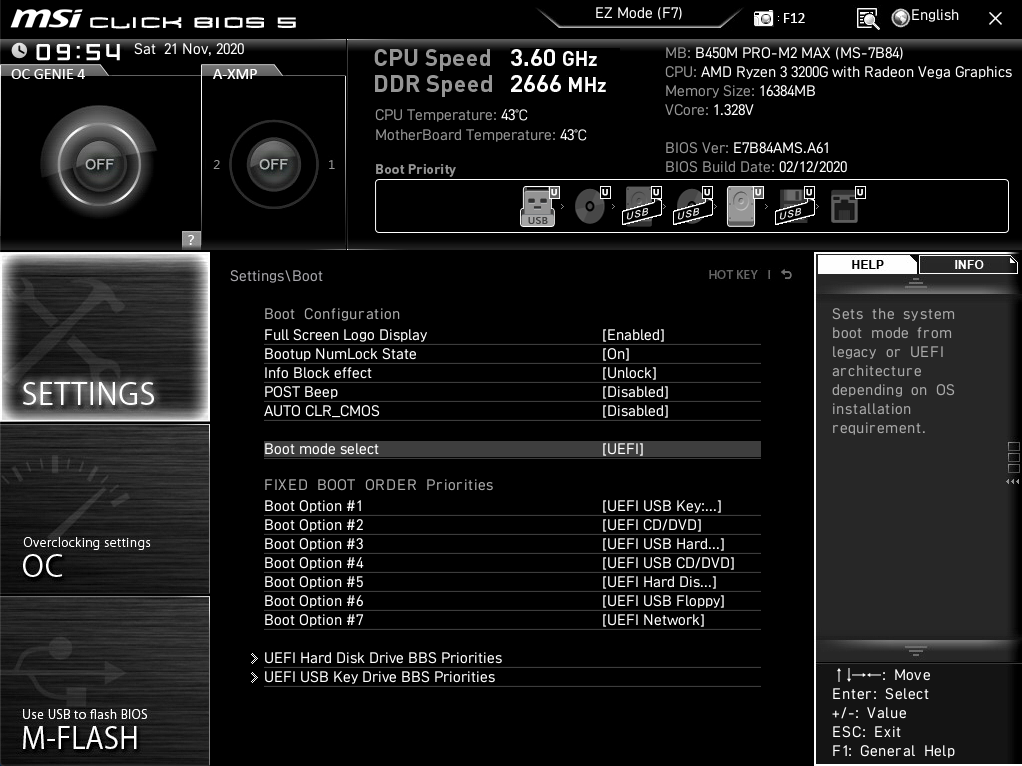
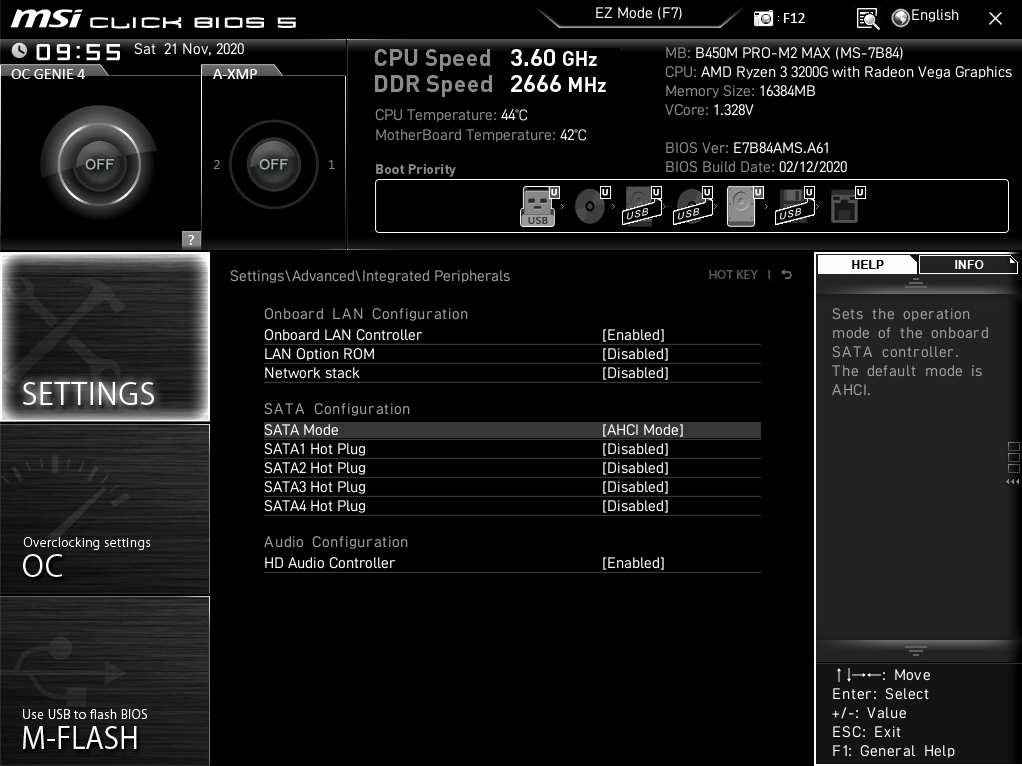
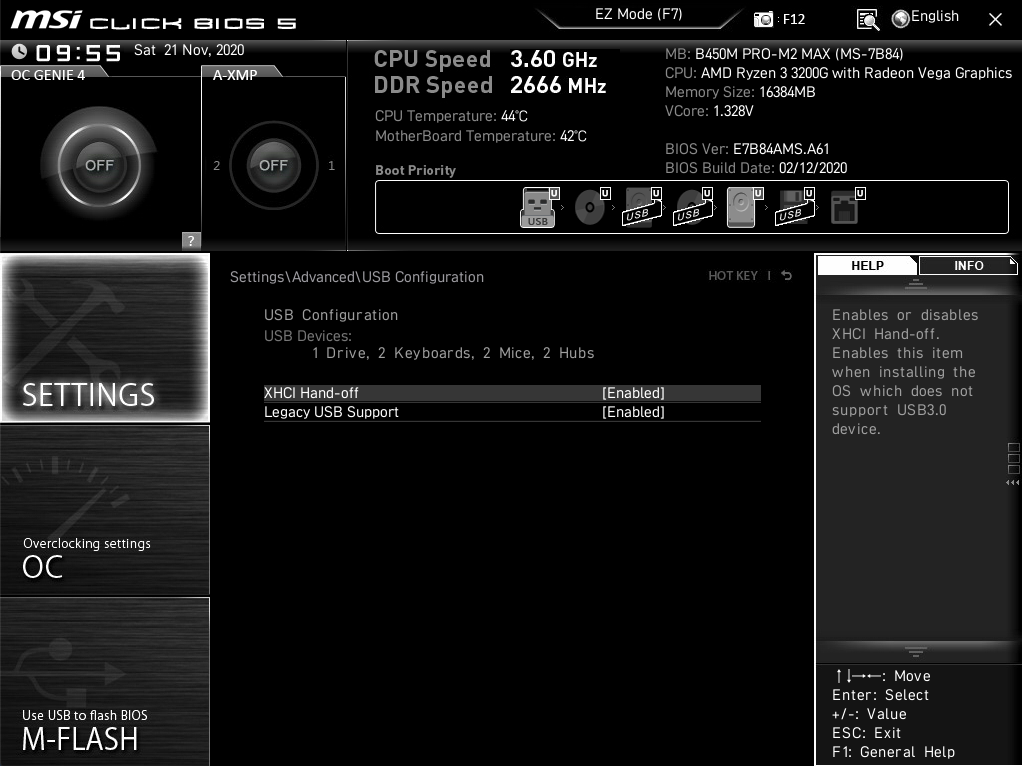
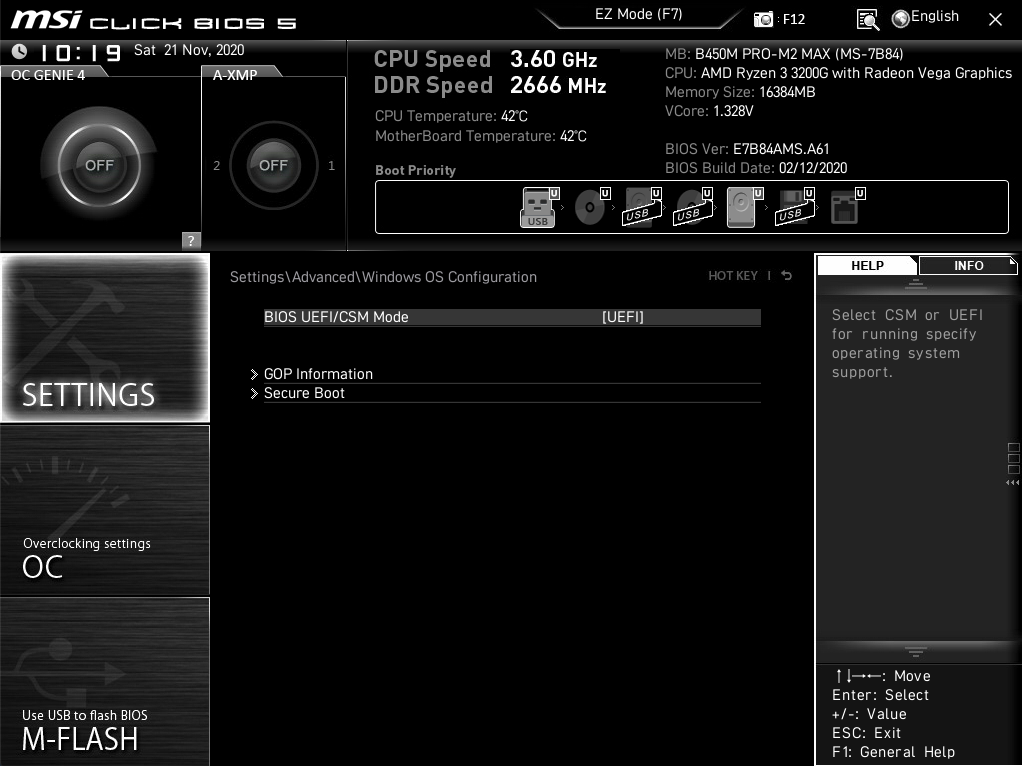
BIOS Settings
Last but not least, it is good to check and configure the BIOS settings accordingly. Here are my settings
Thanks for reading this how to install macOS Big Sur Hackintosh on AMD Ryzen. This tutorial is far from perfect but I wish it can help you to figure out how to hackintosh your AMD Ryzen.


Leave a Reply