

Welcome to the macOS Big Sur Hackintosh Tutorial. In this article, we will show you how to create a macOS Big Sur installer using Windows 10 PC. If you own a Mac, you can follow my other tutorial to create a macOS Big Sur installer from a Mac/Hackintosh. Please note that this is not a complete Big Sur Hackintosh step by step guide. After you create the installer, there still one critical step, creating and configuring the EFI. The EFI configuration will be in another post.
This tutorial is based on OpenCore version 0.6.3. If there is a new version, the steps might be a little bit different but overall its the same.
Prerequisites
- Windows 10 PC with 15 GB of free hard disk space
- OpenCore RELEASE
- Python
- USB Drive 16 GB or more
Step 1. Download the macOS Big Sur Files
At this point, make sure you have installed Python software on your Windows 10. You can download and install Python from the following link.
https://www.python.org/downloads/
After Python is installed, now download the latest OpenCore Master file from the following link
https://github.com/acidanthera/OpenCorePkg/archive/master.zip
Extract the file and then open the command prompt and cd to the macrecovery folder inside the Utilities folder. For example
cd "D:\Software\BigSur_Hackintosh\OpenCorePkg-master\Utilities\macrecovery"
And then run this command. The following command is for macOS Big Sur download. For another macOS version, please visit this dortania page.
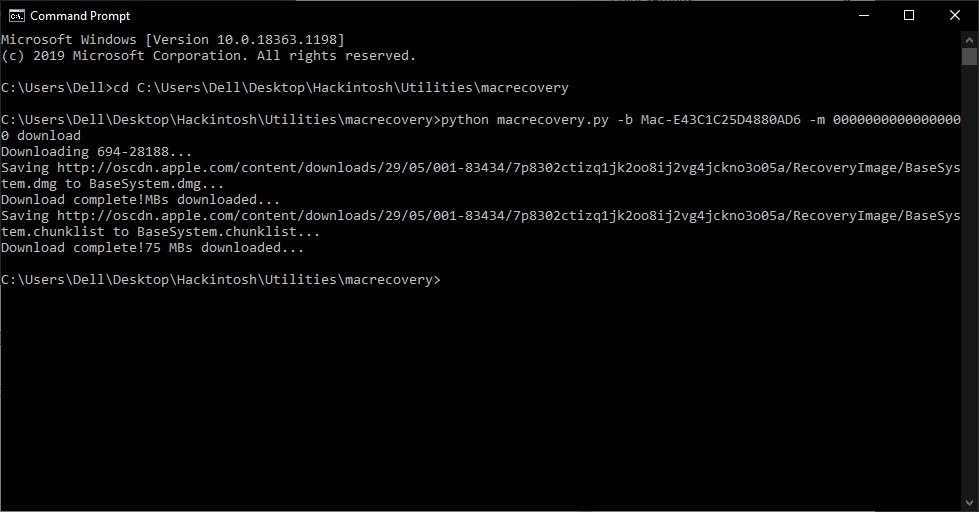
python macrecovery.py -b Mac-E43C1C25D4880AD6 -m 00000000000000000 download
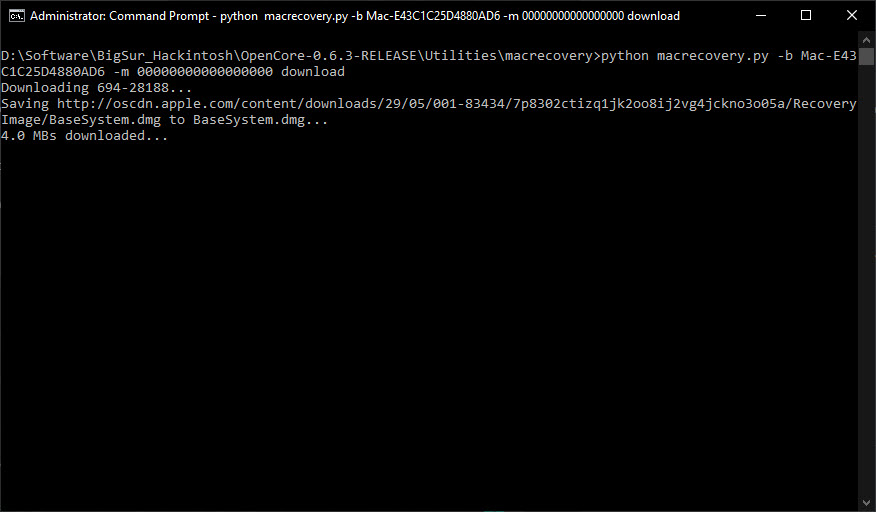
Wait until the download process completes.
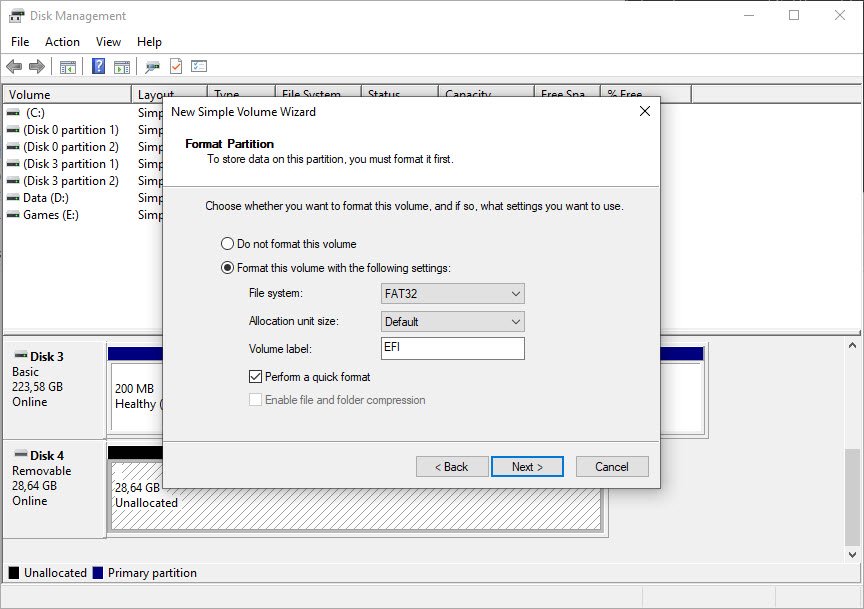
Step 2. Format the USB drive
Once the download completed, now we need to format the USB drive. To do this, open the Disk Management. Right-click the Windows Start Menu and click Disk Management.
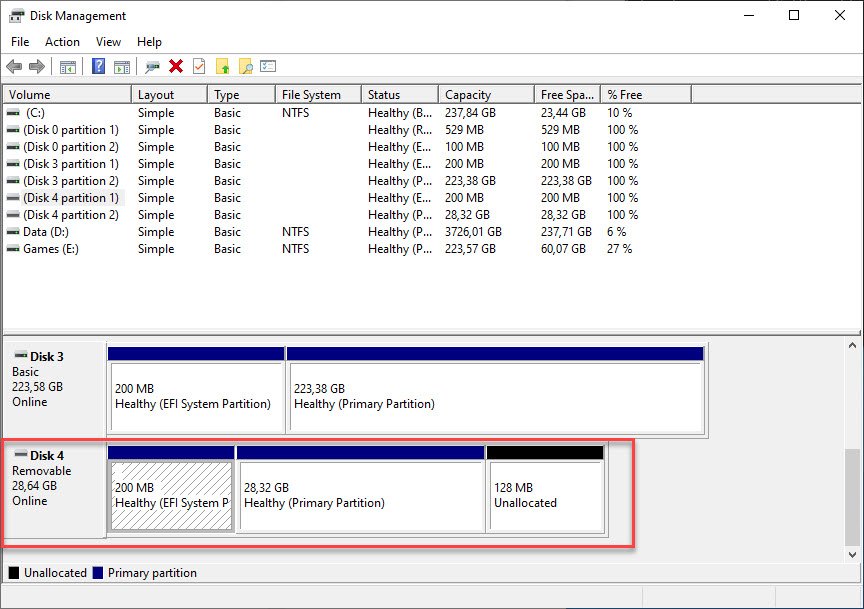
If your USB disk has multiple partitions as mine above, right-click on each volume and click Delete. Make sure there is no important data in it. Backup first if necessary. And then once all volumes are deleted.
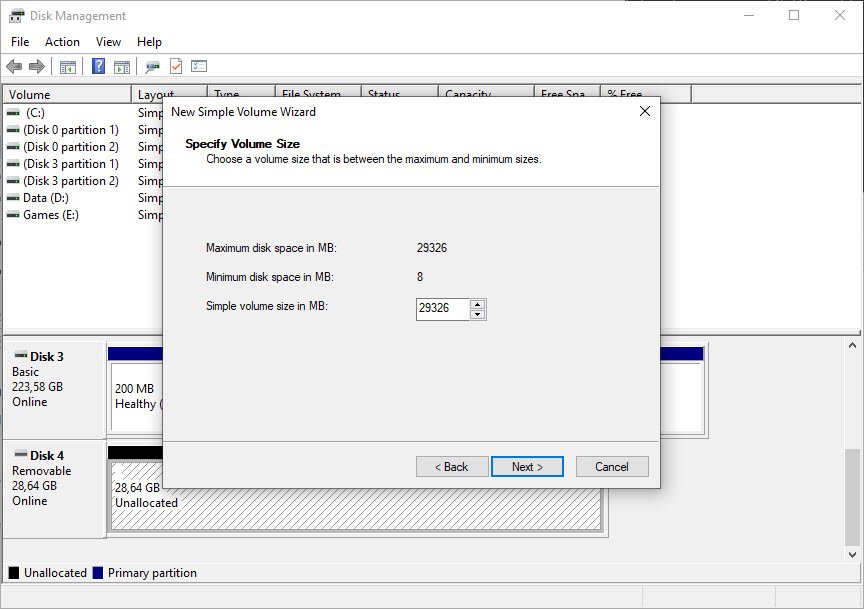
- Right-click and choose New Simple Volume. In this example, I use all the space of my USB drive. And then Format it with FAT32 and call it “EFI”.
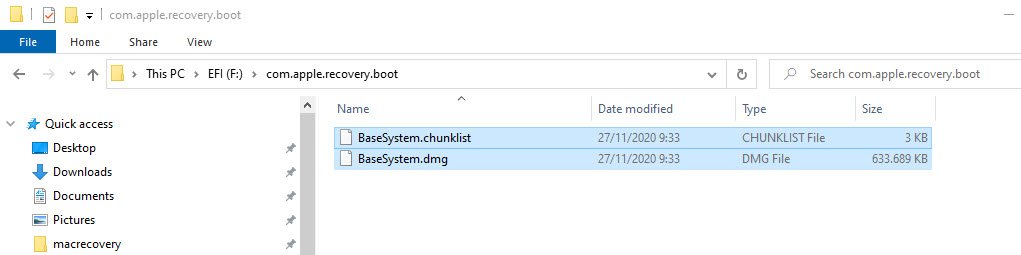
Now open the USB drive and create a new folder called com.apple.recovery.boot. And then copy the following files from the OpenCore folder OpenCore-0.6.3-RELEASE\Utilities\macrecovery.
- BaseSystem.chunklist
- BaseSystem.dmg
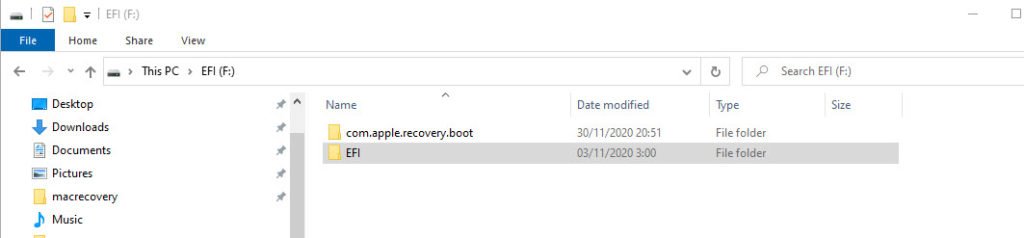
Now copy the EFI folder from the OpenCore folder to the USB drive. In my case, it would be OpenCore-0.6.3-RELEASE\X64\EFI
At this point, we have successfully created the macOS USB installer from Windows 10. But, we still need to configure the EFI in order to boot our PC and install macOS Big Sur.
If you have an AMD FX PC, you may try to use my EFI which can be downloaded from the link below. Replace the EFI folder with mine below. Visit this page and scroll down to the EFI download section.
Download EFI folder for AMD FX for macOS Big Sur
Leave a Reply