

Hello Hackintosh lovers, welcome to another Hackintosh tutorial. This time, I will show you how to install macOS Big Sur Beta on Proxmox virtual machine. In my previous tutorial, I have successfully installed macOS Catalina 10.15.5 on Proxmox virtual machine. It still running pretty smooth. In this article, I will guide you from the very beginning like preparing the macOS Big Sur ISO for the Proxmox installation, create and configure the new virtual machine as well as the Big Sur installation process.
This article is based on the great and informative tutorial below. But I try to write my own so I can remember every step to get this up and running.
https://www.nicksherlock.com/2020/06/installing-macos-big-sur-beta-on-proxmox/
Steps to Install macOS Big Sur on Proxmox VE
Step 1. Download macOS Big Sur and Create ISO
For this purpose, you will need a Mac or a Hackintosh to download the latest macOS Big Sur install file. If you don’t have the Apple Developer Account, you can download and install the macOS Developer Beta Access Utility. After that, open System Preferences >> Software Update. You should see macOS Big Sur there.
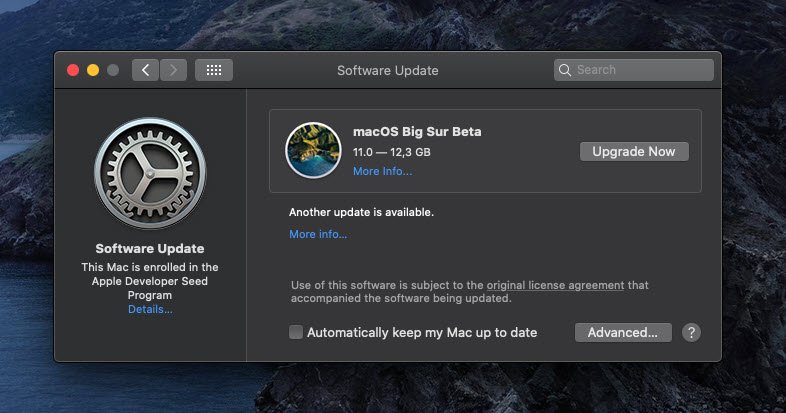
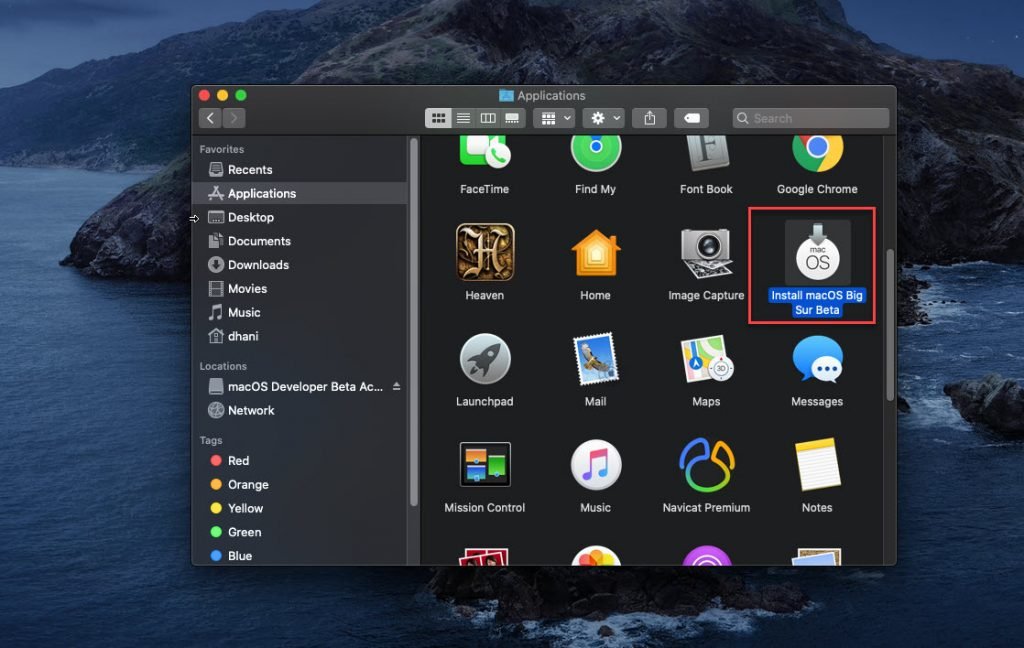
Click Upgrade Now and then it will start downloading the file. Once finished, you should see Install macOS Big Sur Beta in your Applications folder.
Now, download this file below.
This is a small utility that will convert the macOS Big Sur installation file into DMG format.
sudo chmod +x create_dmg_big_sur.sh
./create_dmg_big_sur.sh
Once completed, you will have a new file in your Desktop called: BigSurBeta.dmg. Now, simply rename it to BigSurBeta.iso. You don’t need any ISO converter to do this. So now we have the needed ISO for the Big Sur installation. Upload the ISO file to Proxmox via web dashboard.
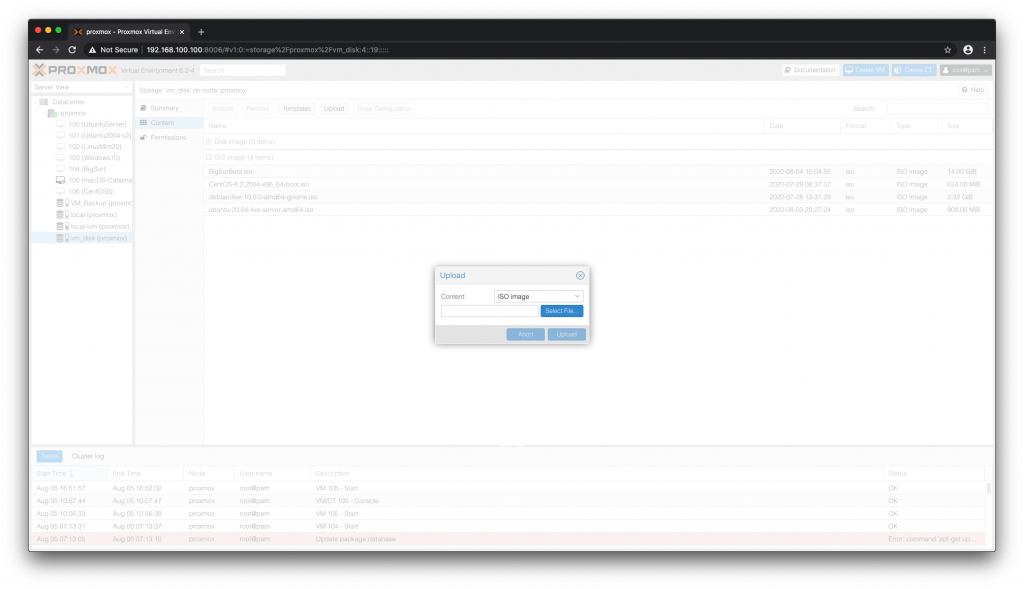
At this point, we have successfully created the Big Sur ISO and upload to Proxmox server.
Step 2. Download OpenCore for macOS Big Sur Proxmox
Now we need to download the OpenCore boot loader for Proxmox. Download the file and then extract it. Upload the .ISO file to Proxmox. So now you have two ISOs, OpenCore and macOS Big Sur ISO.
Step 3. Generate Apple OSK Authentication Key
This step requires you to use a Mac or Hackintosh. Download the small utility below and save it to Desktop for ease of use. And then, open Terminal and execute this command
cd ~/Desktop
xcode-select --install
gcc -o smc_read smc_read.c -framework IOKit
./smc_read
I will produce a 64 character key for you. Make a note of it because we will use it later.
Step 4. Create a New Virtual Machine
Now open the Proxmox web dashboard and create a new VM.
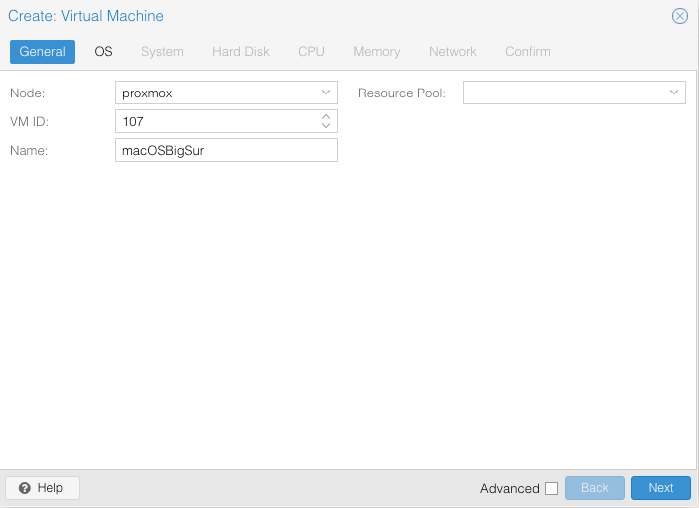
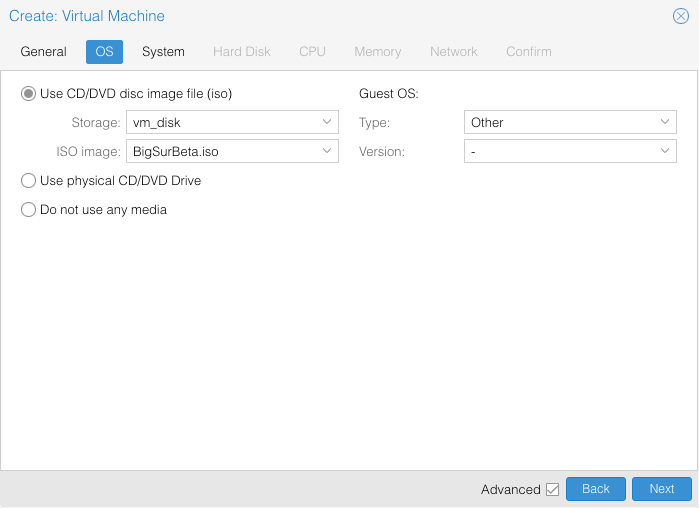
Make a note of the VM ID. We will use it to edit the config later. On the next page, select the BigSurBeta.iso and for the Guest OS, choose Other.
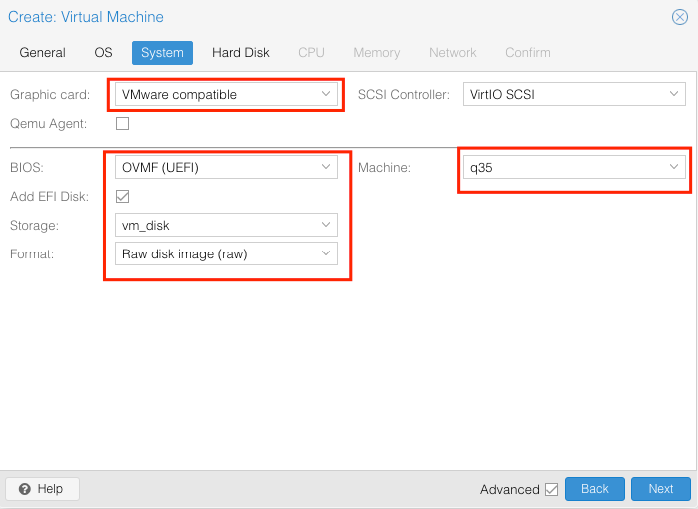
Next, configure the graphic card, BIOS and machine. Select VMware compatible for the Graphic card, must use OMVF (UEFI) and choose q35 for the machine.
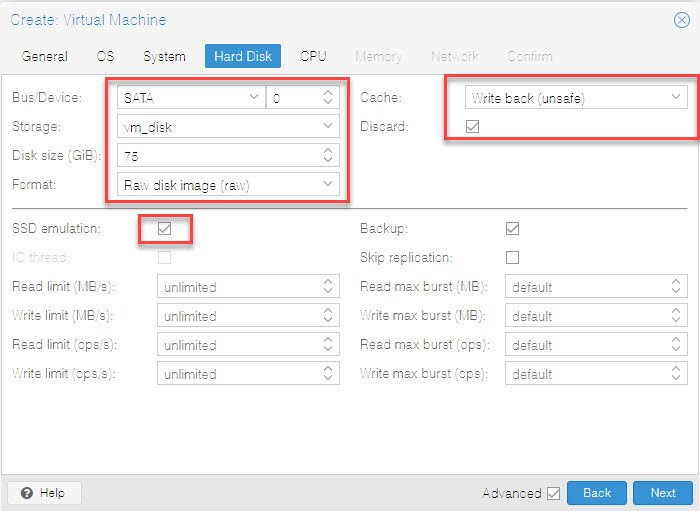
Next we need to create a new disk for our VM. Choose SATA and give more than 60 GB size, enable Write back (unsafe), Discard and SSD emulation as shown below.
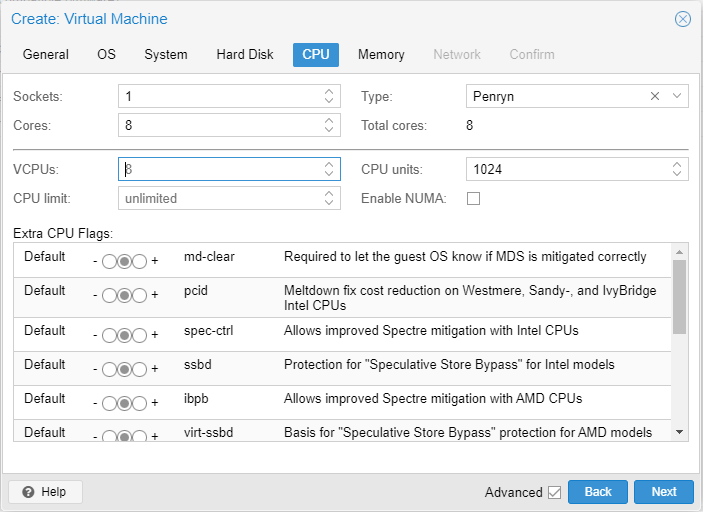
Now on the CPU tab, we need to assign the number of cores for the VM. In this case I put 8 since my host processor has 8 cores. Make sure you choose the Processor type to “Penryn“.
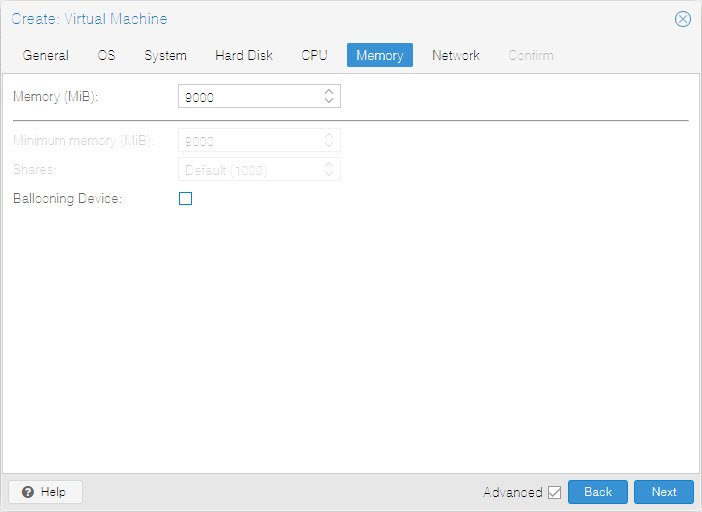
Give 8 GB or more for the memory. And do not enable the Ballooning Device feature.
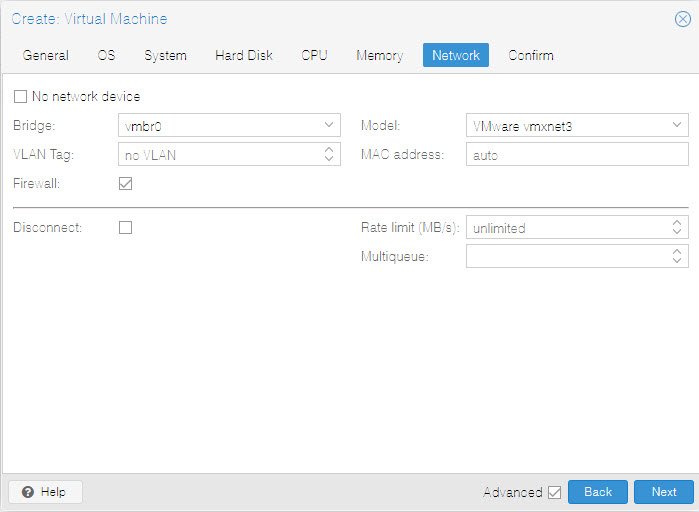
For the network, choose VMwware vmnet3
Done. Do not start the virtual machine yet. We need to add some arguments to the config file for the new vm.
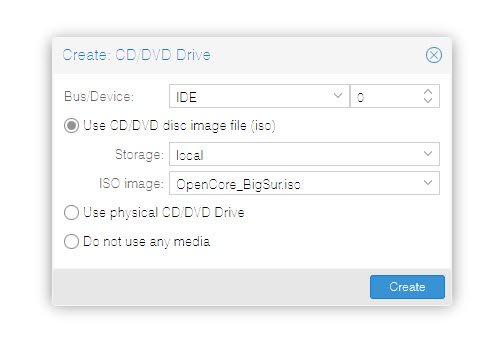
Next, add a new CD/DVD drive to the VM. Choose the OpenCore iso. In this case, I have renamed the iso to OpenCore_BigSur.ISO
Step 4. Edit the config file
Connect to the Proxmox console/terminal and open the config file for the new vm. In my case it is 107.conf which located in /etc/pve/qemu-server/
nano /etc/pve/qemu-server/107.conf
Add this line to the config file
args: -device isa-applesmc,osk="OSK-CODE" -smbios type=2 -device usb-kbd,bus=ehci.0,port=2 -cpu Penryn,kvm=on,vendor=GenuineIntel,+kvm_pv_unhalt,+kvm_pv_eoi,+hypervisor,+invtsc,+pcid,+ssse3,+sse4.2,+popcnt,+avx,+avx2,+aes,+fma,+fma4,+bmi1,+bmi2,+xsave,+xsaveopt,check
Change the OSK-CODE with the actual OSK code you’ve generated on the previous step.
Next still in the config file, find the media=cdrom line, change it to cache=unsafe
ide0: local:iso/OpenCore_BigSur.iso,media=cdrom,size=150M
ide2: vm_disk:iso/BigSurBeta.iso,media=cdrom
Change it to
ide0: local:iso/OpenCore_BigSur.iso,cache=unsafe,size=150M
ide2: vm_disk:iso/BigSurBeta.iso,cache=unsafe
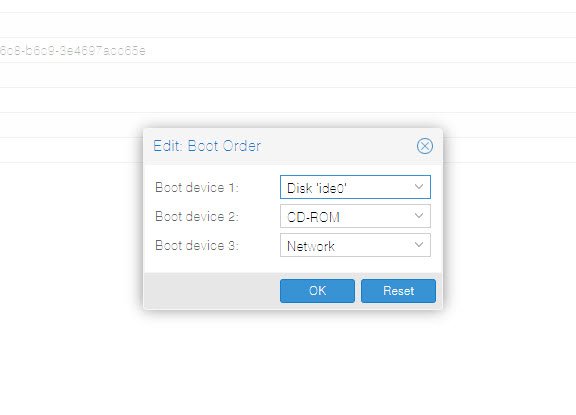
Close and save the file. Now change the boot order. Make sure the OpenCore entry is in the first boot order.
Next, configure Proxmox. Use this command below
echo "options kvm ignore_msrs=Y" >> /etc/modprobe.d/kvm.conf && update-initramfs -k all -u
Now you can start the Big Sur virtual machine.
Step 5. macOS Big Sur Installation
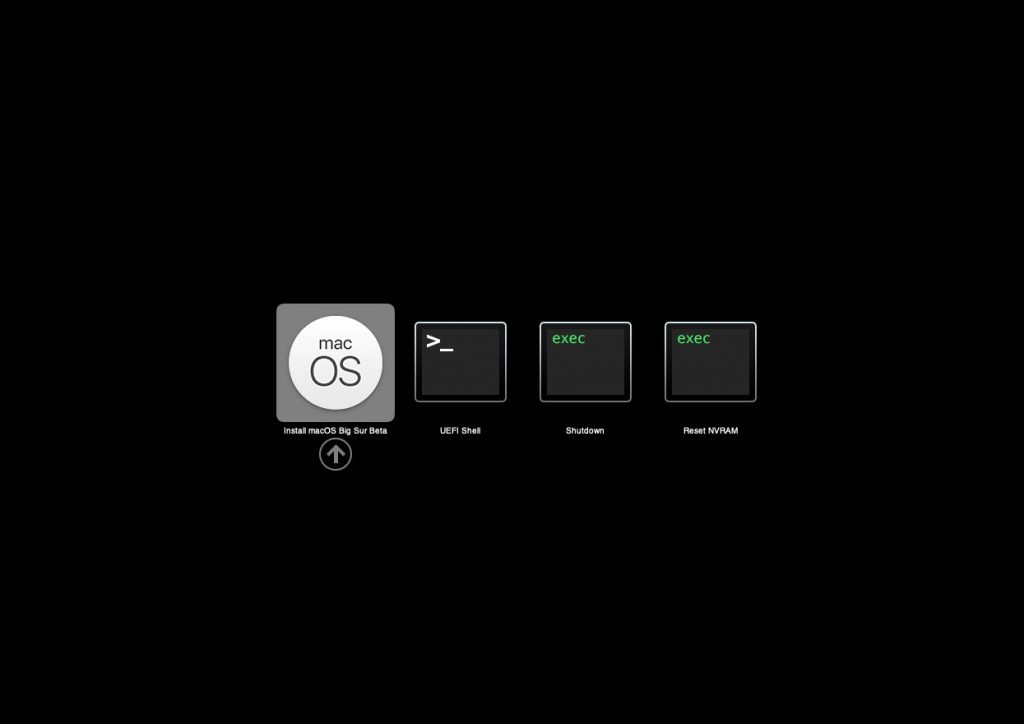
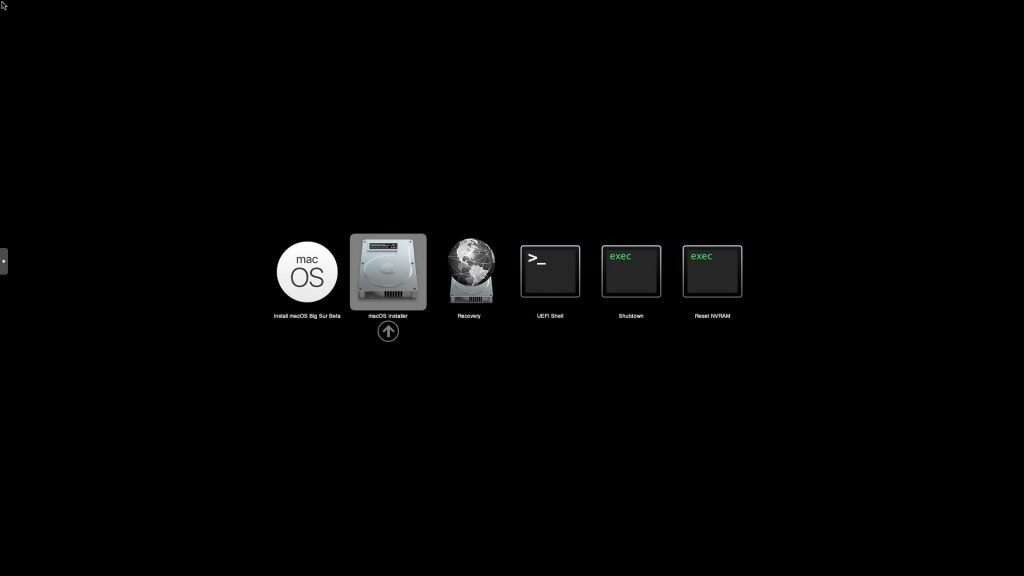
Boot the machine and then open the console. You should see the OpenCore boot menu as shown below.
Next follow the installation wizard.

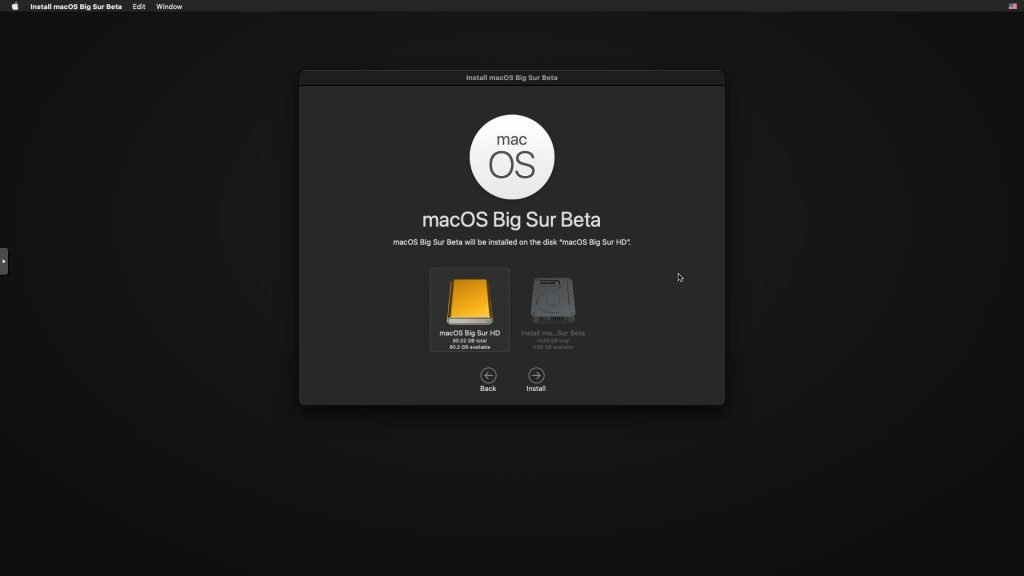
Click Disk Utility 
Choose the disk. Usually its recognized as External 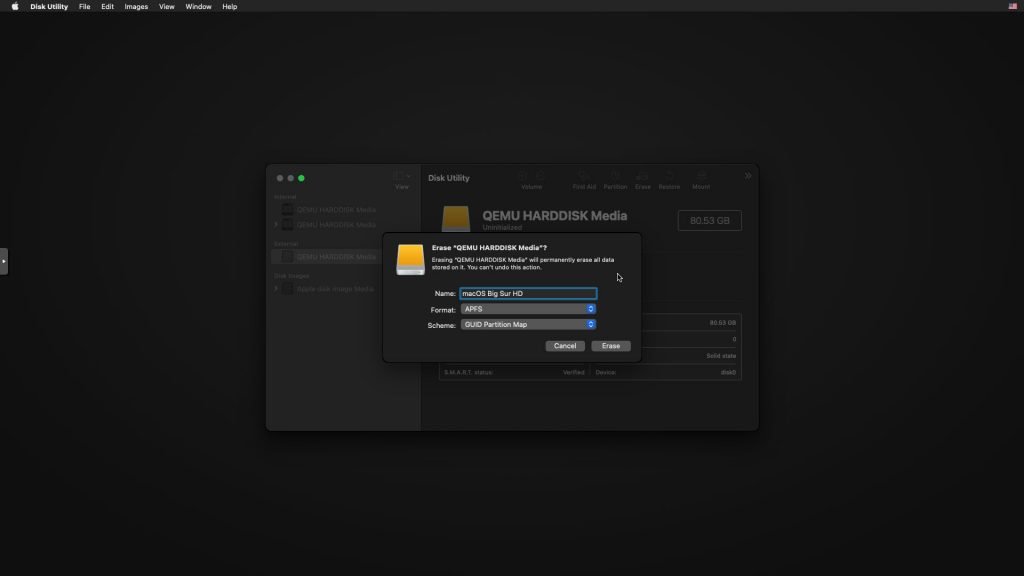
Give a name, format: APFS, GUID Partition Map 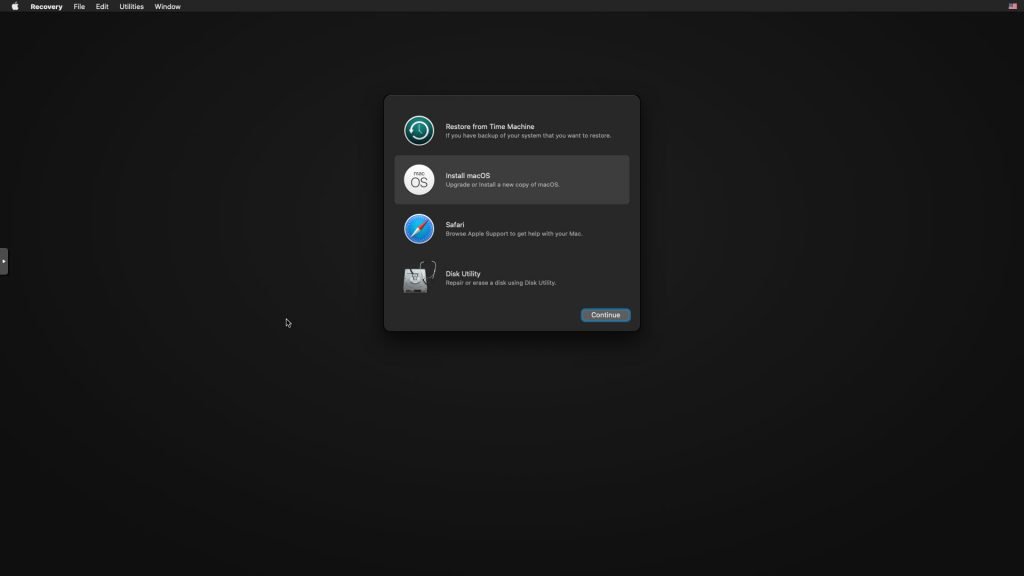
Click Install macOS 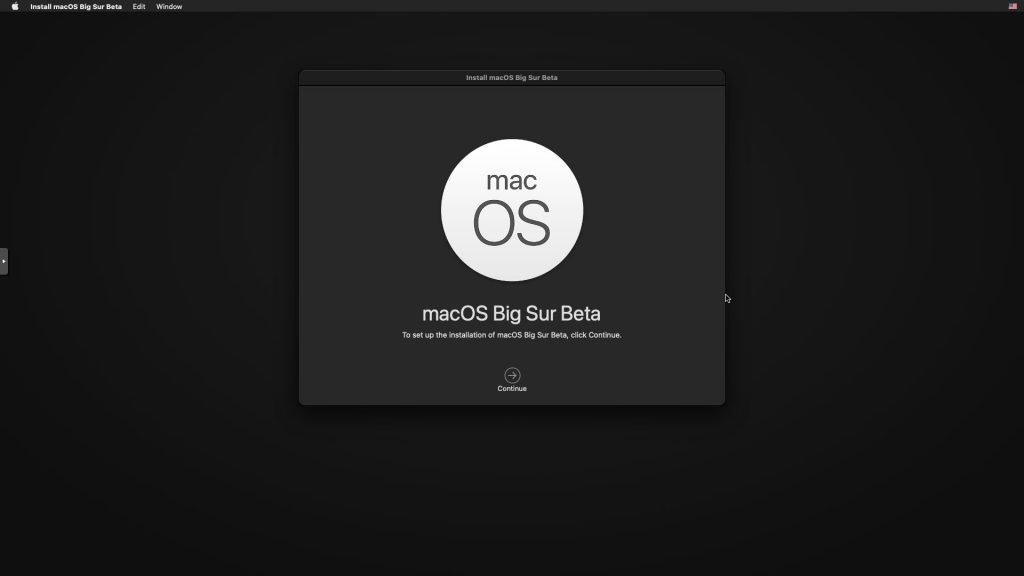
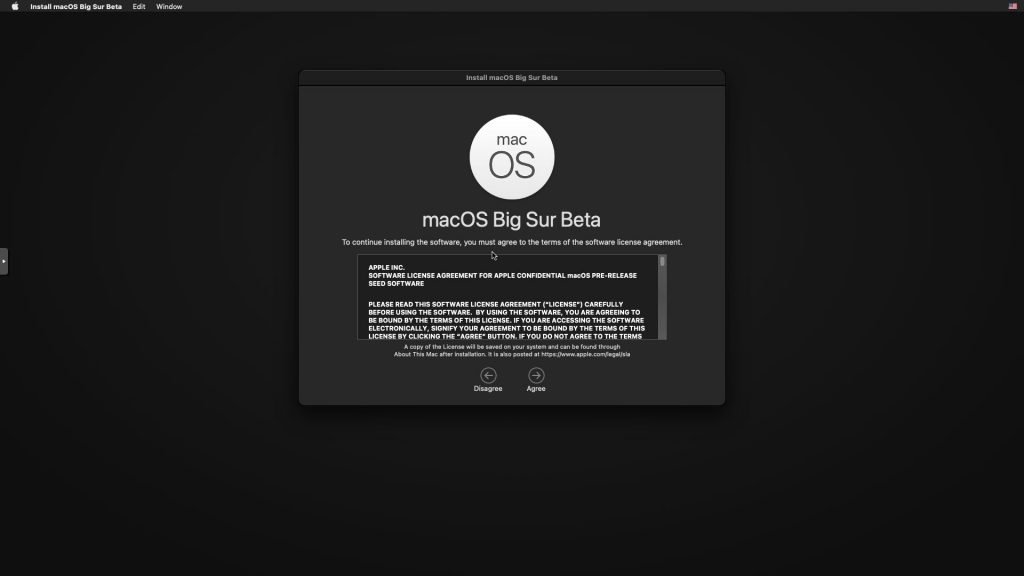
Accept license agreement 
The installer will reboot several times, make sure you choose the macOS Installer upon reboot during installation.
The installation will continue. You will need to answer some standard questions during the next steps.
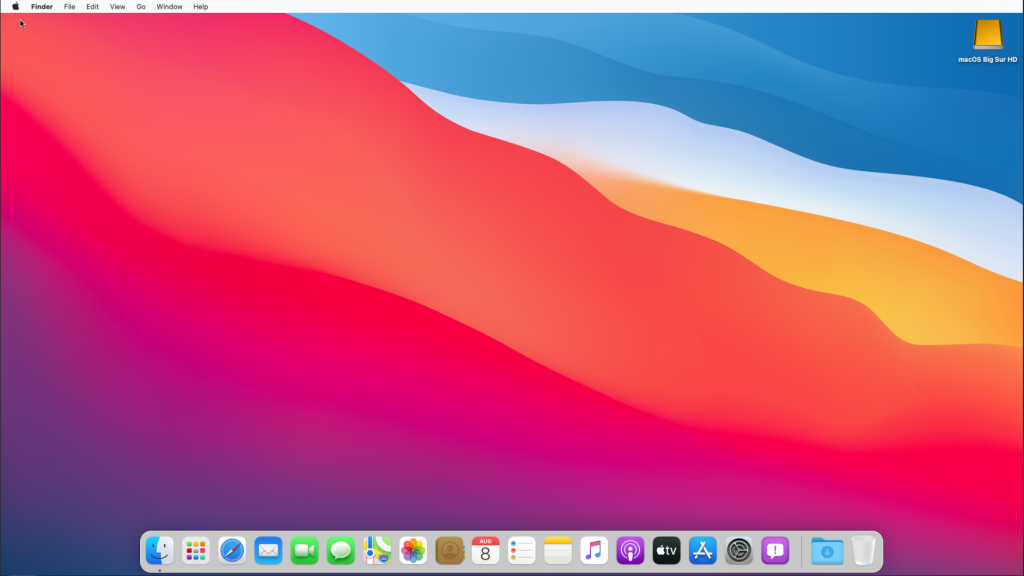
Finally, macOS Big Sur Beta is ready.
The performance of this VM is still very poor. To improve the performance, we will need to set up the GPU Passthrough to this VM. But I will explain it later.
Step 6. Make the Installation Permanent
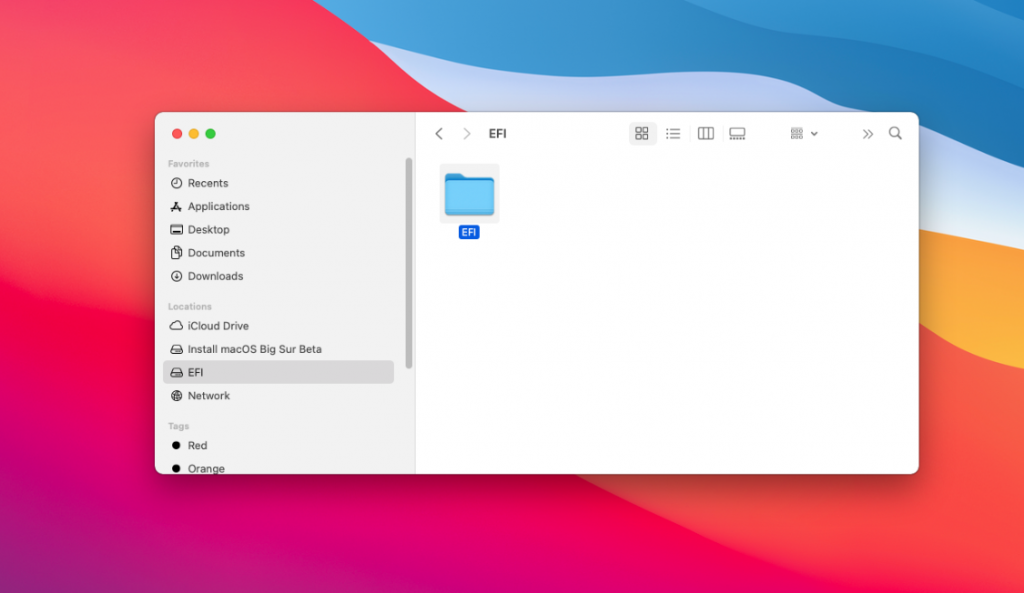
The installation is now completed. But you will still need the OpenCore.ISO to boot the Big Sur. Now, let’s copy the EFI folder to the newly installed system. I would use Clover Configuration to mount the EFI folder in the Big Sur installation disk. Find the Clover Configurator download link on this page below.
Mount and open the EFI partition from the installer disk. Copy the EFI folder and paste in the EFI partition on your macOS Big Sur disk.
Enable automatic boot
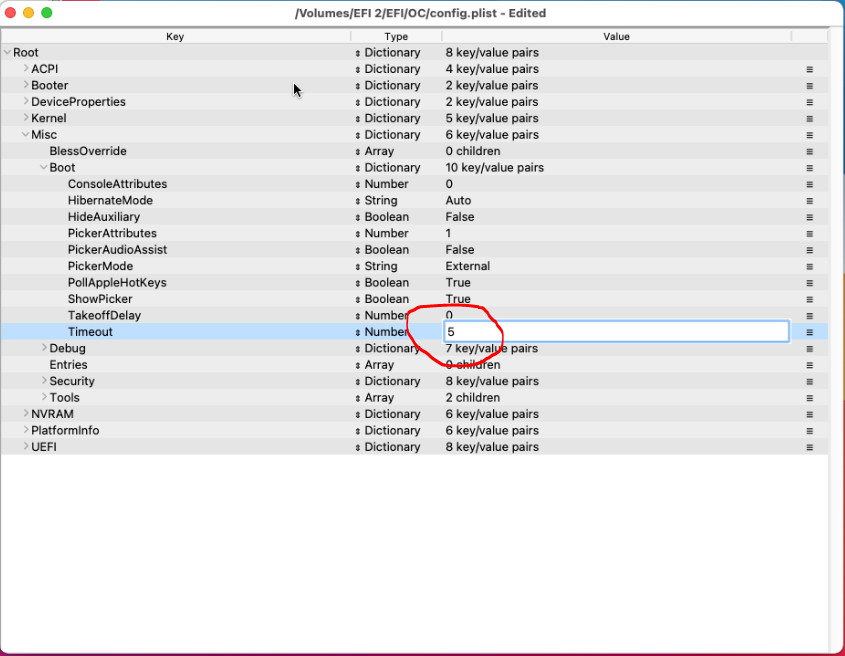
The OpenCore configuration on this build will require us to manually select the boot disk and we need to press Enter. To enable the automatic boot, we need to edit the config.plist in the OC folder in the EFI. Use the ProperTree software to edit. You can download ProperTree from my Hackintosh Download Zone.
Scroll down to the Misc>>Boot>>Timeout. Change the number for 0 to something link 5 (seconds).
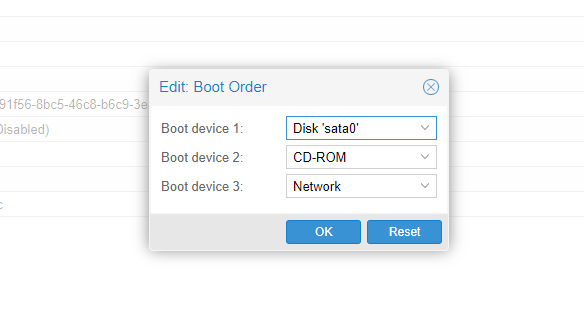
Close and save it. Now shut down the VM and change the boot partition. Make the macOS disk as the first boot. Also you can remove the OpenCore and macOS Big Sur ISO from the hardware section.
Enable Remote Desktop
I would recommend you to enable screen sharing or remote desktop on macOS Big Sur. We can then connect from Windows PC via VNC or use share screen app from a Mac.
Enable GPU Passthrough on macOS Big Sur
Enabling the GPU Passthrough on the macOS Big Sur virtual machine is pretty easy. I am not going to write the steps to enable the GPU passthrough on Proxmox. You may read it here. I will create a separate article to cover How to enable GPU Passthrough on macOS Big Sur.
Thanks for reading, I hope you enjoy the article. Please leave your thought or comments.
Leave a Reply