

The new macOS Monterey is now available for public. I think it is a good time to update my AMD Hackintosh system to this latest release. I am currently running macOS Big Sur on my AMD Ryzen 3 3200G series. It runs very well, all works except for the cracking sound which I still unable to solve this issue. Apart from that, it was pretty smooth. The OpenCore version 0.7.6 is now available when this article is being written. Now, I have successfully installed the latest macOS Monterey on my Ryzen 3 3200G. It works nicely even the sound problem persist. But, I don’t think it is a big deal.

Steps to Install macOS Monterey on AMD Ryzen 3 3200G
If you are new to Hackintosh world, please keep in mind that installing Hackintosh requires a lot of resources, time, and patience. Make sure to spend some time to read about how to do Hackintosh. Refers to the Dortania GitHub for more information. Below are the general steps of installing macOS Monterey on AMD Ryzen.
- Create macOS Monterey USB bootable media
- Configure EFI
- BIOS Setting
- Install macOS Monterey
- Post Installation
Requirements:
- USB flash disk 16 GB in size (for Mac users) and 4 GB (for Windows users)
- Good internet connection
- Patience
Get ready and let’s do it.
Step 1. Create macOS Monterey USB Bootable media
To create the USB bootable media, you can use Mac, Windows or Linux system. Please refers to our previous guide below:
Step 2. Configure EFI
This step will cover every steps we need to take in order to configure the EFI for our system. Please note that this tutorial is specific for AMD Ryzen system and B450 motherboard only. Different hardware configuration requires different settings or configurations.
Hardware specifications:
- AMD Ryzen 3 3200G (4 cores)
- MSI B450 M2 Pro Max motherboard (with Realtek LAN chipset)
- MSI Radeon RX570 8 GB
Download OpenCore 0.7.6
First, let’s download the latest OpenCore 0.7.6 and save it to our working directory. In this case, I will save to my Desktop. Extract the zip file and then copy the EFI folder inside the x64 folder to somewhere that easier for us to work with.
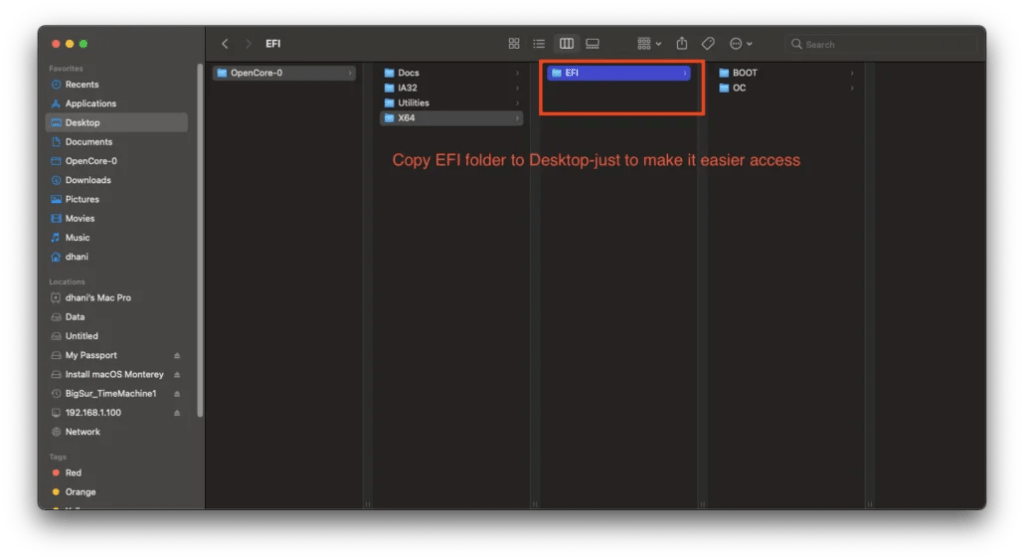
In this case, I copy the EFI to Destop. We will work mostly from this EFI folder.
Clean Up the EFI folder
I would recommend to delete some files from the EFi folder since we may not needed. We will start from a clean working folder. Open the EFI\OC\Drivers and then delete everything except the OpenRunTime.efi. Also, delete everything inside the EFI\OC|Tools except OpenShell.efi. So now your EFI folder should looks like this.

Gathering Files
For more information about the files needed by OpenCore, please visit the following page. I will only include the files that I use on this build.
https://dortania.github.io/OpenCore-Install-Guide/ktext.html
A. Firmware Drivers
- HfsPlus.efi
- OpenRunTime (This file already included in the EFI folder we downloaded earlier)
Put these files inside the EFI\OC\Drivers.
B. Kexts
All the following kexts must go to the EFI\OC\Kexts
- VirtualSMC.kext (download the zip file and then extract and copy the VirtualSMC.kext)
- Lilu.kext (Copy the Lilu.kext file)
- WhatEverGreen.kext (Copy the WhatEverGreen.kext)
- AppleALC.kext (Copy the AppleALC.kext file)
- Ethernet (My motherboard has Realtek LAN card. Please check your motherboard and download the appropriate file that match your ethernet model). See the full list of different Ethernet kext here.
- AppleMCEReporterDisabler.kext
C. SSDT
Now we need to pick the correct SSDT for our build. Again, these SSDTs are specific for this build. Put the .aml file inside EFI\OC\ACPI
At this point, we have gathered files needed for our EFI. Now the folder structure should looks like this

Configure Config.plist
First of all, we need to copy the sample.plist file from the OpenCore folder to the EFI folder. It’s located under Doc folder. Copy the sample.plist to your EFI\OC folder and rename it to config.plist.

Now it should looks like this

We need to edit the Config.plist using ProperTree. Download ProperTree from the link below.
Next, open the ProperTree.command file. And then, open the Config.plist file using ProperTree.

Now we are ready to edit and configure it. Please refers to the Dortania page to see which values need to be changed or modified. I will also explain here but for more complete explanation, please visit the page below.
https://dortania.github.io/OpenCore-Install-Guide/AMD/fx.html#starting-point
Clean Snapshot
First, we need to do a clean snapshot. Go to File and then click Clean OC Snapshot. Select your EFI\OC folder and press OK. This step will read all the files in the OC folder and associated into the Config.plist.
ACPI
After we perform Clean Snapshot above, you should see the following in the ACPI section

Booter
Under Booter, please set the following (marked in magenta)

Kernel\Emulate
Under the Emulate section, set the DummyPowerManagement to True.

Kernel\Quirks
We need to modify the following items under Kernel\Quirks

Kernel Patch
We need to replace the Patch section under Kernel. AMD processor needs this patch. Download the patches.plist and then open it using ProperTree. And then delete the Kernel\Patch from your Config.plist and then copy paste the Patch from the patches.plist. Watch the following video to see how to do it correctly.
Next, we need to modify the value on the Patch\0, Patch\1 and Patch\2. Look for the Replace value. We need to change the value on the area marked as red. Because the AMD Ryzen 3 3200G has 4 cores, so we need to change the Replace value to the following:
- B8040000 0000
- BA040000 0000
- BA040000 0090

Misc
Under the Misc section, please change the following values. Please note that I modified this section because when I use the settings provided by Dortania, my system was unable to boot.
- AppleDebug = False
- ApplePanic = True
- Target = 3
- AllowNvramReset = True
- AllowSetDefault = True

NVRAM
Under NVRAM, please change the following items:

- boot-args = -v keepsyms=1 debug=0x100 npci=0x2000 alcid=1
- prev-lang-kbd = 72752D52 553A3235 32
PlatformInfo
Under the PlatformInfo section, we will need to provide the SMBIOS for our system. To do this we will need GenSMBIOS software. Run GenSMBIOS.command. And then follow the sequence on the GenSMBIOS as shown below.
Please make sure you choose the corrent SMBIOS. In this case, I have RX 580 so I use the iMacPro1,1. For a complete list of SMBIOS that supported, please visit:
https://dortania.github.io/OpenCore-Install-Guide/AMD/zen.html#platforminfo
UEFI
Last but not least, make sure the HfsPlus.efi and OpenRuntime.efi are listed under Drivers as follow.

Copy the EFI to USB installer
Now we need to copy the EFI folder to the USB installer. In this case, you will need to mount the EFI partition in the USB drive. I use Clover Configurator for ease of use. Download Clover Configurator and run it.

Click Mount EFI and then click Mount Partition next to your USB drive. By doing this, you should see the EFI partition in the Finder.

Done. Next, we need to change the BIOS settings.
Step 3. BIOS Settings
Boot into your BIOS and then set the following:
Enable
- EHCI/XHCI Hand-off
- OS type: Windows 8.1/10 UEFI Mode
- SATA Mode: AHC
Disable
- Above 4G decoding. (When I enable this, my system won’t boot. So disable this feature and make sure you add npci=0x2000 in the boot-args)
- Fast Boot
- Secure Boot
- Serial/COM Port
- Parallel Port
- Compatibility Support Module (CSM)(Must be off, GPU errors like
gIOare common when this option in enabled)
Step 4. Installation
Now boot your PC to the USB drive. Select the USB drive as the first boot media. And then you should see the picker options showing a boot menu. Choose the one that says “Instal…(External)”. And then follow the installation step shown there. Please refers to this video below and scroll to the installation step. It’s pretty much the same.
If you have the same system as this build, you can download the EFI folder using the link below. Go to the AMD section and the download link is there.
Leave a Reply