

I have been using VMware Workstation for some time now. And I am using VMware Workstation version 15.5 on my Windows 10. In this article, I am going to show you how to enable and configure the VMware Workstation Server. Why do we need to enable this feature? Well, the VMware Workstation allows us to share VMs. The shared VMs then will be accessible through the network. So other users in the network can connect to the same virtual machine from the other computers.
In order to do this, you will need to install VMware Workstation on both the local and remote computers.
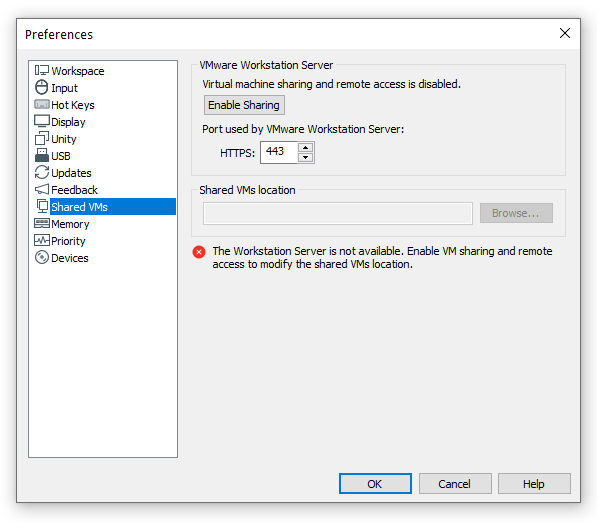
Configure the VMware Workstation Server
- Open VMware Workstation
- Stop all running virtual machines
- Go to Edit | Preferences
- Click Shared VMs
- Click Enable Sharing button. You may also need to specify the shared VMs location as well as the https port.
- Click OK
Connect to the remote VMware Workstation Server
Connecting to VMware Workstation Server is very easy. In summary, you can do the following:
- Open VMware Workstation
- Go to File | Connect to Server
- Type the Server name or IP address, username and password. This is the Windows user and password
- Click OK
Thanks for reading this article and I hope you enjoy it. See you next time.
Leave a Reply