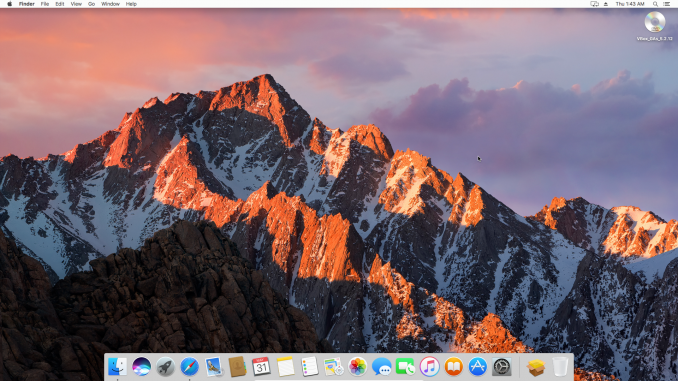
Is it possible to install or run Mac OS Sierra on Virtualbox? Well, personally I will answer this question with confident. YES, you can run Mac OS X Sierra on Virtualbox installed on Windows 10 for example. With few simple steps, you will be able to run Mac OS Sierra on Windows. On this tutorial, you will learn how to do this. Don’t worry, I will guide you step by step from the scratch.
Mac OS X High Sierra on Windows 10 via Virtualbox
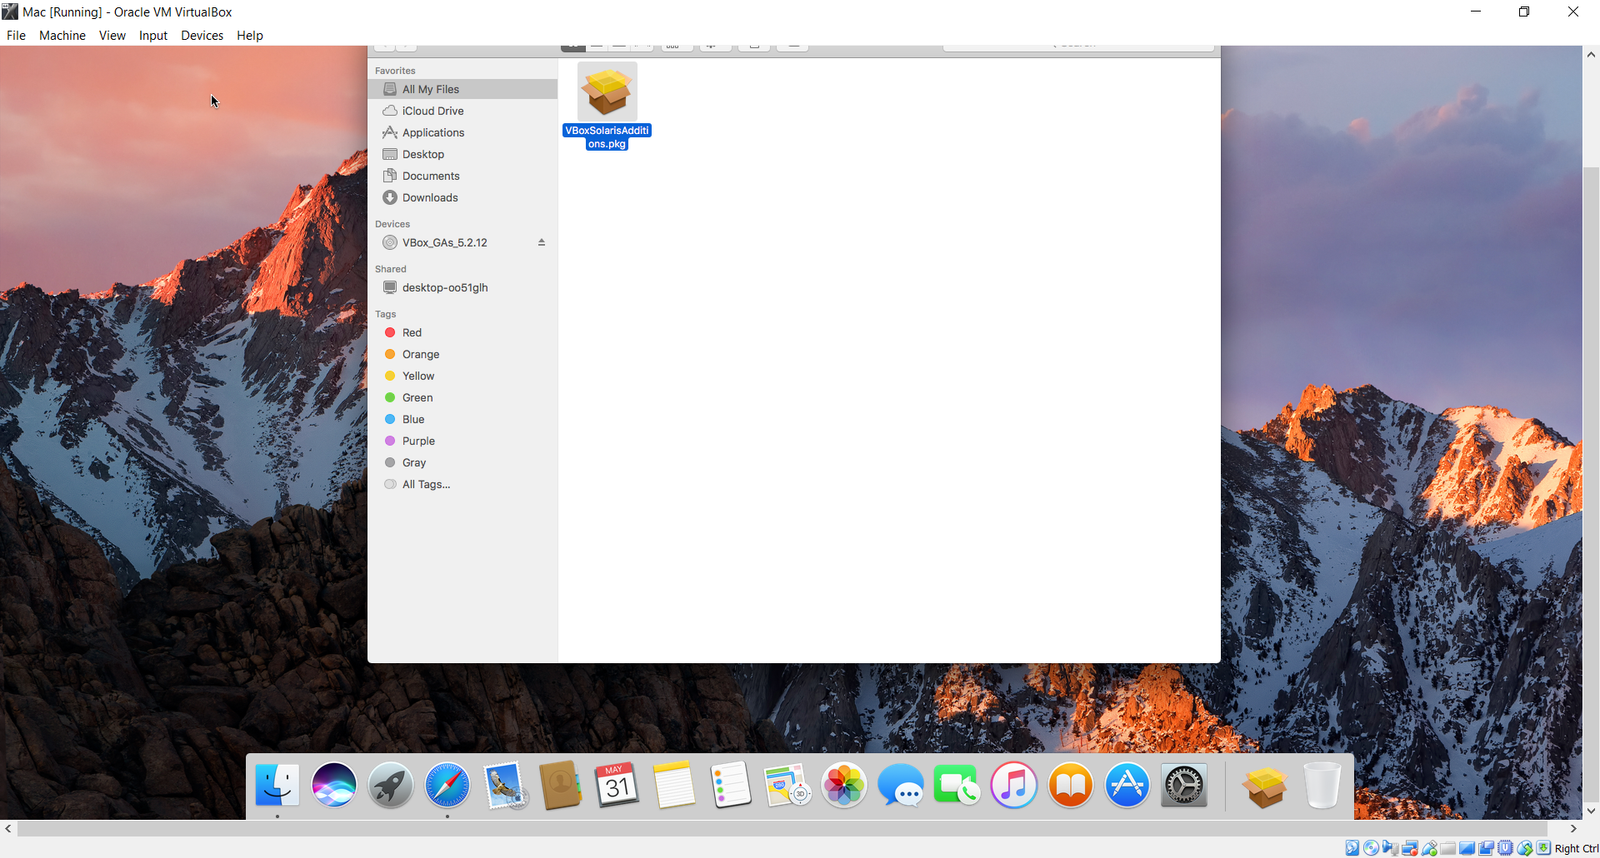

In order to run Mac OS Sierra on Windows 10, make sure your computer meet the following requirements:
- 64 bit computer
- at least 4 GB of RAM
- a Dual core processor
But I would recommend you to have more than that. At least, you will need 4 GB for the virtual machine itself. So you will need 8 GB of total memory on your laptop would be great.
In order to run Mac OS X Sierra on Windows 10 via Virtualbox, please follow this step by step guide below.
Step 1. Download and Install Oracle Virtualbox
Skip this step if you have Virtualbox installed already. Make sure you have the latest version of Virtualbox to get the best performance. You can download the latest version of Virtualbox from this link.
Step 2. Download Mac OS X Sierra disk image (VMDK)
Now, you will need to download the image file (.VMDK). Use the link below to download the Mac OS Sierra version 10.12.
Download Mac OS Sierra 10.12 Image File
Please let us know if the link above does not work. I will upload my own file so you can download. After download, extract the file and you will have a file called: macOS 10.12 Sierra Final by TechReviews
Step 3. Create a new Virtual Machine
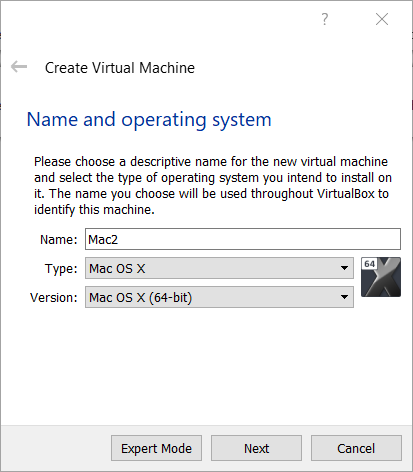
These step will guide you to create a new virtual machine. Select Mac OS X from the list.
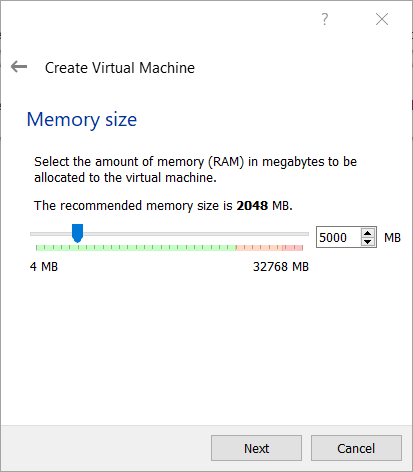
Next, allocate 4GB or more RAM to the new VM
Click Next to continue. Normally, you will need to create a new virtual disk. But here, select the bottom one: Use and existing virtual hard disk file.
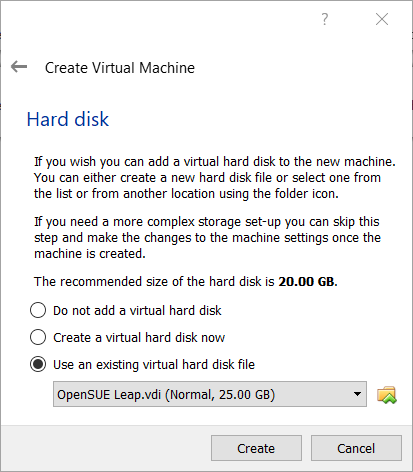
Now browse to the VMDK file you’ve just downloaded and extracted from the previous step mentioned above.
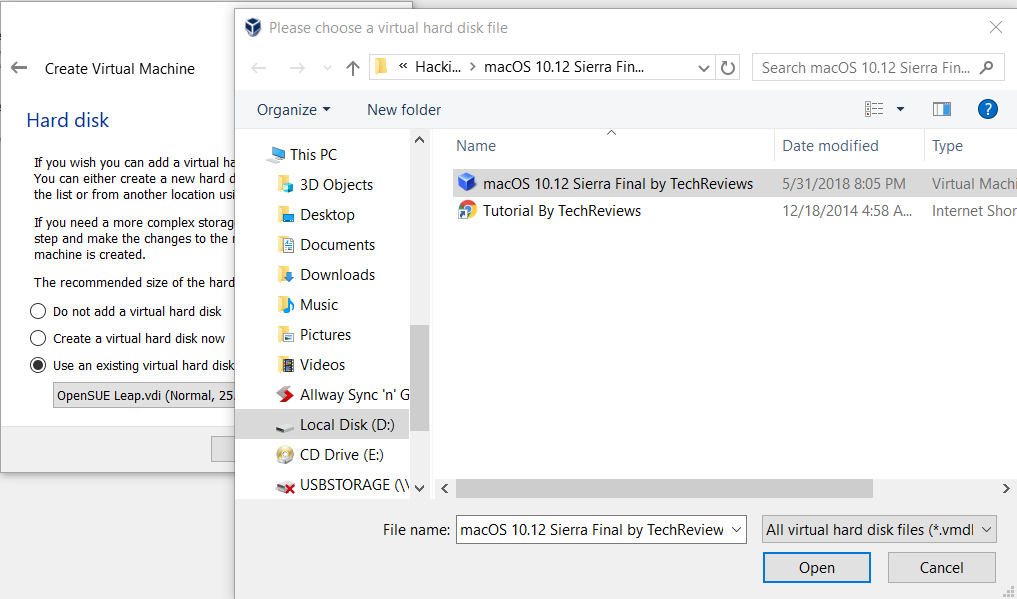
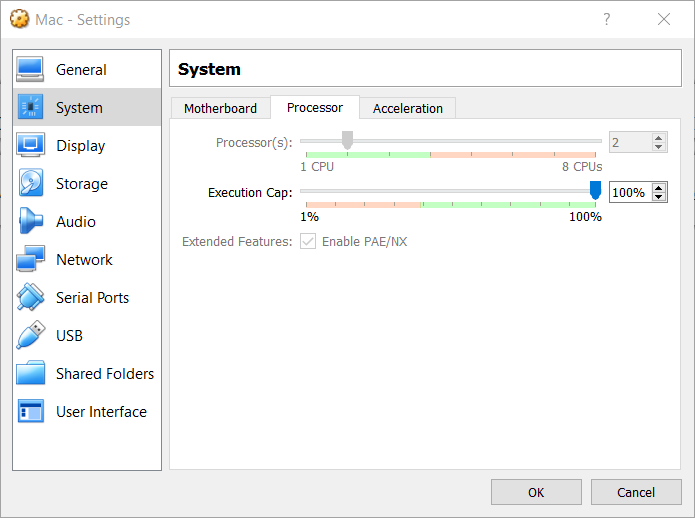
Click Open and then click Create. Now your new virtual machine should be created. But do not start the virtual machine yet. We need to do some other tweaking. Click the Virtual machine we just created and then click Settings. Go to System and then Processor. Adjust the slide and allocate 2 or more core processors to the VM. Also, enable PAE/NX feature.
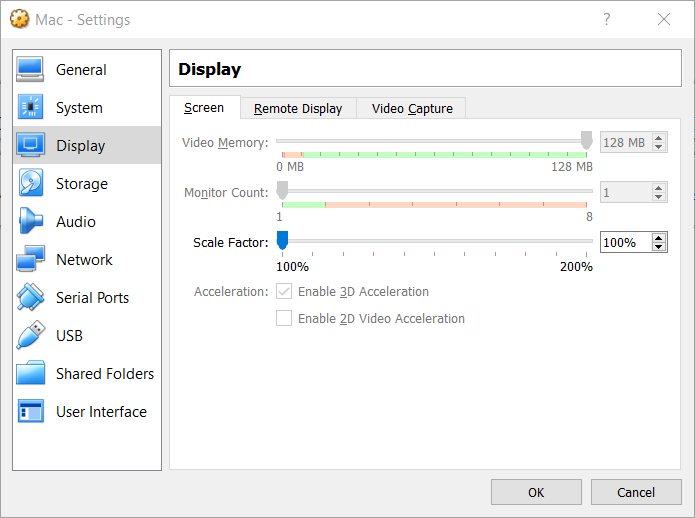
Adjust the Display Settings
I recommend you to put 128 MB on the video memory and enable 3D acceleration.
Step 4. Edit the Virtual Machine
This step is very important. So, follow step by step below. We will execute some codes in command line.
First, make a note of your virtual machine name. You can find you VM name under General tab on the Settings page. For example:
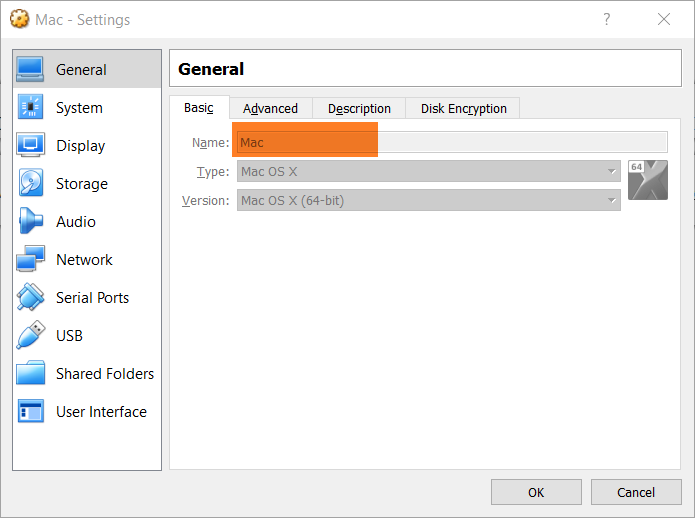
Now copy the following lines of code to Notepad.
cd "C:\Program Files\Oracle\VirtualBox\"
VBoxManage.exe modifyvm "Your VM Name" --cpuidset 00000001 000106e5 00100800 0098e3fd bfebfbff
VBoxManage setextradata "Your VM Name" "VBoxInternal/Devices/efi/0/Config/DmiSystemProduct" "iMac11,3"
VBoxManage setextradata "Your VM Name" "VBoxInternal/Devices/efi/0/Config/DmiSystemVersion" "1.0"
VBoxManage setextradata "Your VM Name" "VBoxInternal/Devices/efi/0/Config/DmiBoardProduct" "Iloveapple"
VBoxManage setextradata "Your VM Name" "VBoxInternal/Devices/smc/0/Config/DeviceKey" "ourhardworkbythesewordsguardedpleasedontsteal(c)AppleComputerInc"
VBoxManage setextradata "Your VM Name" "VBoxInternal/Devices/smc/0/Config/GetKeyFromRealSMC" 1
And then replace Your VM Name with your actual VM name. On this example, the lines would be:
cd "C:\Program Files\Oracle\VirtualBox\"
VBoxManage.exe modifyvm "Mac" --cpuidset 00000001 000106e5 00100800 0098e3fd bfebfbff
VBoxManage setextradata "Mac" "VBoxInternal/Devices/efi/0/Config/DmiSystemProduct" "iMac11,3"
VBoxManage setextradata "Mac" "VBoxInternal/Devices/efi/0/Config/DmiSystemVersion" "1.0"
VBoxManage setextradata "Mac" "VBoxInternal/Devices/efi/0/Config/DmiBoardProduct" "Iloveapple"
VBoxManage setextradata "Mac" "VBoxInternal/Devices/smc/0/Config/DeviceKey" "ourhardworkbythesewordsguardedpleasedontsteal(c)AppleComputerInc"
VBoxManage setextradata "Mac" "VBoxInternal/Devices/smc/0/Config/GetKeyFromRealSMC" 1
And then, open cmd as Administrator. Click Windows logo and type cmd. Right click on it and select Run as administrator.
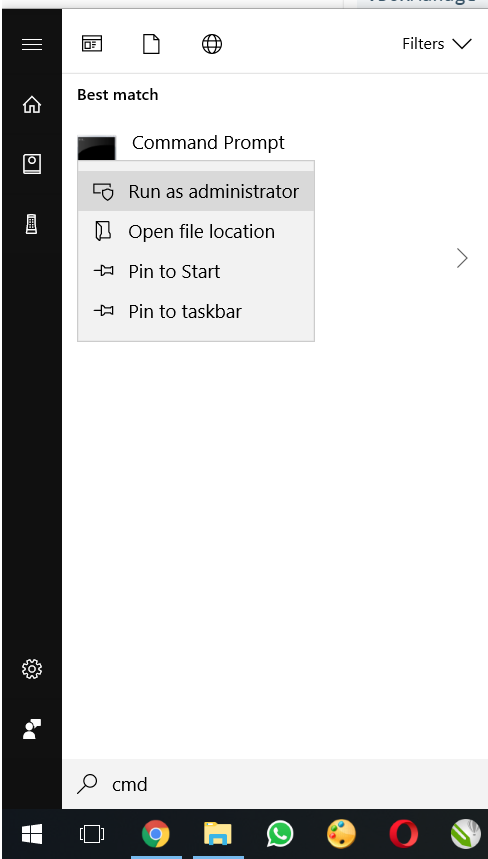
Now copy the code one by one. For example:
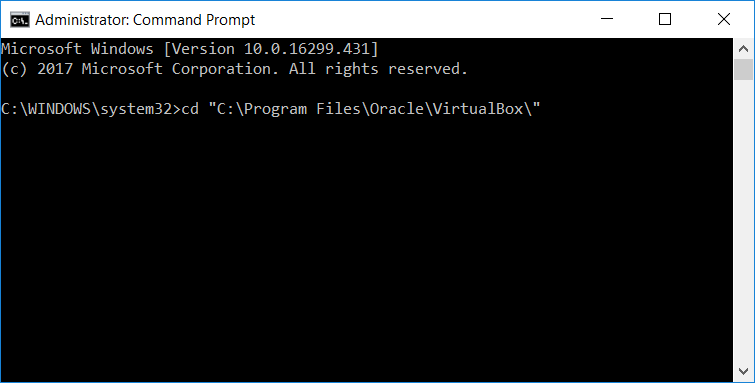
Repeat the step until all lines are executed. Once finished, and make sure there is no error. Run the Virtual Machine. You will be guided to configure Mac OS X Sierra for the first time.
How to Change the screen resolution on Mac OS Sierra on Virtualbox
After the installation process is completed, you may want to change your screen resolution rather than the default 800×600. The following steps will show you how to change your Mac screen resolution under Virtualbox.
First, stop or shut down your virtual machine and then open cmd as administrator and execute these commands one by one.
cd "C:\Program Files\Oracle\Virtualbox"
VBoxManage setextradata “Your VM Name” VBoxInternal2/EfiGraphicsResolution HxV
Caution:
Don’t forget to change Your VM Name with your actual VM name. And also, change the HxV with the actual screen resolution you like. Here are some example of the screen resolution you can choose
Resolutions to choose:Resolutions to choose: 1280×720 | 1920×1080 | 2560×1440 | 2048×1080 | 3840×2160 | 5120×2880 | 1280×800 | 1280×1024 |1600×900 | 1440×900
For example, I want to change my resolution to 1920×1080, the code would be:
cd "C:\Program Files\Oracle\Virtualbox"
VBoxManage setextradata “Mac” VBoxInternal2/EfiGraphicsResolution 1920x1080
Now start your Mac OS X virtual machine and enjoy the full resolution.
Thank you

Leave a Reply