

MySQL Server has become part of my daily work. I use it almost every day to store my data. In this article, I am going to show you step by step to install MySQL Server on Debian 10 Buster. If you install using apt install command, you will get the MariaDB instead of MySQL. So, this tutorial will actually install MySQL Server, not MariaDB in Debian 10.
Steps to Install MySQL Server on Debian 10
A. Prerequisites
I would suggest you install any updates you might have. Use the update command below prior to the MySQL installation.
su
apt update && apt upgrade -y
B. Configure MySQL PPA on Debian 10
As root, execute the following commands to configure the PPA on Debian 10
wget http://repo.mysql.com/mysql-apt-config_0.8.13-1_all.deb
dpkg -i mysql-apt-config_0.8.13-1_all.deb
Next, you will need to choose which MySQL version you want to install. You may also want to install MySQL Tools such as Workbench. Finally, choose OK and hit enter.
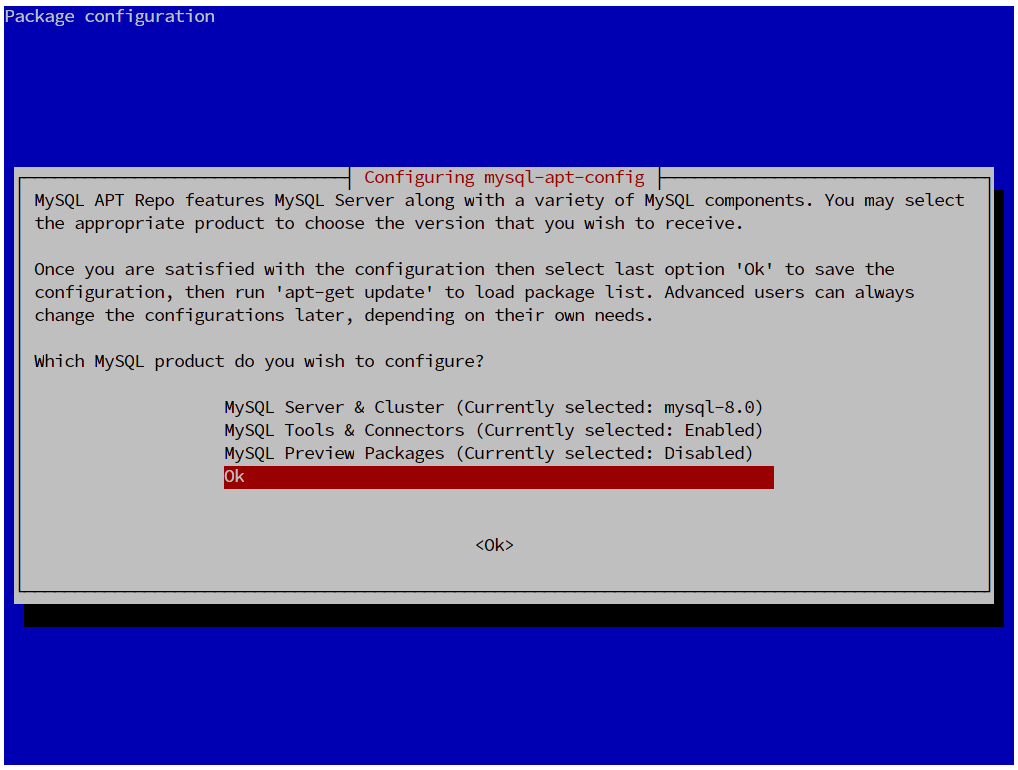
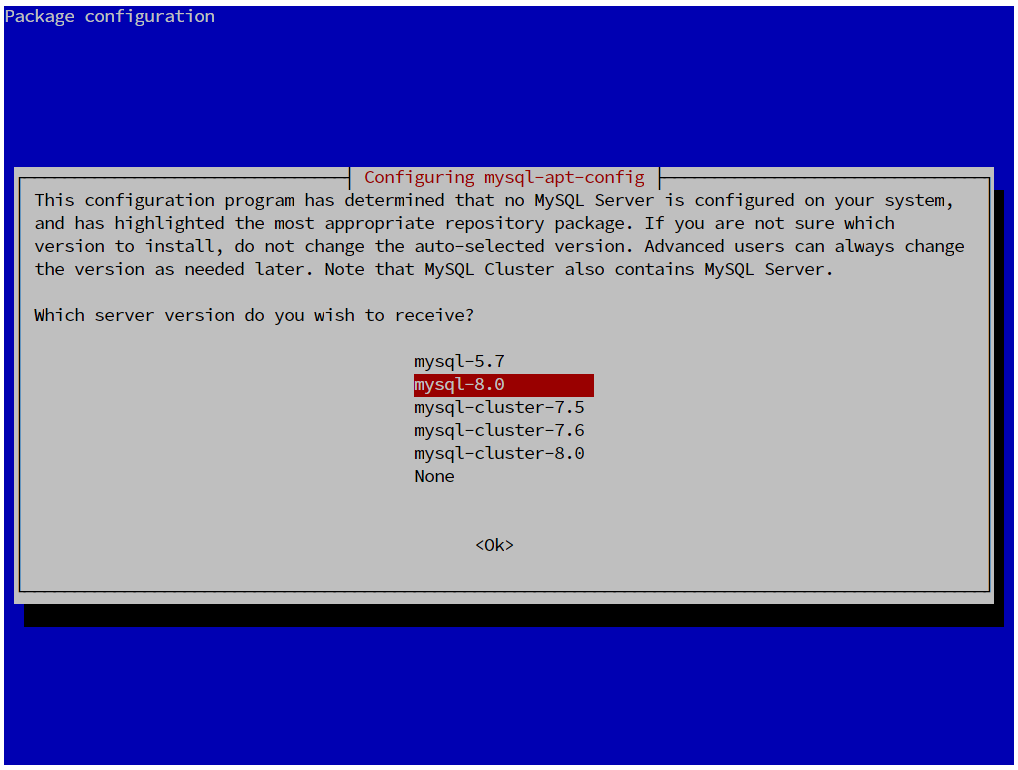
As I previously mentioned, you can choose which MySQL version you want to install. Move your cursor to the top which says MySQL Server & Cluster and then hit enter. Now choose the MySQL version from the list.
C. Install MySQL
Now, we are ready to install the MySQL Server on Debian 10. In this article, I choose to install MySQL version 8.0. As root, execute these commands
apt update
apt install mysql-server
Output:
root@debian:/home/dhani# apt install mysql-server
Reading package lists… Done
Building dependency tree
Reading state information… Done
The following packages were automatically installed and are no longer required:
bamfdaemon libbamf3-2 libplank-common libplank1 libqgis-3d3.8.1 libqgis-3d3.8.2
libqgis-analysis3.8.1 libqgis-analysis3.8.2 libqgis-app3.8.1 libqgis-app3.8.2 libqgis-core3.8.1
libqgis-core3.8.2 libqgis-gui3.8.1 libqgis-gui3.8.2 libqgis-native3.8.1 libqgis-native3.8.2
libqgis-server3.8.1 libqgis-server3.8.2 libqgisgrass7-3.8.1 libqgisgrass7-3.8.2
libqgispython3.8.1 libqgispython3.8.2
Use ‘apt autoremove’ to remove them.
The following additional packages will be installed:
libmecab2 mecab-ipadic mecab-ipadic-utf8 mecab-utils mysql-client mysql-common
mysql-community-client mysql-community-client-core mysql-community-server
mysql-community-server-core
The following NEW packages will be installed:
libmecab2 mecab-ipadic mecab-ipadic-utf8 mecab-utils mysql-client mysql-community-client
mysql-community-client-core mysql-community-server mysql-community-server-core mysql-server
The following packages will be upgraded:
mysql-common
1 upgraded, 10 newly installed, 0 to remove and 2 not upgraded.
Need to get 29.9 MB of archives.
After this operation, 294 MB of additional disk space will be used.
Do you want to continue? [Y/n]
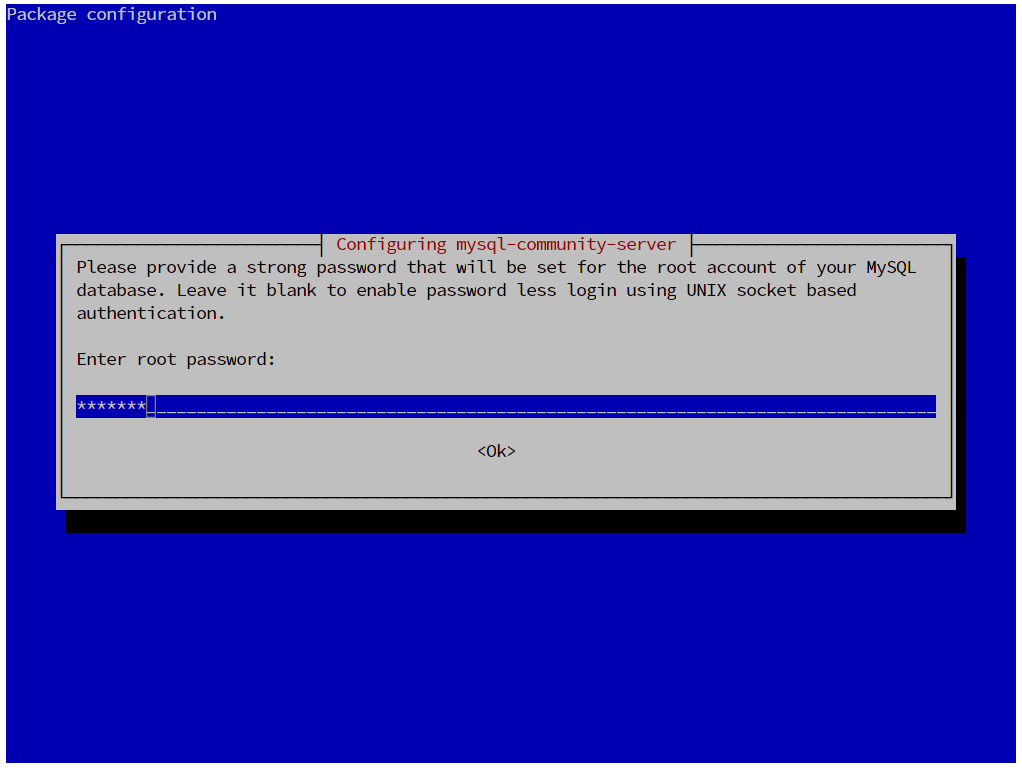
During installation, you will need to create a new password for the MySQL root user.
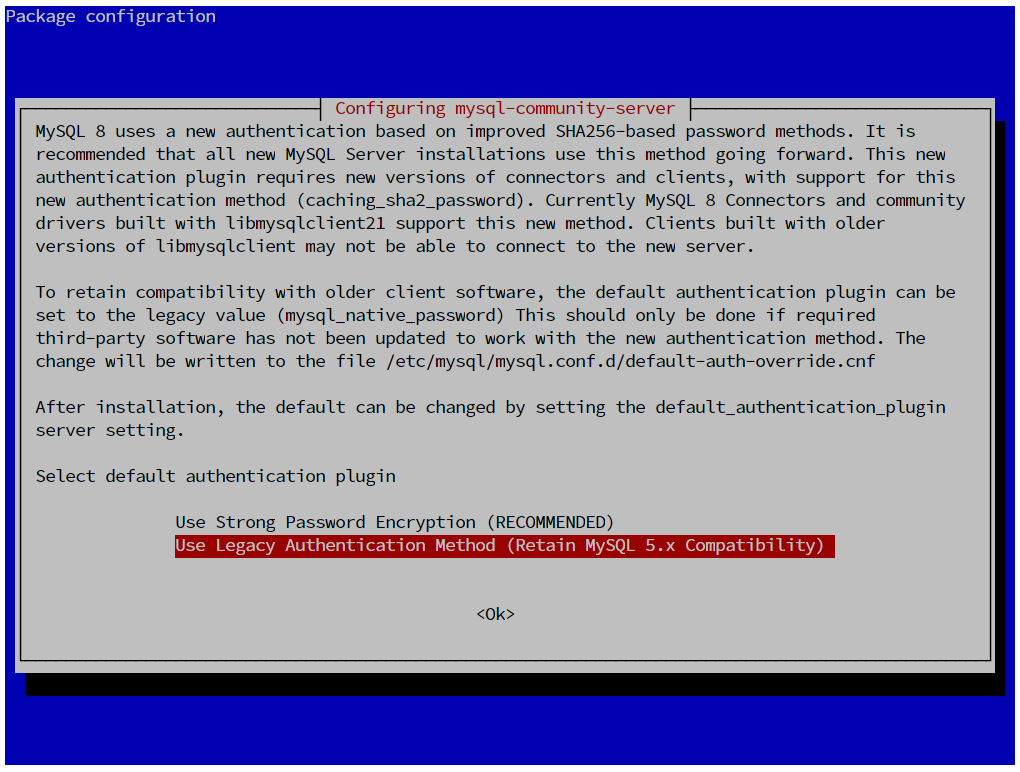
Next, configure the password encryption. The new MySQL server offers better security with a new password encryption feature. But for now, I don’t want to enable it.
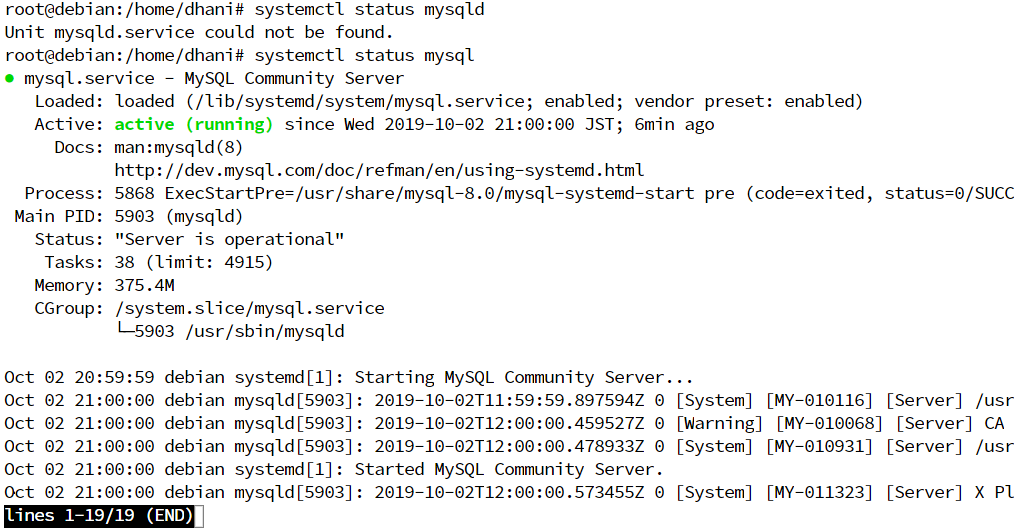
The installation will continue. Wait until it completes. Once completes, check the service status with this command
systemctl status mysql
You should see something like this
D. Secure MySQL Installation
Next, let’s do some security changes to our database server. Use this command below and answer some questions shown in your Terminal window.
mysql_secure_installation
Output example:
root@debian:/home/dhani# mysql_secure_installation
Securing the MySQL server deployment.
Enter password for user root:
VALIDATE PASSWORD COMPONENT can be used to test passwords
and improve security. It checks the strength of password
and allows the users to set only those passwords which are
secure enough. Would you like to setup VALIDATE PASSWORD component?
Press y|Y for Yes, any other key for No: n
Using existing password for root.
Change the password for root ? ((Press y|Y for Yes, any other key for No) : n
… skipping.
By default, a MySQL installation has an anonymous user,
allowing anyone to log into MySQL without having to have
a user account created for them. This is intended only for
testing, and to make the installation go a bit smoother.
You should remove them before moving into a production
environment.
Remove anonymous users? (Press y|Y for Yes, any other key for No) : y
Success.
Normally, root should only be allowed to connect from
‘localhost’. This ensures that someone cannot guess at
the root password from the network.
Disallow root login remotely? (Press y|Y for Yes, any other key for No) : n
… skipping.
By default, MySQL comes with a database named ‘test’ that
anyone can access. This is also intended only for testing,
and should be removed before moving into a production
environment.
Remove test database and access to it? (Press y|Y for Yes, any other key for No) : y
Dropping test database…
Success.
Removing privileges on test database…
Success.
Reloading the privilege tables will ensure that all changes
made so far will take effect immediately.
Reload privilege tables now? (Press y|Y for Yes, any other key for No) : y
Success.
All done!
E. Connect to MySQL
Now, we are ready to connect to our MySQL server from the Terminal.
mysql -u root -p
Enter your MySQL root password when asked.
root@debian:/home/dhani# mysql -u root -p
Enter password:
Welcome to the MySQL monitor. Commands end with ; or \g.
Your MySQL connection id is 10
Server version: 8.0.17 MySQL Community Server – GPL
Copyright (c) 2000, 2019, Oracle and/or its affiliates. All rights reserved.
Oracle is a registered trademark of Oracle Corporation and/or its
affiliates. Other names may be trademarks of their respective
owners.
Type ‘help;’ or ‘\h’ for help. Type ‘\c’ to clear the current input statement.
mysql>
Enable Remote Access
In the following task, we are going to show you how to enable remote access to MySQL database on Debian 10. By doing this, you will be able to connect to your MySQL database from the network or even from the internet. Let’s do it.
The only thing we need to do it to create a new user and enable the user to connect to the server from the network. First, login to MySQL console
mysql -u root -p
Next, create a new MySQL user.
CREATE USER manjaro@'%' IDENTIFIED BY '12345';
Sample:
root@debian:/etc/mysql/mysql.conf.d# mysql -u root -p
Enter password:
Welcome to the MySQL monitor. Commands end with ; or \g.
Your MySQL connection id is 10
Server version: 8.0.17 MySQL Community Server – GPL
Copyright (c) 2000, 2019, Oracle and/or its affiliates. All rights reserved.
Oracle is a registered trademark of Oracle Corporation and/or its
affiliates. Other names may be trademarks of their respective
owners.
Type ‘help;’ or ‘\h’ for help. Type ‘\c’ to clear the current input statement.
mysql> create user manjaro@’%’ identified by ‘12345’;
Next, grant privileges to the new user. In this example, I want to grant everything to my new user
GRANT ALL PRIVILEGES ON *.* TO manjaro@'%';
FLUSH PRIVILEGES;
EXIT;
Done. Now try to connect to your MySQL server from another computer. You can use MySQL Workbench, Navicat Premium or any other software you need.
Leave a Reply