
On my previous article, I have shown you how to enable the GPU passthrough on Proxmox 6.2. And now, I will share some tips on how to utilise the GPU passthrough on a Windows 10 virtual machine. By default, if you install Windows 10 on Proxmox, you will have a poor graphical performance. That’s why the GPU passthrough is the solution for better graphic performance.
There are some settings that you need to take care before you create the Windows 10 virtual machine.
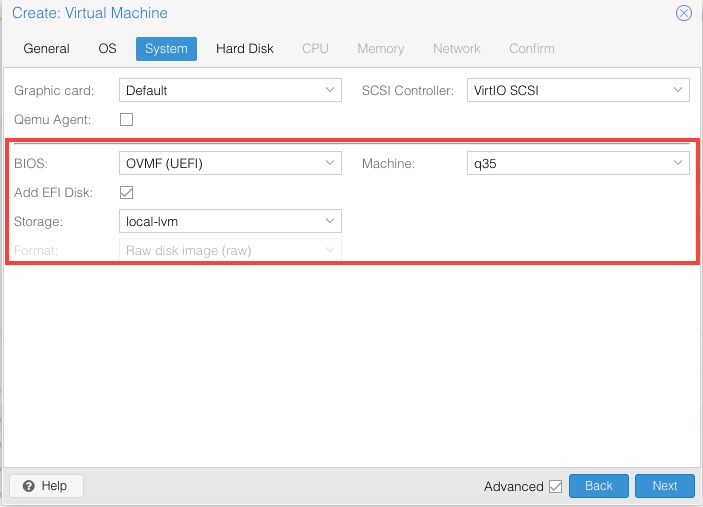
- BIOS: OVMF (UEFI)
- Machine: q35
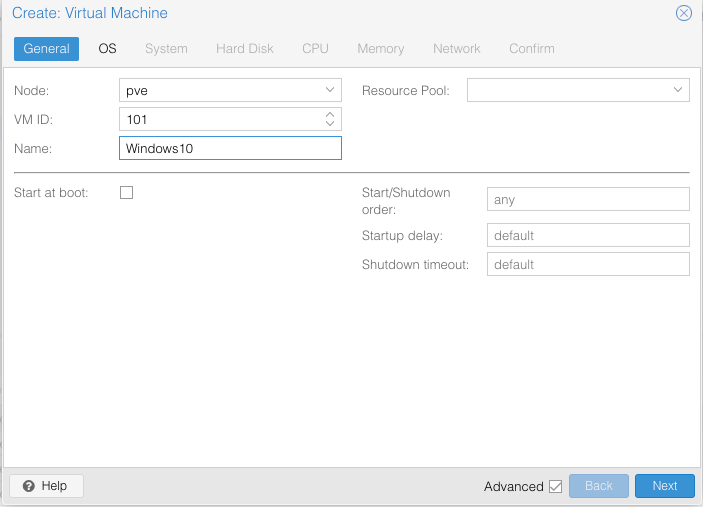
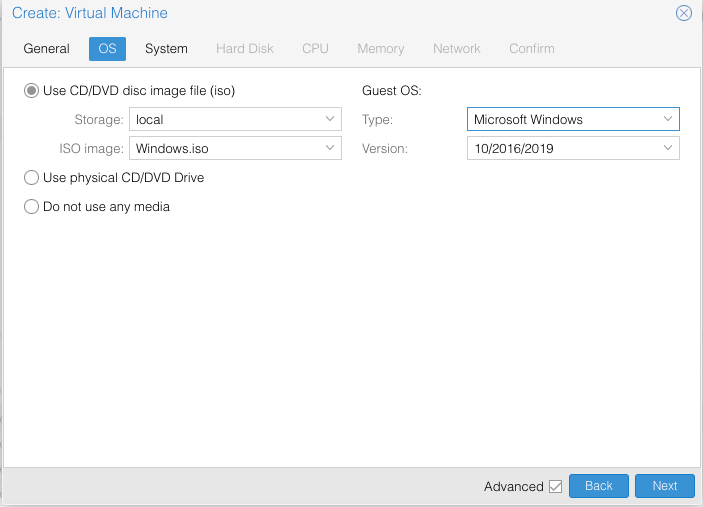
For more details, I will show you step by step to create a new Windows 10 vm for GPU passthrough.
On the following step, due take a note that you MUST choose OVMF(UEFI) on the BIOS, enable Add EFI Disk and choose the storage. Also, don’t forget to change the Machine to “q35”.
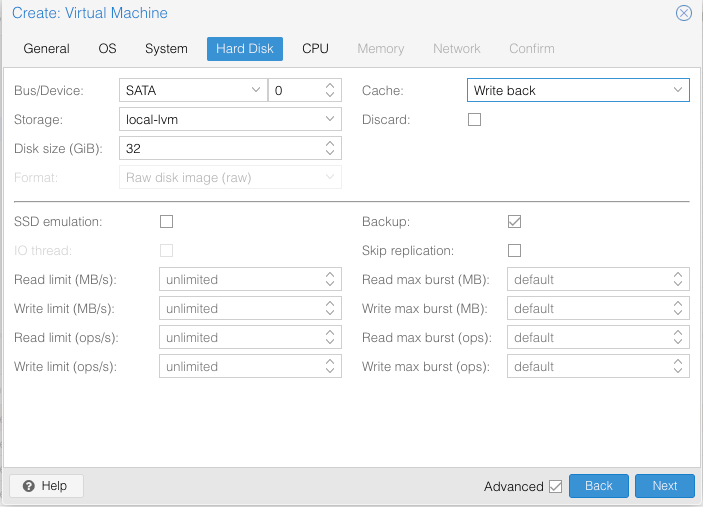
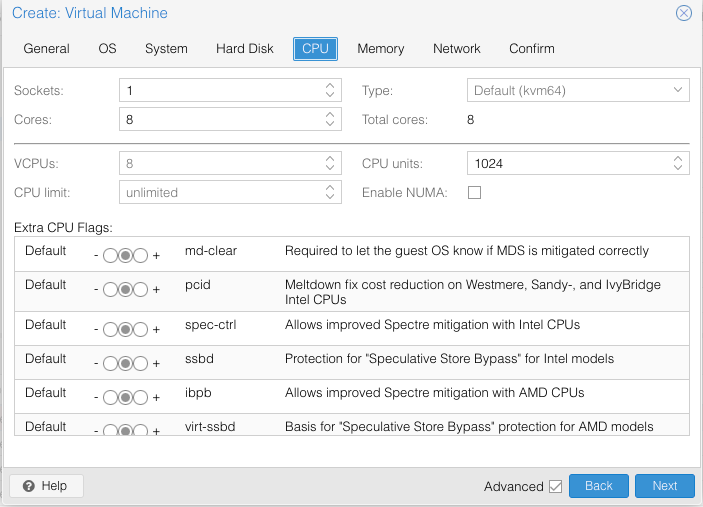
Assign the CPU cores. In this example, I use all the 8 cores on my processor.
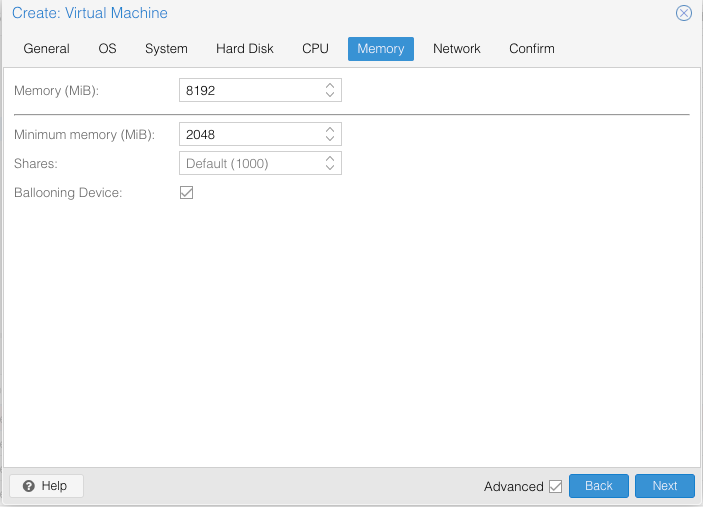
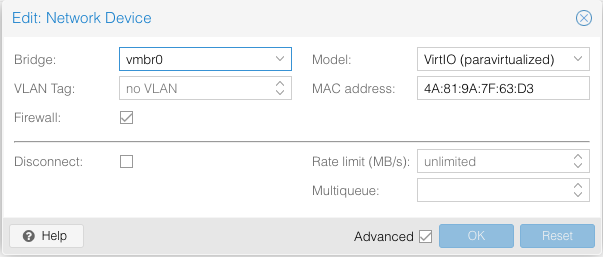
Finally, here is my Windows 10 hardware summary.
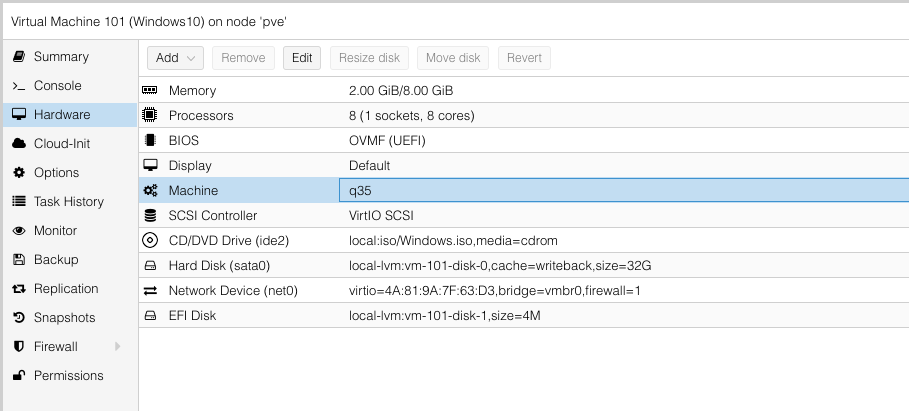
IMPORTANT
Now start the VM with current config. And make sure you enable the remote desktop connection in Windows 10 after the installation is complete. I will also recommend to use static IP address for this purposes.
Enable GPU Passthrough on Windows 10 VM
Please note that after you enable the GPU Passthrough, you won’t be able to connect to your VM via Proxmox Console. That’s why I enable the RDP on Windows 10 VM.
Stop the VM and then SSH to the Proxmox host and we will edit the newly created Windows 10 vm. Open and edit the vm-id.conf under /etc/pve/qemu-server/ directory. In this case, my vm-id is 101. So I am going to edit the file 101.conf
nano /etc/pve/qemu-server/101.conf
This is the original 101.conf
balloon: 2048
bios: ovmf
bootdisk: sata0
cores: 8
efidisk0: local-lvm:vm-101-disk-1,size=4M
ide2: local:iso/Windows.iso,media=cdrom
machine: q35
memory: 8192
name: Windows10
net0: virtio=4A:81:9A:7F:63:D3,bridge=vmbr0,firewall=1
numa: 0
ostype: win10
sata0: local-lvm:vm-101-disk-0,cache=writeback,size=32G
scsihw: virtio-scsi-pci
smbios1: uuid=74e3cfc3-824a-427a-bb85-43a960134e94
sockets: 1
vmgenid: b3579e2a-a493-4b65-b4eb-fe190941db55
We are going to add the following lines to the config file
cpu: host,hidden=1,flags=+pcid
hostpci0: 01:00,pcie=1,x-vga=on
Please note that value of the line hostpci0 could be different with mine. This is the PCI Express where the VGA graphic card is located. Please read my other tutorial how to get the PCI id of the graphic card.
Final config file
balloon: 2048
bios: ovmf
bootdisk: sata0
cores: 8
cpu: host,hidden=1,flags=+pcid
hostpci0: 01:00,pcie=1,x-vga=on
efidisk0: local-lvm:vm-101-disk-1,size=4M
ide2: local:iso/Windows.iso,media=cdrom
machine: q35
memory: 8192
name: Windows10
net0: virtio=4A:81:9A:7F:63:D3,bridge=vmbr0,firewall=1
numa: 0
ostype: win10
sata0: local-lvm:vm-101-disk-0,cache=writeback,size=32G
scsihw: virtio-scsi-pci
smbios1: uuid=74e3cfc3-824a-427a-bb85-43a960134e94
sockets: 1
vmgenid: b3579e2a-a493-4b65-b4eb-fe190941db55
Now the Hardware configuration should looks like this
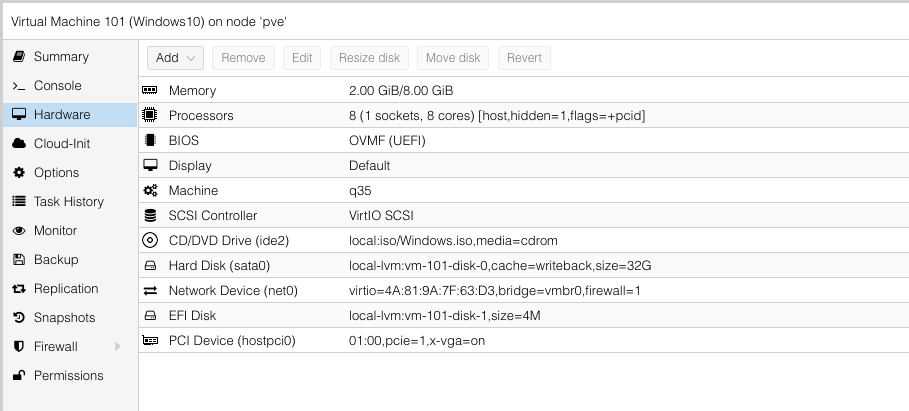
Notice that the new device called PCI Device (hostpci0) is now in the hardware section. Now start the VM and you can connect to the Windows 10 via RDP from other computer.
Or, if you have spare monitor, you can connect the monitor to the VGA graphic card on the Proxmox server and you can use Windows 10 VM on that monitor. That’s cool.
USB Keyboard and Mouse Passthrough
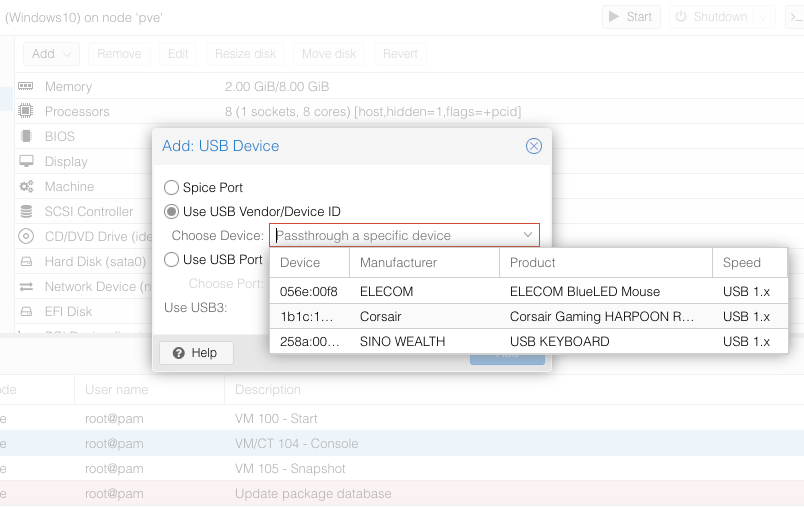
When you use the monitor, you will also need to passthrough the USB Keyboard and mouse so you can use them together on Windows 10 VM. To do this, simply go to the Hardware section of the Windows 10 VM. Click Add button and choose USB devices from the list. Next, choose the USB mouse and keyboard from the list.

Leave a Reply