There are several ways to install macOS on a PC. We can install it directly or use the virtual machine. In this article, we will guide you how to install macOS Sequoia in Proxmox using the easy way. In the past, I installed macOS Ventura in Proxmox manually. It take a lot of efforts and time. But with this new method, it will be very simple and easy.
Installing macOS in Proxmox will never easier than this. With only few steps, we can have a fully functional macOS Sequoia (and other versions). This will be a pretty long tutorial, so bare with us.
Why Use Proxmox?
Proxmox is a modern way to turn a normal PC into a powerful, rich-features virtual environment. We can spin up multiple operating systems simultaneously. More than that, the PCI Passthrough is the feature that most people love. With PCI Passthrough, we can assign a dedicated GPU and other devices to a specific VM. Then, the selected VM will have access to the hardware directly.
Steps to Install macOS Sequoia in Proxmox
Step 1. Preparation
If this is your first time doing Hackintosh in Proxmox, I would remind you that by installing macOS in Proxmox, you will have a poor performance. To be said, its almost unusable. The graphical performance is very slow (without GPU passthrough that will be explained later in this post). In order to install macOS Sequoia in Proxmox you will need the following
- a PC or server with Proxmox installed: SSD is highly recommended to store the macOS VM.
- Good internet connection: Proxmox has to be connected to the internet during the macOS installation
Step 2. Update Proxmox
It is recommended to update Proxmox to the latest version available. Currently, Proxmox 8.3 is available. Please update your system to this latest version. You may follow my guide how to update Proxmox.
Step 3. Download and Run the Installer Script
As I mentioned above, this technique of macOS Sequoia installation is very simple. Thanks to the one who provide this excellent script. Please visit the GitHub page. Download the installation script and run it. It will only take a few seconds to run the script. Go to Proxmox web dashboard and then go to Shell. Paste this script below and follow the steps.
/bin/bash -c "$(curl -fsSL https://install.osx-proxmox.com)"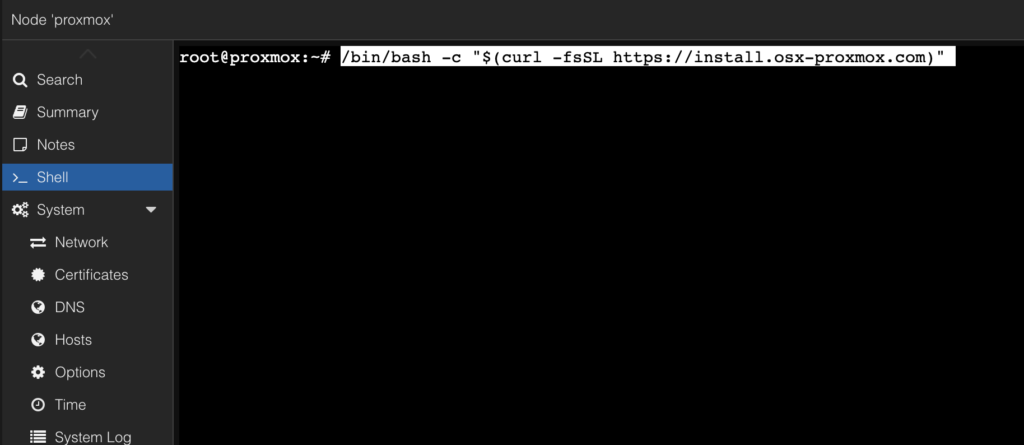
This command will download the required files from the internet. Soon, you will see this screen in the Proxmox Shell.
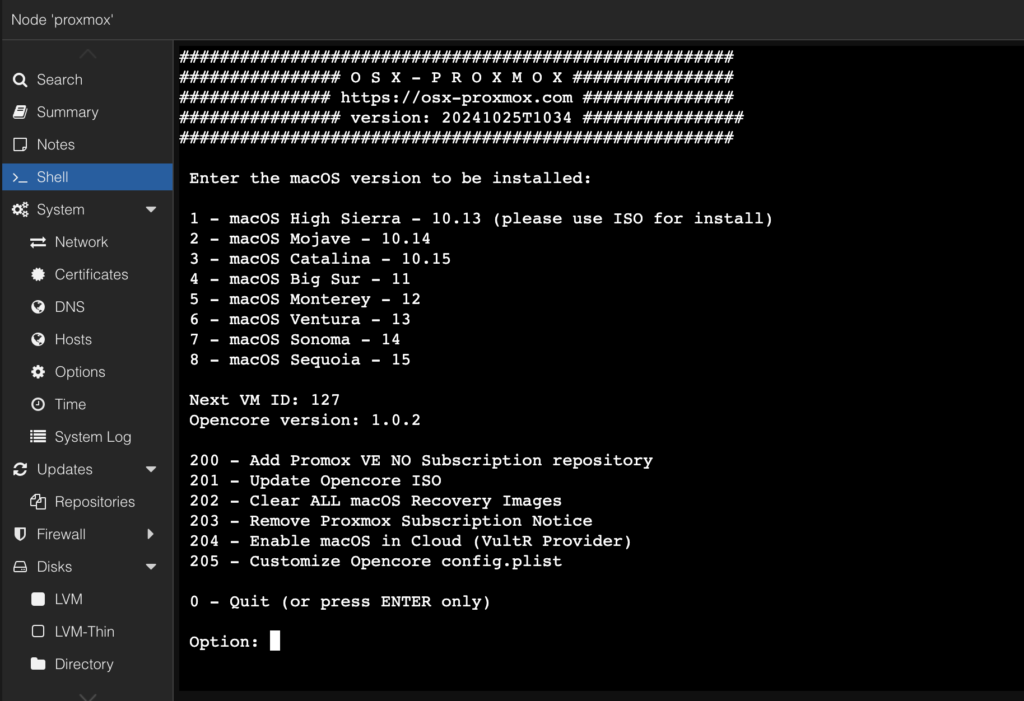
Type 8 to select the macOS Sequoia and press Enter. Next, enter the required information such as:
- VM ID: Leave blank to use the default value
- VM Name: In this case, we call it macOS-Sequoia
- Disk Size: Default is 64 GB. In this example, we use 100 GB
- Choose the storage. If you have multiple storages, type the one you want to use to store the VM disk.
- Download and Create recovery image.

Wait until the download completed.

Step 4. Install macOS Sequoia
In the previous step above, the install script will automatically created a new VM and all the settings we need to boot the macOS Sequoia installer. Now we need to go to the Proxmox Dashboard, run the new VM and start the macOS installation.

Choose SEQUOIA (dmg) and press enter to boot macOS. This will take a while.
Format the Disk
When you see this window, click Disk Utility. We need to format our disk so we can install macOS.
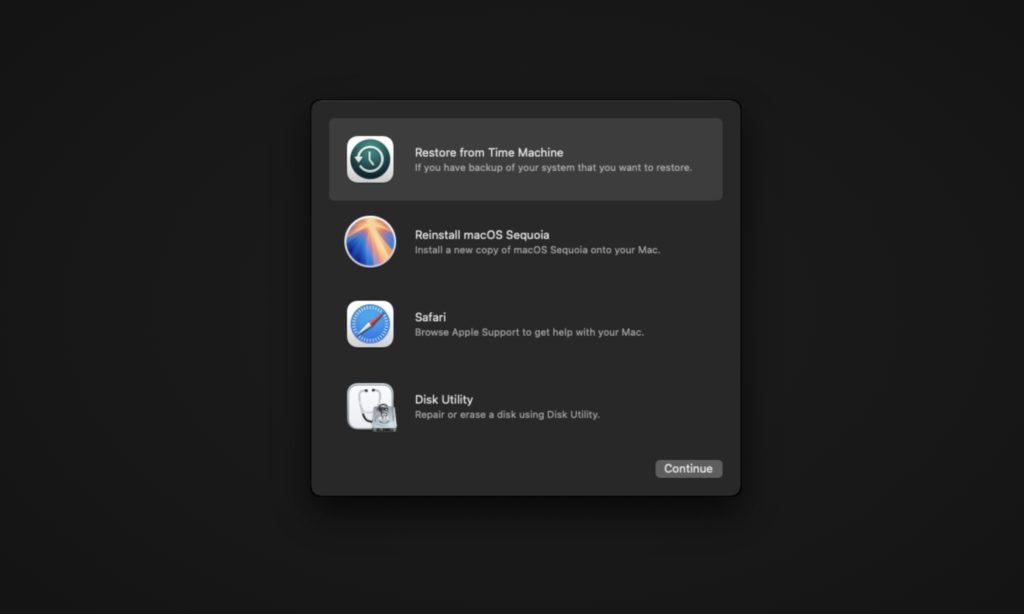
Watch the following video to format the Disk. Make sure you choose the correct format as shown below.
Install macOS Sequoia
Now choose Reinstall macOS Sequoia to start the installation. Please watch the following video showing the process. This installation process requires internet connection. So, make sure you have a proper internet connection. It will download a lot of files from the internet.
During the installation process, the VM will restart couple of times. Upon restart, there will be one new boot entry. Do not choose the SEQUOIA (dmg) again.
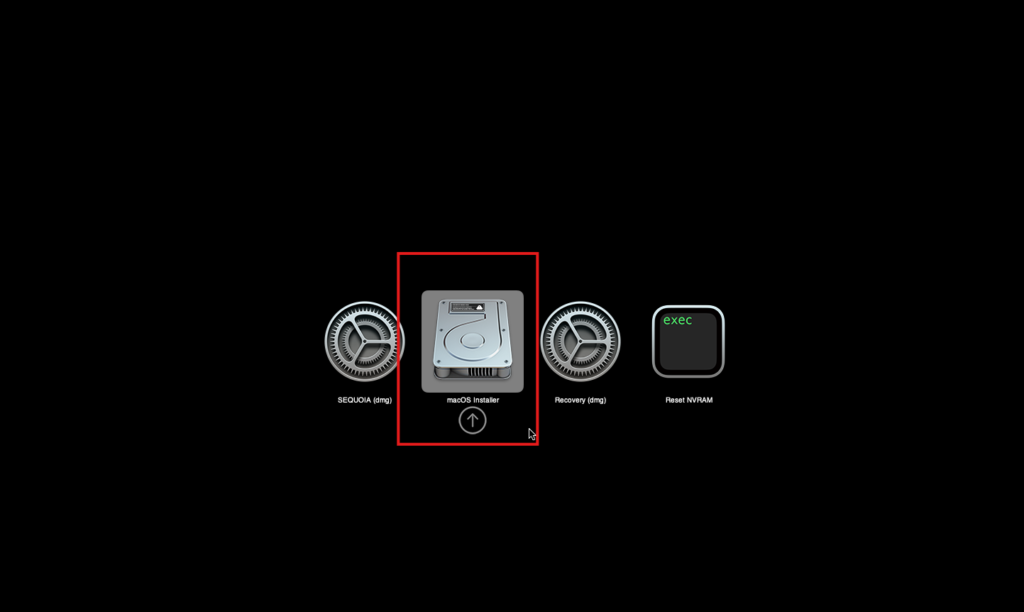
The installation will continue. And will be restarting few times. Next, the macOS installation wizard will start and we need to follow the install steps as shown below.
At this point, we have successfully installed macOS Sequoia in Proxmox. Stay tuned on this blog. There still some additional steps to complete the installation. We will cover this in the next post.
Watch the installation video below;

Leave a Reply