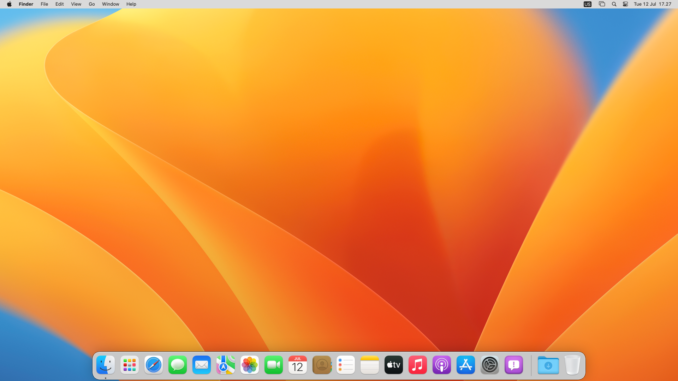
Hello Hackintosh lovers, today we are going to install the latest macOS Ventura Beta on Proxmox 7.1. I will guide you step by step to get the macOS Ventura installed on your Proxmox system. macOS Ventura is still in Beta and it is not publicly available just yet. So, you will need to have Apple Developer Account to download it. BUT, don’t worry. We found a simple way to bypass this. You don’t need Apple Developer Account in order to download the latest macOS Ventura Beta. In order to install macOS Ventura Beta, your host computer must meet the following requirements.
- The host computer must support AVX2
- The minimum processor is Intel Haswell
- AMD Ryzen PC should be fine
Disclaimers:
Since the macOS Ventura is still in Beta, we expect there are many bugs and instability in both macOS itself and the OpenCore boot loader. So please do not use this for your production machine.
Steps to Install macOS Ventura Beta on Proxmox 7
In this article, I am using Proxmox version 7.1.7. As mentioned on Nick’s website, you can use the latest Proxmox 7.2 as well.
Step 1. Create macOS Ventura Beta image
The first thing we need to do is to create the macOS Ventura Beta image for Proxmox. You will need a real Mac or a Hackintosh to do this. Please read my previous article below to create macOS Ventura Beta for Proxmox.
I assume now you have the Ventura-full.img file uploaded to your Proxmox server.
Step 2. Download OpenCore for Ventura Beta
Download the OpenCore ISO using the link below. Again, thanks to Nick Sherlock who provides this. This OpenCore ISO supports macOS BigSur, Monterey as well as Ventura Beta.
Once you downloaded it, upload the ISO to Proxmox.
Step 3. Create a New VM
Now open the Proxmox web dashboard and then Create a New VM. Please see my screenshots below carefully. There are some things that we need to pay attention.
General
Give a unique name for the new VM. Leave everything else as is. No changes are needed at this point.
OS
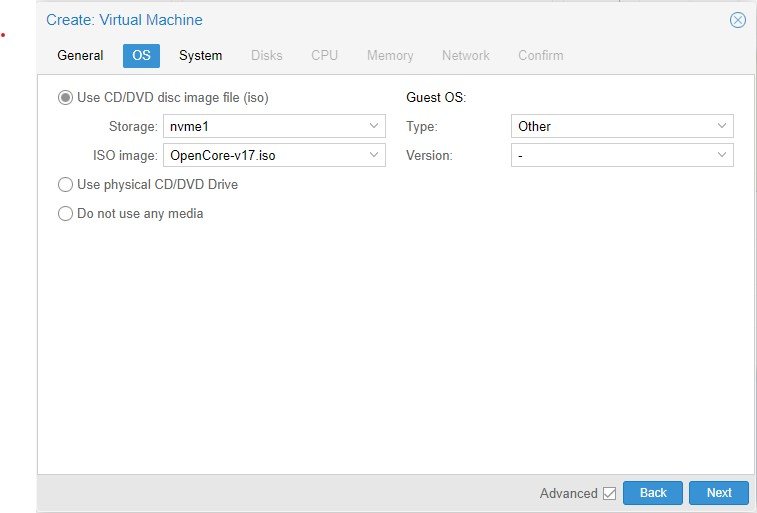
Next, choose the OpenCore v17 ISO and change the OS type to Other as shown below.
System
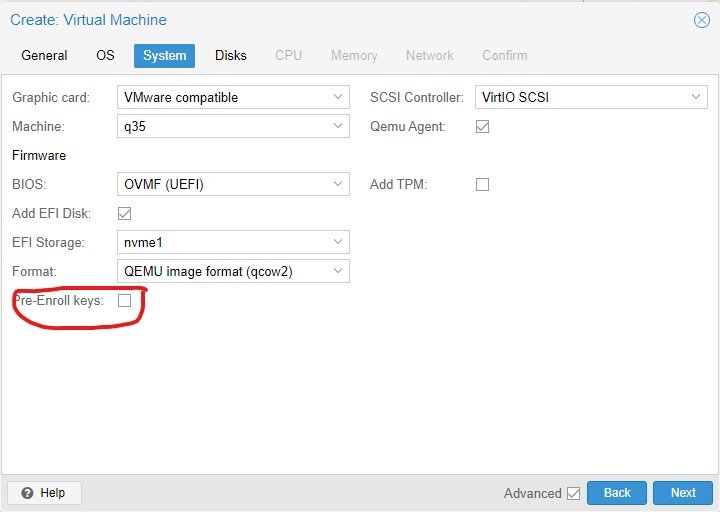
Choose the VMware compatible for the Graphic card, q35 machine, OMVF(UEFI) BIOS, and untick the Pre-Enroll key.
Disk
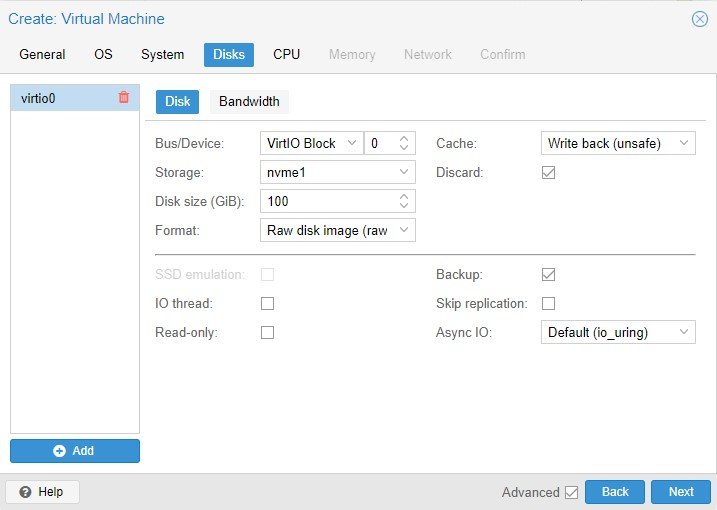
Make sure you give the disk size of more than 60 GB. In this case, I put 100 GB for my storage. It will give me more flexibility. Also, change the Cache to Write back (unsafe) and enable Discard.
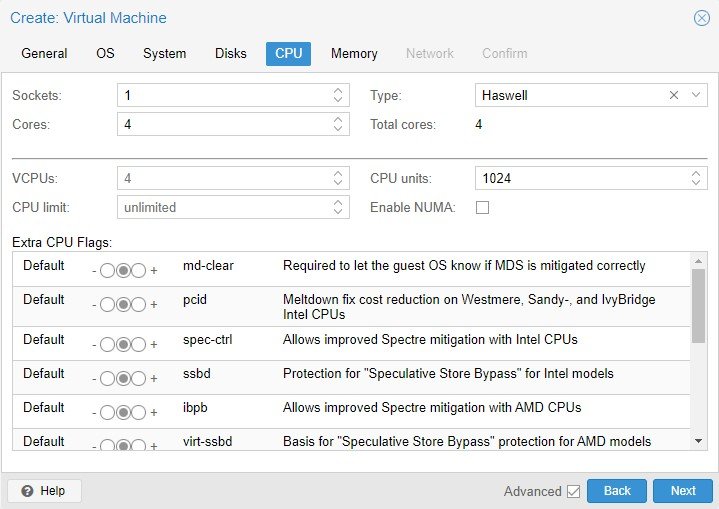
CPU
In this CPU section, allocate the appropriate cores for the CPU. Use the numbers i.e 1, 2, 4, and 8. Do not use 3, 6, etc. And also, set the CPU type to Haswell.
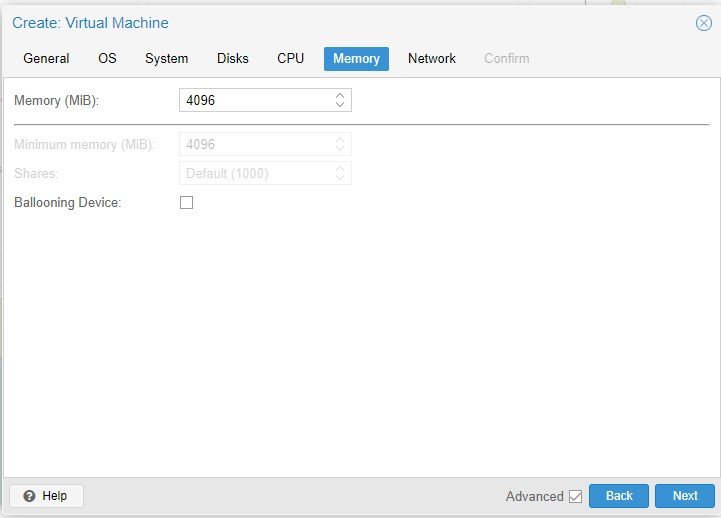
Memory
Allocate the memory. I would recommend using a minimum of 4 GB memory. Disable Ballooning Device option.
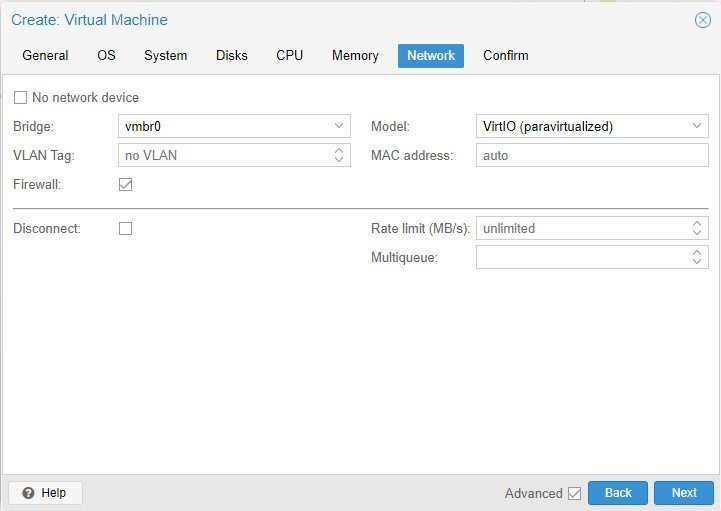
Network
Set the network model to VirtIO (paravirtualized).
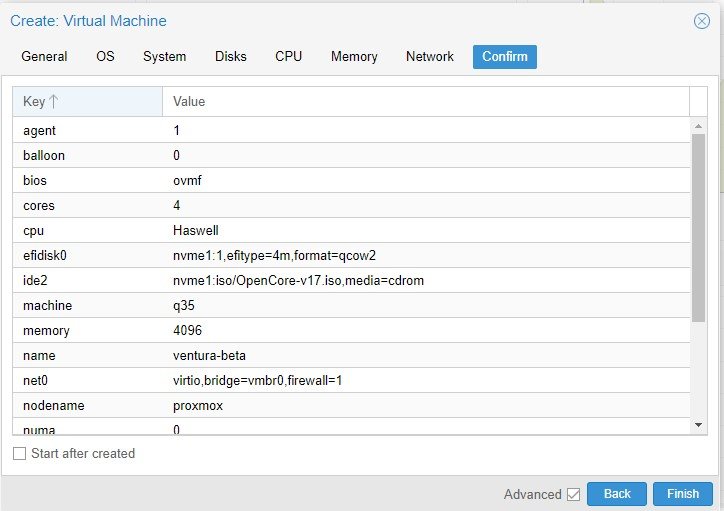
Confirm
Finally, check everything again and make sure all is correct.
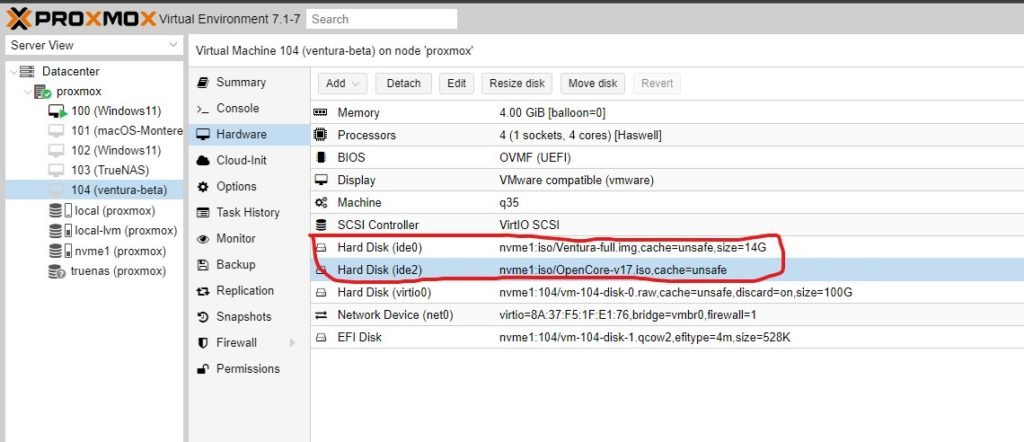
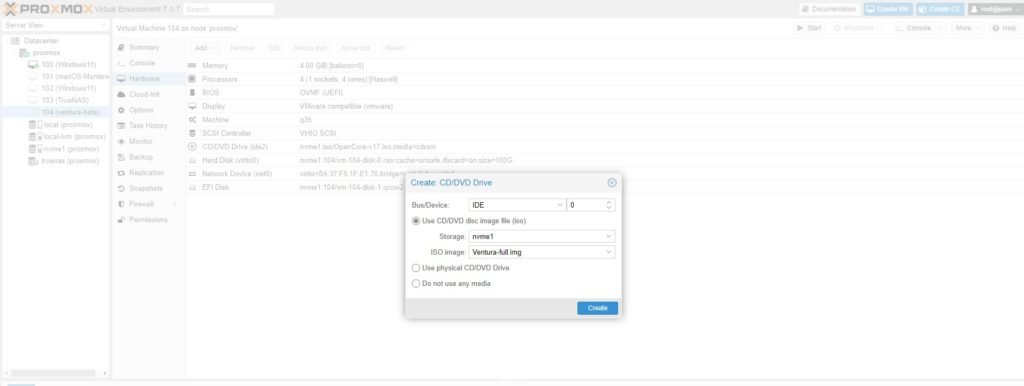
Now open the Hardware tab on the newly created VM. Add a new CD/DVD Drive and then choose IDE 0 and select the Ventura-full.img.
Do not start the VM yet. We still need to edit the configuration file for this new virtual machine. Proceed to step number 3 below.
Step 3. Configure VM
Now we need to edit the config file for our new virtual machine. Make a note of your new virtual machine ID. In my case, my new VM ID is 104. Now log in to the Proxmox server and run this command to edit the 104.conf file.
nano /etc/pve/qemu-server/104.confFirst, replace the word media=cdrom with cache=unsafe. These are for the two ISO’s file that we defined before. And then add the following line:
args: -device isa-applesmc,osk="THE-OSK-KEY" -smbios type=2 -device usb-kbd,bus=ehci.0,port=2 -global nec-usb-xhci.msi=off -global ICH9-LPC.acpi-pci-hotplug-with-bridge-support=off -cpu Haswell,vendor=GenuineIntel,+kvm_pv_eoi,+kvm_pv_unhalt,+hypervisor,+invtsc,kvm=onPlease replace THE-OSK-KEY with the actual OSK key. You can download the OSK Key below
Now your config file should looks like this:
args: -device isa-applesmc,osk="....." -smbios type=2 -device usb-kbd,bus=ehci.0,port=2 -global nec-usb-xhci.msi=off -global ICH9-LPC.acpi-pci-hotplug-with-bridge-support=off -cpu Haswell,vendor=GenuineIntel,+kvm_pv_eoi,+kvm_pv_unhalt,+hypervisor,+invtsc,kvm=on
agent: 1
balloon: 0
bios: ovmf
boot: order=virtio0;ide2;net0;ide0
cores: 4
cpu: Haswell
efidisk0: nvme1:104/vm-104-disk-1.qcow2,efitype=4m,size=528K
ide0: nvme1:iso/Ventura-full.img,cache=unsafe,size=14G
ide2: nvme1:iso/OpenCore-v17.iso,cache=unsafe
machine: q35
memory: 4096
meta: creation-qemu=6.1.0,ctime=1657591713
name: ventura-beta
net0: virtio=8A:37:F5:1F:E1:76,bridge=vmbr0,firewall=1
numa: 0
ostype: other
scsihw: virtio-scsi-pci
smbios1: uuid=d33cdb7c-02ab-4ffc-8bcc-021ca4b16b34
sockets: 1
vga: vmware
virtio0: nvme1:104/vm-104-disk-0.raw,cache=unsafe,discard=on,size=100G
vmgenid: dba1fa19-9bf2-44cc-bdcc-f55e28319d2f
Now close and save it.
Step 4. Configure Proxmox
Now run this command in the Proxmox Terminal
echo "options kvm ignore_msrs=Y" >> /etc/modprobe.d/kvm.conf && update-initramfs -k all -uStep 5. Install macOS Ventura Beta
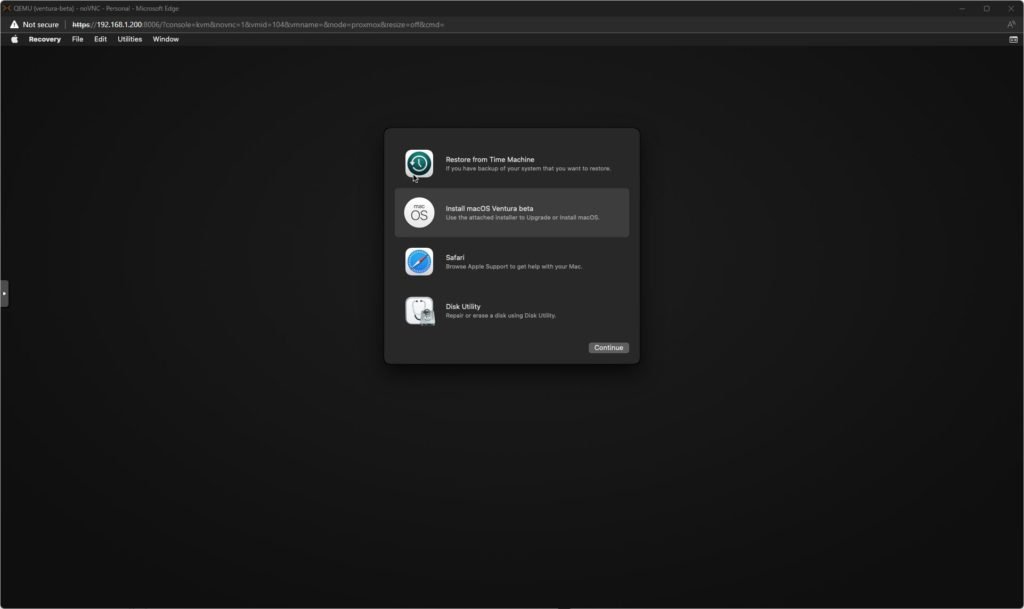
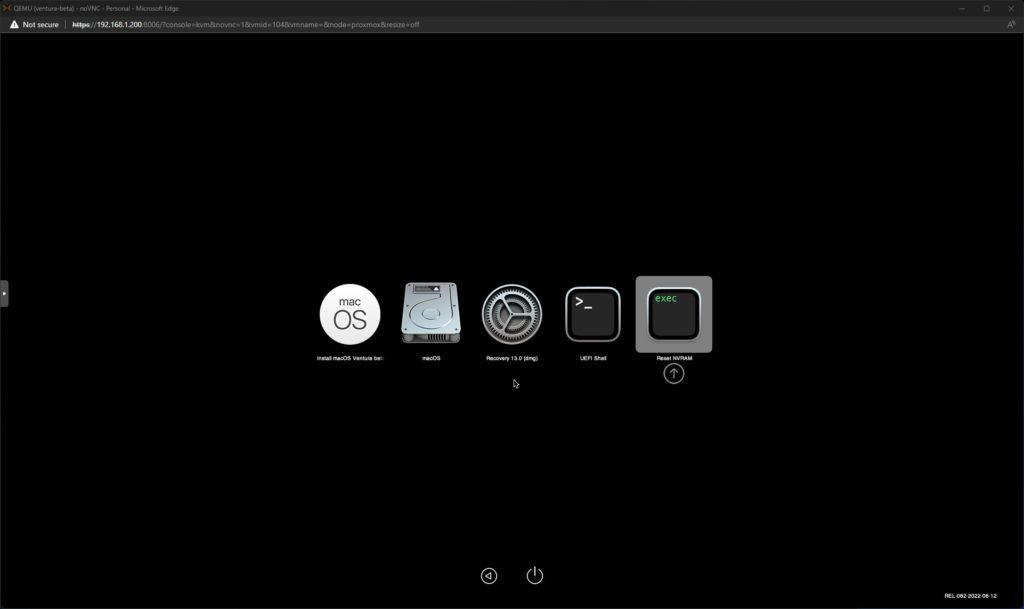
Now Start your VM and then you should be able to see the following screen.
Choose Install macOS Ventura Beta and press Enter.
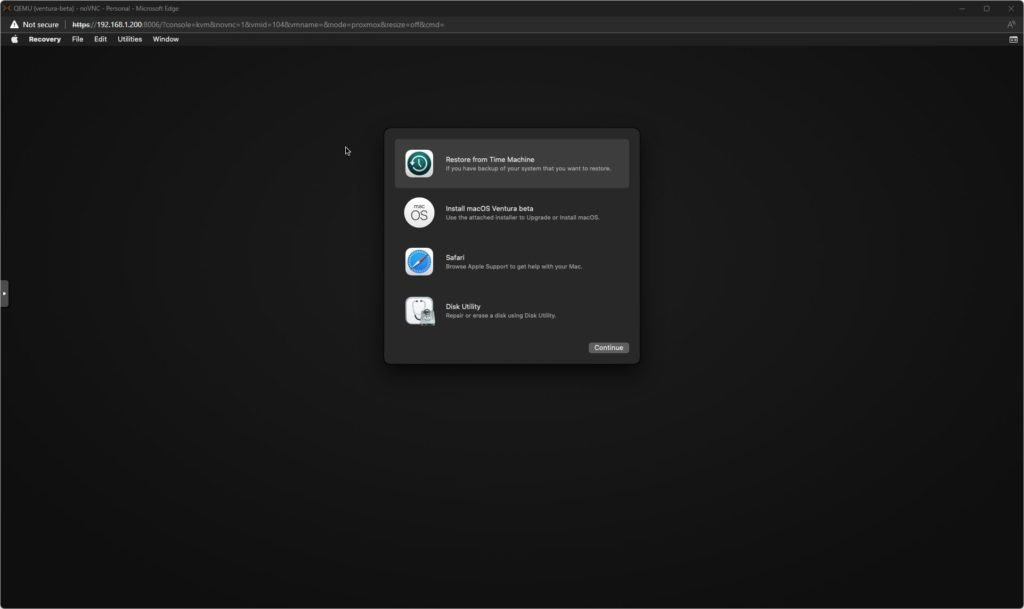
Choose Disk Utility and press Continue. We are going to format our disk first.
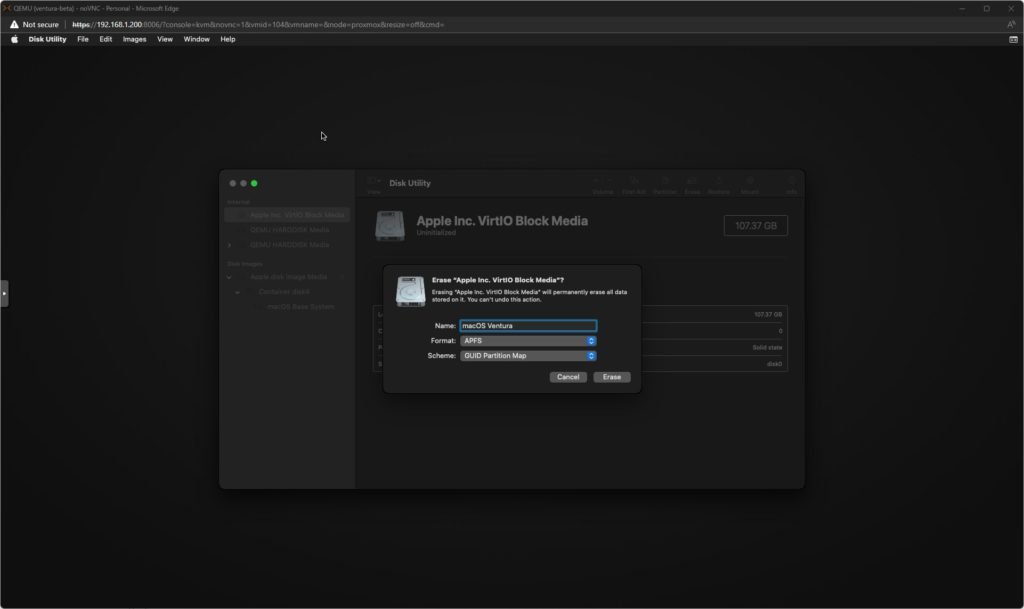
Change the View to Show All Devices and then click Apple Inc. VirtIO Block Media. Then, click Erase.
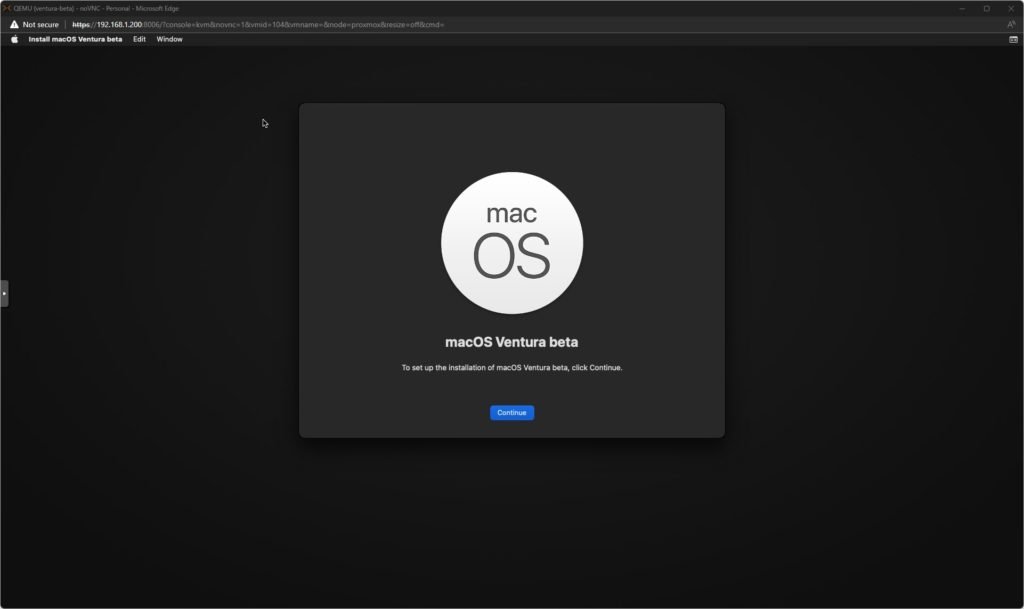
Give a new name and make sure the format is APFS and Schema is GUID Partition Map. Click Erase. Once finishes, close the Disk Utility window and then choose Install macOS Ventura Beta.
Now follow the installation steps as shown on your screen. I am not going to do screenshots for each step.
Administrator Login Error
You may see this error showing that you need to log in as Administrator in order to unlock your disk.
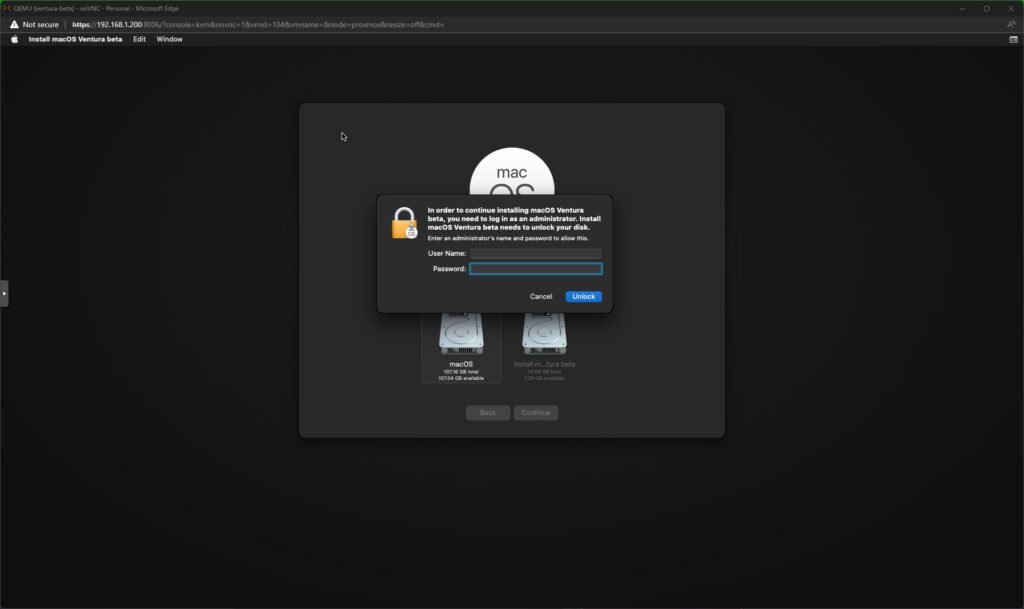
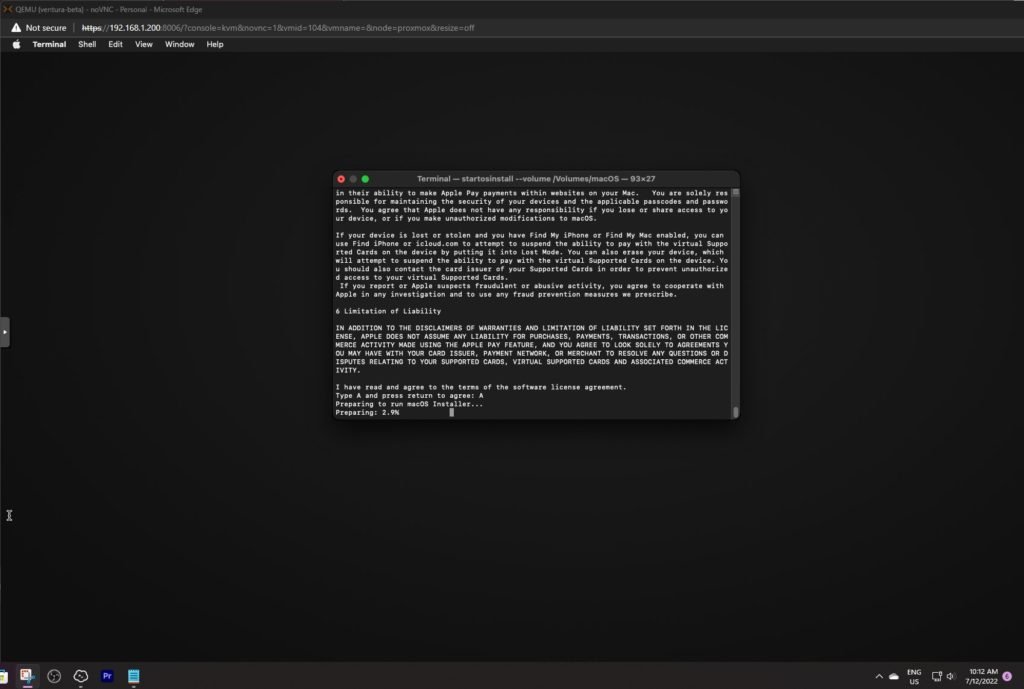
To fix this, Quit the installation and then click Terminal from the Utility menu.
/Volumes/Image\ Volume/Install\ macOS\ Ventura\ beta.app/Contents/Resources/startosinstall --volume /Volumes/macOS\ Ventura/The process will take a while. Once completes, it will restart. And then you can continue installing macOS Ventura without this error.
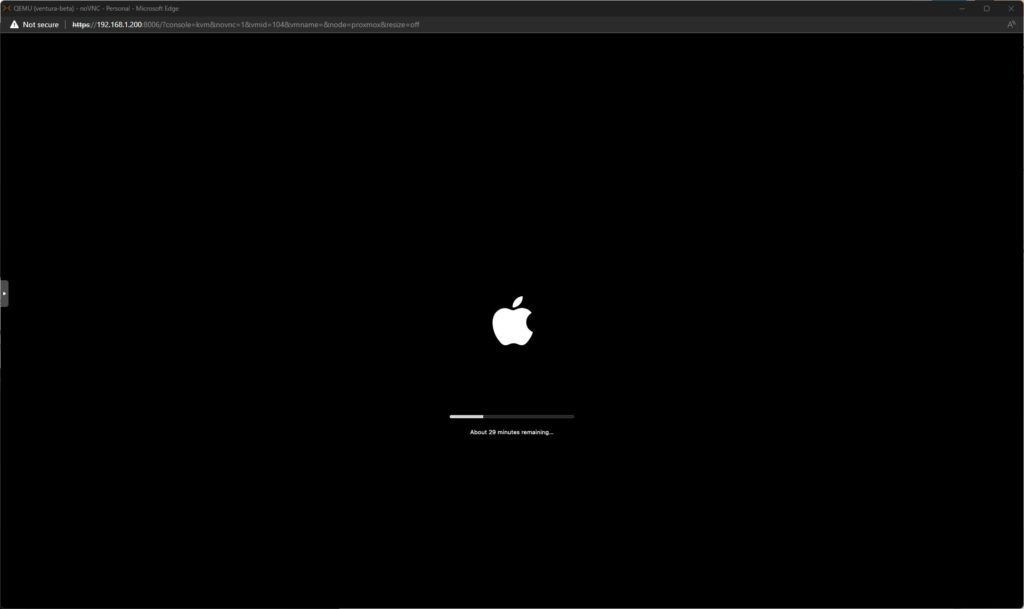
The installer will restart several times.
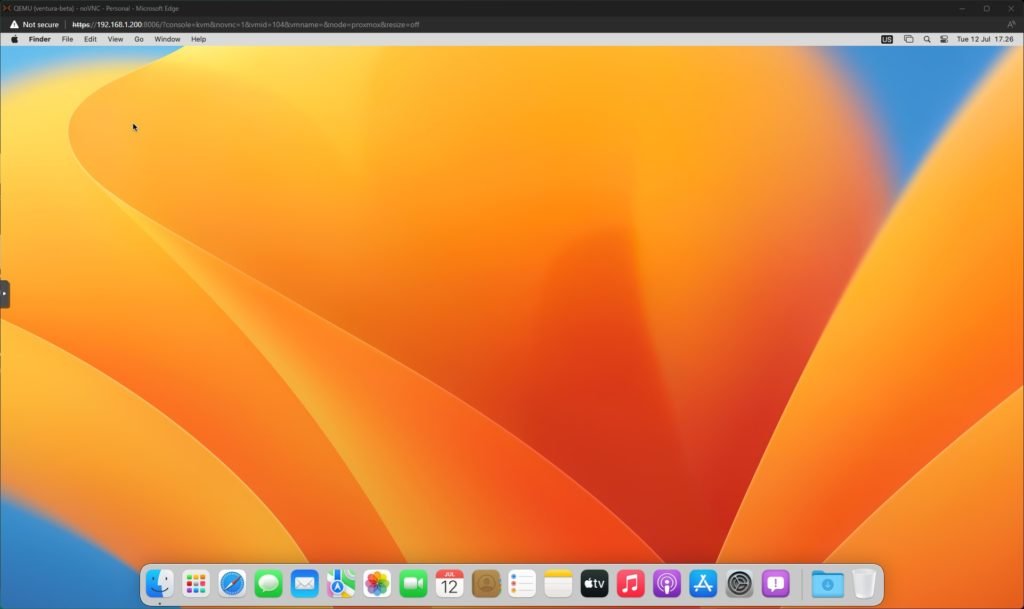
Finally, macOS Ventura Beta on Proxmox is ready.
Step 6. Post Installation Settings
At this point, we have successfully installed macOS Ventura Beta on Proxmox system. There are something we need to do after the installation is complete. We will need to copy the OpenCore EFI to the macOS EFI partition.
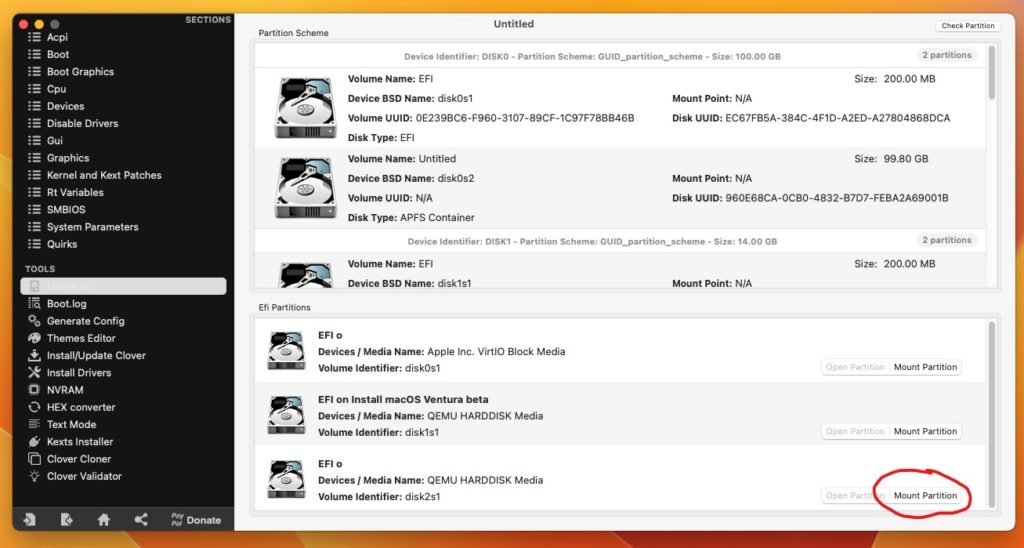
To copy the OpenCore EFI, I usually use the Clover Configurator. A graphical software that we use to mount the EFI partition. Download Clover Configurator from the link below.
Download Clover Configurator 5.22.0.0 | mackie100 projects
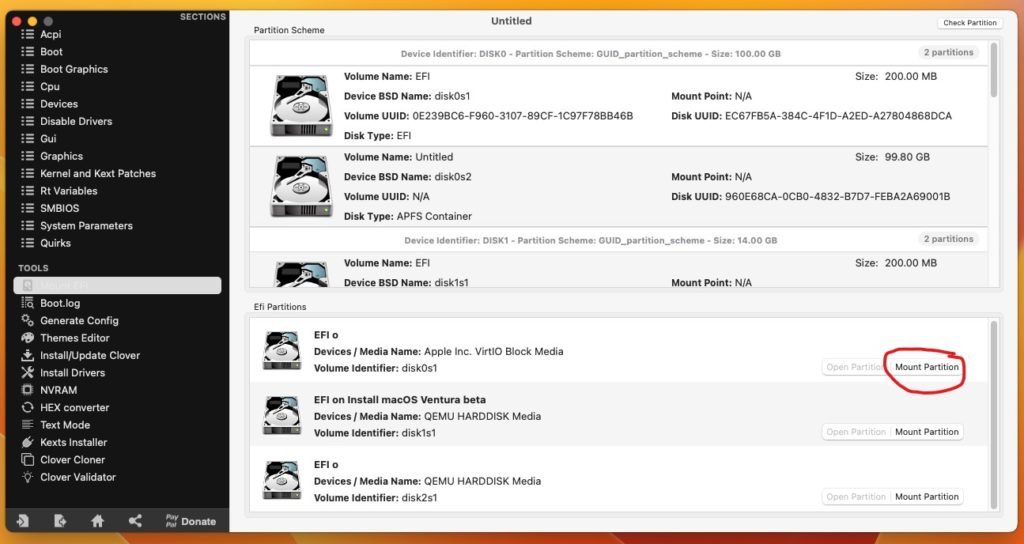
Run Clover Configurator and then mount the EFI partition on the OpenCore drive.
And then Open the Partition and copy the EFI folder. Next, mount the EFI partition on the macOS Ventura disk.
paste the EFI folder into this partition. Done. Now we can remove the two disks (IDE0 and IDE1) from the VM hardware tab.
Basically, that’s all the processes to install macOS Ventura Beta on Proxmox. Please leave us comments if any questions.
Special thanks to:




Leave a Reply