This tutorial is going to show you how to open or import OVF to Virtualbox. OVF (Open Virtualization Format) is a general format for appliance distribution. It supports various virtualization platform including Virtualbox and VMWare Workstation. There are many virtual appliances available for download. You may check many great appliance at Bitnami. You can download the OVF version of the appliance.
How to import OVF to Virtualbox
Step 1. Prepare your OVF file
Your OVF file can be obtained from many sources. You can even export your own Virtualbox Guest Machine to OVF format. Go to Bitnami website and you can download many free virtual appliance from there. Save the OVF file on your local directory. For example, you will have this kind of file below:
Step 2. Import OVF
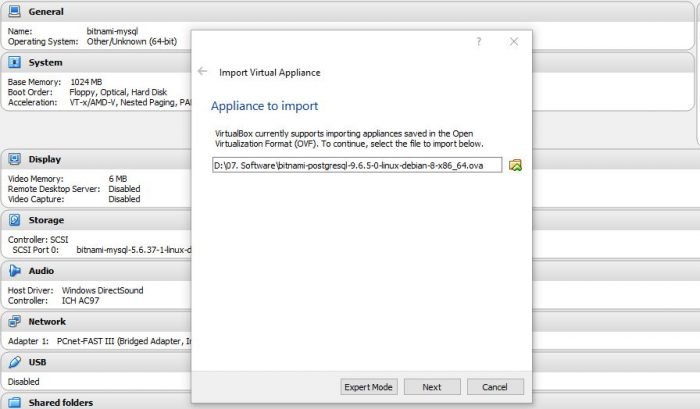
Open Virtualbox and go to File | Import Appliance. Browse the .ovf file you just downloaded.
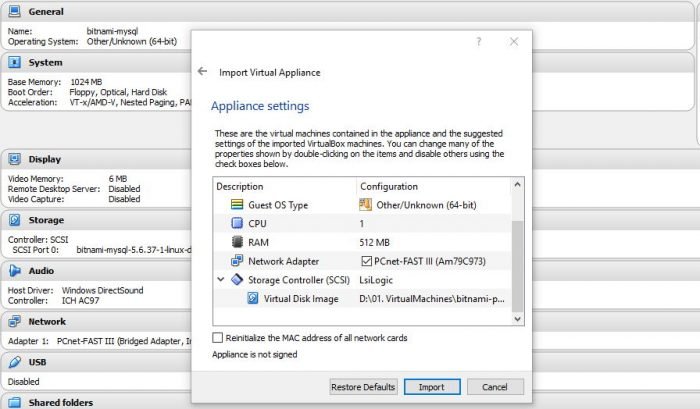
In the next window, you can see the virtual machine settings. You may change some settings here. For example you want to allocate more RAM to the appliance.
Click Import to start the import process. In few minutes, Virtualbox will create a new virtual machine with the settings you specified. You can start using this new VM right away.
Step 3. Start your VM
Now, you can start your VM and enjoy the new virtual machine based on the OVF file. It is also possible for you to export your Virtualbox VM’s to OVF file which you can distribute them to others.
So we have finished importing the OVF file into Virtualbox. It’s pretty easy to import the OVF file to Virtualbox isn’t it?


Leave a Reply