

The new Ubuntu 18.10 is an interesting Linux distribution for desktop. It’s extremely fast, and beautiful. The new Yaru theme and icon theme looks perfect but there are still many chance to improve it. On this article, I am going to show you how to make Ubuntu 18.10 looks like Mac OS X Mojave. Well, some of you maybe think that this is not a good idea. But for me, Mac OS X Mojave style on Ubuntu is still the best looking. I will guide you step by step to install Mac OS X Mojave theme on Ubuntu 18.10.
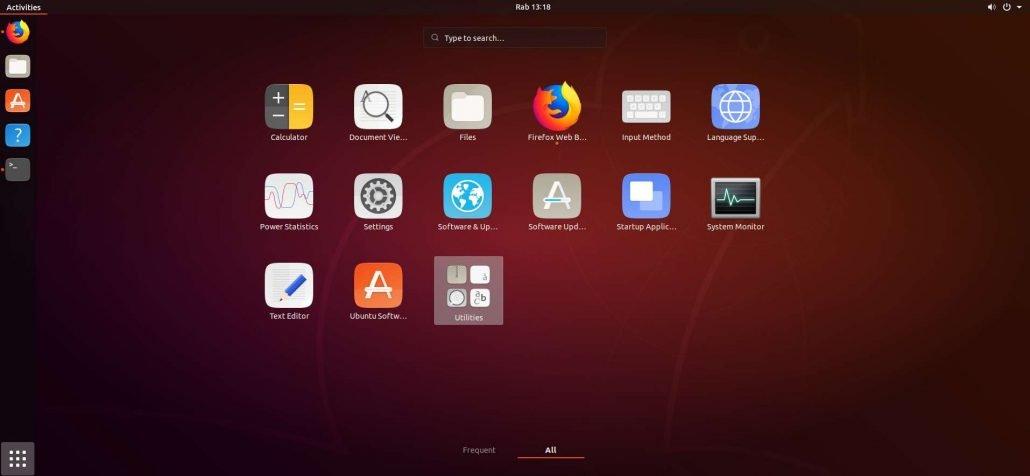
So basically, this tutorial will make the default Ubuntu 18.10 style below
Into something like this

If you don’t like it. It’s time for you to leave this site. No need to say something bad.
To make Ubuntu 18.10 looks like Mac OS X Mojave, you will need the following items. You can click the link to download the theme, icon theme and other materials.
- Mac OS X GTK Theme
- Icon Theme
- Mac OS X cursor
- Fonts
- Gnome Tweaks
- Plank
Steps to Install Mac OS X Mojave Theme on Ubuntu 18.10
Step 1.Install Gnome Tweaks
First thing to do is to install Gnome Tweaks. You can use Ubuntu Software Center to install this software. Or, simply use this command on Terminal.
sudo apt update
sudo apt install gnome-tweaks
Gnome Tweaks is a GUI tool that we can use to change the Ubuntu appearance and some other settings.
Step 2. Install the Mac OS X theme
Next, let’s download the Mac OS X Theme. Use the link below to download the GTK Theme. Save it to your download location. You should have a new file called: McOS-MJV-Dark-mode-Gnome-3.30-1.1.tar.xz. Extract the file by right clicking on the file and select extract here. It will produce a new folder: McOS-MJV-Dark-mode-Gnome-3.30-1.1.

We need to move this folder to /usr/share/themes. To do this, right click on the empty space and then choose Open in Terminal. It will open up the Terminal window in the current directory. Next, use this command to move the two folders to /usr/share/themes.
sudo mv McOS-MJV-Dark-mode-Gnome-3.30-1.1 /usr/share/themes/
Now, let’s apply this new theme. Open Gnome Tweaks and click Appearance. Change the GTK theme to McOS-MJV-Dark-xxxx. Your new theme is ready and it should looks like this.

Step 3. Install Mac OS X Icon Theme
On the following step, we are going to install Mac OS X Icon Theme. First, download the icon theme from this link. You will have a new file called: MacOSX-icon-theme.tar.xz. Extract the file, and it will produce a new folder, MacOSX-icon-theme. Double click the folder and you should see there are two different sub folders, MacOSX and MacOSX-dark. We need to move these two sub folders to /usr/share/themes.
sudo mv MacOSX MacOSX-dark /usr/share/icons
Now apply this new icon theme using Gnome Tweaks. Now your desktop will looks like this
![]()
![]()
Step 4. Enable User-Theme Extension
By default, the user-theme extension is not enabled. To make our Mac OS X theme even better, we need to enable this user-theme extension feature. First, install the required package
sudo apt install chrome-gnome-shell
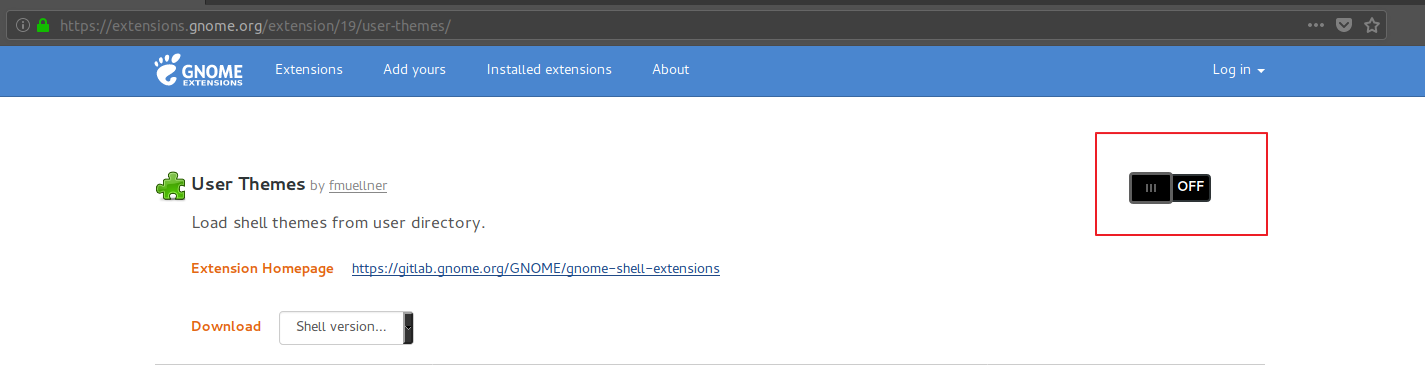
Now open this User Theme Extension page. Next, click the link that say Click Here to install Browser extension at the top of the page.
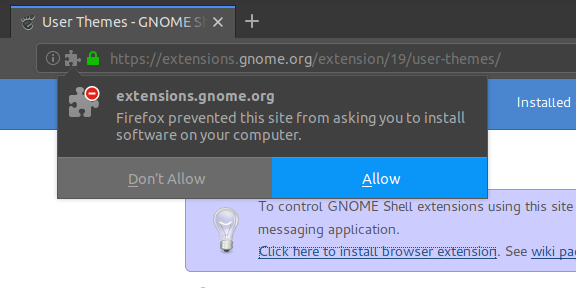
Next click Allow to start the installation. After adding the browser extension, refresh firefox and then turn ON the button on the top right as follow.
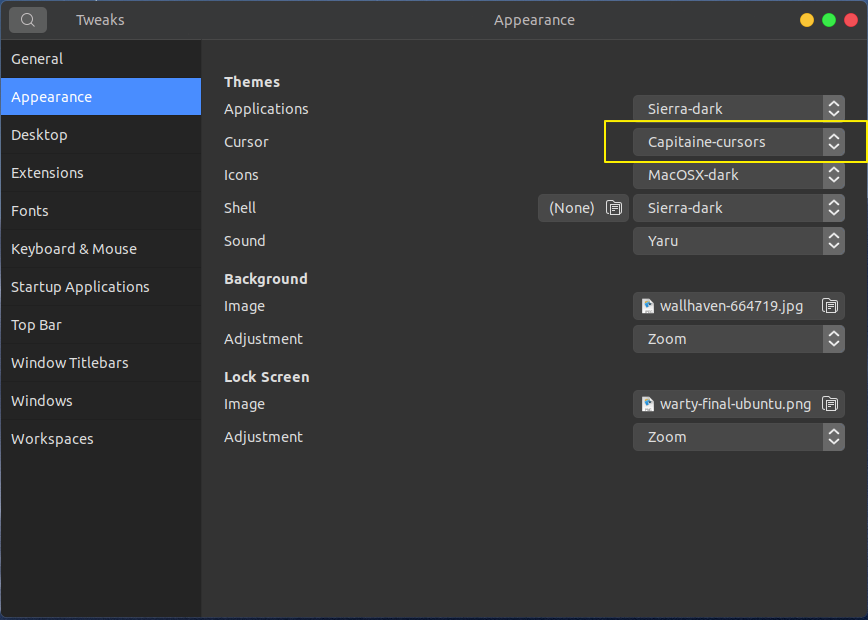
After that, open Gnome Tweaks and select Sierra-dark from the list.

Now you should see the Mac icon on the top left of your desktop.
![]()
Step 4. Install Mac OS X Cursor
To make it even more close to Mac OS X Mojave, let’s install the Mac OS X cursor on Ubuntu 18.10. Download the file from this link. Extract it and move it to /usr/share/themes.

Apply the new cursor using Gnome Tweaks
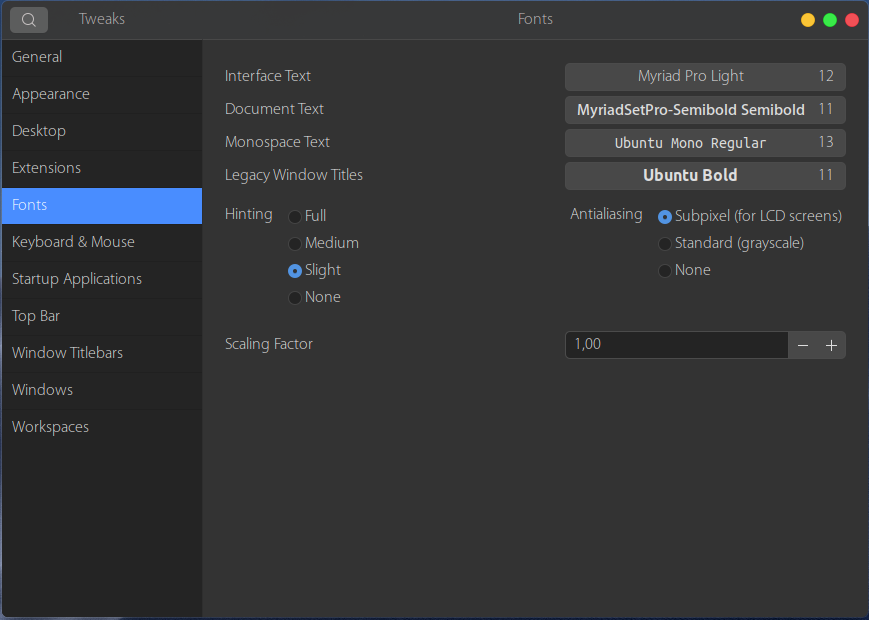
Step 5. Install Mac Font
Well, if you like this font, you can download and install it. But the default Ubuntu 18.10 font already looks great. Download the Myriad Font from this link. Extract and then double-click each font and press Install.
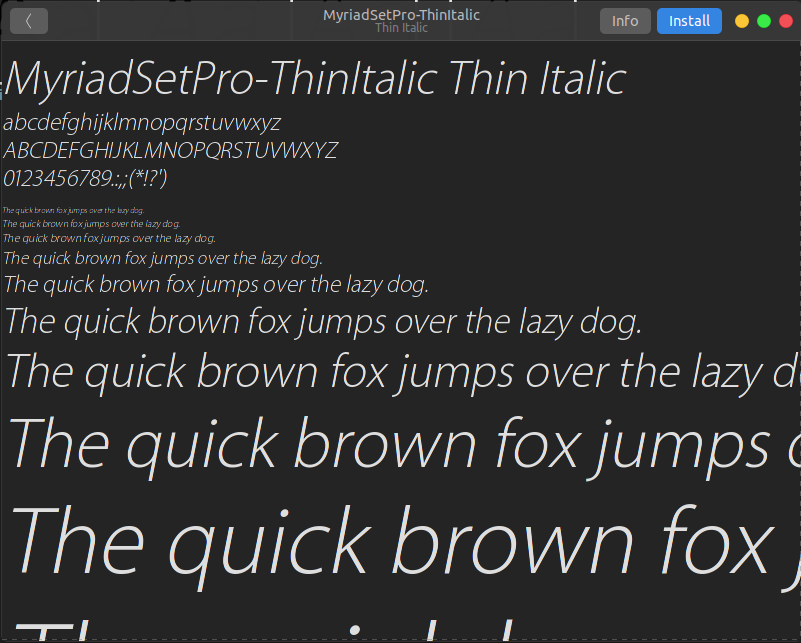
Again, apply this new font via Gnome Tweaks.
Step 6. Install Plank
Plank is a docking system where we can put more application shortcuts. It’s a very useful program you should have to make Ubuntu 18.10 looks like Mac.
sudo apt install plank
Now run Plank
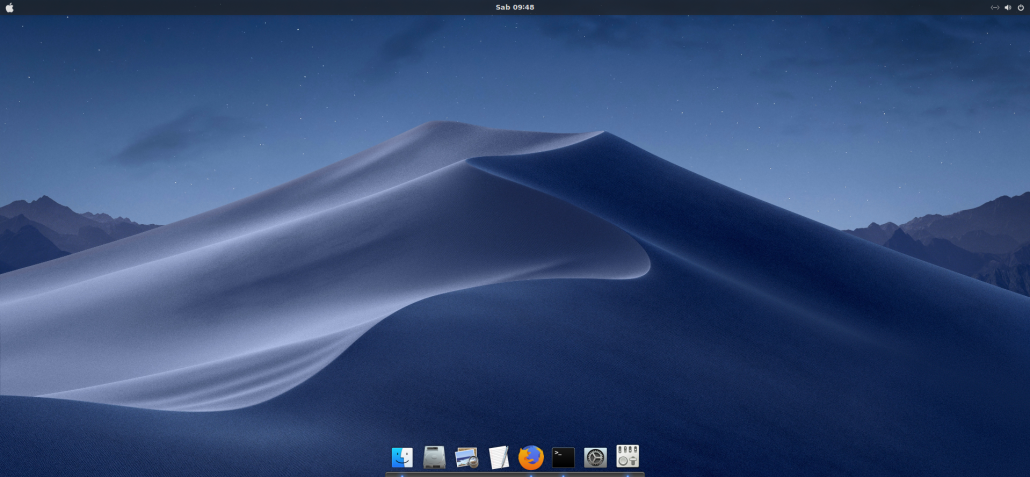
Step 7. Download Mac OS X Mojave Dark Wallpaper
Download the Mojave Dark desert wallpaper.
Closing Words
No matter which theme or modifications you have made, make sure you feel comfortable with your modification. And so far, this Mac theme is very comfortable and good looking for me. Thanks for reading this How to make Ubuntu 18.10 looks like Mac OS X Mojave tutorial.
Leave a Reply