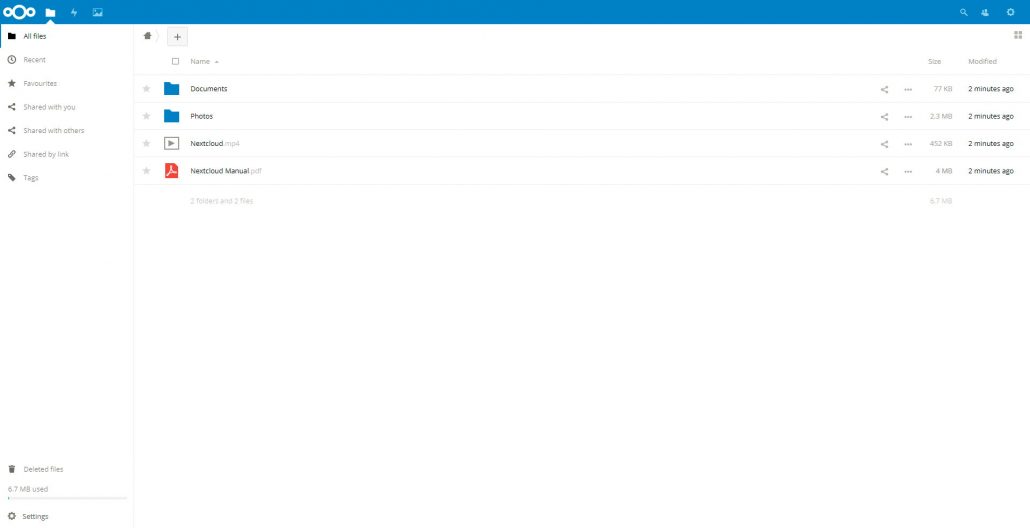
Welcome to Manjaro.site. Today we are going to install Nextcloud on Ubuntu 17.10. Nextcloud is another free and open source file storage and sharing service. With this tool, you can build your own cloud storage, share files and documents without relying with any third party cloud providers. You have full control of your data. Nextcloud gives you access to all your files, photos and documents from anywhere. You can run Nextcloud server at home, public cloud server or official Nextcloud providers. Nextcloud allows us to access, sync and share our existing data in FTP server, Dropbox or NAS.
Before you install
Nextcloud does not require a high specification server to run. If you have a low cost public cloud server with the following specifications will also work. You may build a low cost public cloud server at DigitalOcean for just $5 per month. Power up your own cloud server and then install ubuntu on it.
- Recommended minimum RAM: 512 MB
- 1 or 2 Cores CPU
Steps to install Nextcloud on Ubuntu 17.10
At the moment, Nextcloud 12.0.3 is now available. I am going to install Nextcloud on Ubuntu 17.10 Server.
Step 1. Install LAMP Server on Ubuntu 17.10
Nextcloud requires a working web server with MySQL/MariaDB and PHP support. You can follow my previous tutorial to install LAMP Server on Ubuntu 17.10 Server. Nextcloud needs some other PHP modules to run. So, we need to install it now.
sudo apt install php-gd php-json php-mysql php-curl php-mbstring php-intl php-mcrypt php-imagick
php-xml php-zip
sudo systemctl restart apache2
Output example:
dhani@ubuntu:~$ sudo apt install php-gd php-json php-mysql php-curl php-mbstring php-intl php-mcrypt php-imagick
php-xml php-zip
Reading package lists... Done
Building dependency tree
Reading state information... Done
php-mysql is already the newest version (1:7.1+54ubuntu1).
php-mcrypt is already the newest version (1:7.1+54ubuntu1).
php-xml is already the newest version (1:7.1+54ubuntu1).
php-xml set to manually installed.
The following additional packages will be installed:
  fontconfig-config fonts-dejavu-core fonts-droid-fallback fonts-noto-mono ghostscript gsfonts
  imagemagick-6-common libcupsfilters1 libcupsimage2 libfftw3-double3 libfontconfig1 libgd3 libgomp1 libgs9
  libgs9-common libijs-0.35 libjbig0 libjbig2dec0 libjpeg-turbo8 libjpeg8 liblcms2-2 liblqr-1-0 libltdl7
  libmagickcore-6.q16-3 libmagickwand-6.q16-3 libpaper-utils libpaper1 libtiff5 libwebp6 libxpm4 libzip4
  php7.1-curl php7.1-gd php7.1-intl php7.1-mbstring php7.1-zip poppler-data ttf-dejavu-core
Suggested packages:
  fonts-noto ghostscript-x libfftw3-bin libfftw3-dev libgd-tools liblcms2-utils libmagickcore-6.q16-3-extra
  poppler-utils fonts-japanese-mincho | fonts-ipafont-mincho fonts-japanese-gothic | fonts-ipafont-gothic
  fonts-arphic-ukai fonts-arphic-uming fonts-nanum
The following NEW packages will be installed:
  fontconfig-config fonts-dejavu-core fonts-droid-fallback fonts-noto-mono ghostscript gsfonts
  imagemagick-6-common libcupsfilters1 libcupsimage2 libfftw3-double3 libfontconfig1 libgd3 libgomp1 libgs9
  libgs9-common libijs-0.35 libjbig0 libjbig2dec0 libjpeg-turbo8 libjpeg8 liblcms2-2 liblqr-1-0 libltdl7
  libmagickcore-6.q16-3 libmagickwand-6.q16-3 libpaper-utils libpaper1 libtiff5 libwebp6 libxpm4 libzip4
  php-curl php-gd php-imagick php-intl php-json php-mbstring php-zip php7.1-curl php7.1-gd php7.1-intl
  php7.1-mbstring php7.1-zip poppler-data ttf-dejavu-core
0 upgraded, 45 newly installed, 0 to remove and 0 not upgraded.
Need to get 19.7 MB of archives.
After this operation, 70.3 MB of additional disk space will be used.
Do you want to continue? [Y/n]
Step 2. Create MySQL Database for Nextcloud
On this step we are going to create a new MySQL database and user for Nextcloud.
dhani@ubuntu:~$ mysql -u root -p
Enter password:
Welcome to the MySQL monitor.  Commands end with ; or \g.
Your MySQL connection id is 4
Server version: 5.7.20-0ubuntu0.17.10.1 (Ubuntu)

Copyright (c) 2000, 2017, Oracle and/or its affiliates. All rights reserved.

Oracle is a registered trademark of Oracle Corporation and/or its
affiliates. Other names may be trademarks of their respective
owners.

Type 'help;' or '\h' for help. Type '\c' to clear the current input statement.

mysql> create database nextcloud;
Query OK, 1 row affected (0.00 sec)

mysql> create user dhani@localhost identified by '12345';
Query OK, 0 rows affected (0.01 sec)

mysql> grant all privileges on nextcloud.* to dhani@localhost identified by '12345';
Query OK, 0 rows affected, 1 warning (0.00 sec)

mysql> flush privileges:
Query OK, 0 rows affected (0.00 sec)

mysql> exit
Bye
Step 3. Download and install Nextcloud 12.0.3
Now we need to download the Nextcloud package. Use the following command to download Nextcloud 12.0.3 or visit the official download page for newer version if available.
cd /tmp
wget https://download.nextcloud.com/server/releases/nextcloud-12.0.3.tar.bz2
Now extract the package. This will produce a new directory called nextcloud inside your /tmp directory
tar -xvf nextcloud-12.0.3.tar.bz2
Now change the ownership
sudo chown -R www-data:www-data nextcloud
Move nextcloud folder to /var/www/html/ directory
sudo mv nextcloud /var/www/html/
Configure Apache
We need to create apache configuration file. Create a new config file under /etc/apache2/sites-available/. For example:
sudo nano /etc/apache2/sites-available/nextcloud.conf
Now paste the following lines
Alias /nextcloud "/var/www/html/nextcloud/"

<Directory /var/www/html/nextcloud/>
  Options +FollowSymlinks
  AllowOverride All

 <IfModule mod_dav.c>
  Dav off
 </IfModule>

 SetEnv HOME /var/www/html/nextcloud
 SetEnv HTTP_HOME /var/www/html/nextcloud

</Directory>
Don’t forget to change the installation directory to match with yours. In this case, we put our nextcloud directory under /var/www/html/.
Now execute these commands to enable some modules
sudo a2ensite nextcloud.conf
sudo a2enmod rewrite
sudo a2enmod headers
sudo a2enmod env
sudo a2enmod dir
sudo a2enmod mime
Restart Apache
sudo systemctl restart apache2
Configure Nextcloud via Web Browser
Open a web browser and type your server ip address with the following format:
http://ip-address/nextcloud
You should now see the following screen on your browser
Create a new admin user, password and also you will need to supply the MySQL database name and user we created earlier.
Finally, your Nextcloud is now ready
Conclusion
Nextcloud is a great solution for you who wants to build a powerful cloud storage and file sharing service. Imagine you have a Dropbox like service on your own server. Install Nextcloud on Ubuntu 17.10 is pretty easy isn’t it? With a little effort we can have a great server. You have full control of any aspects on the system. Thanks for reading this how to install Nextcloud on Ubuntu 17.10. Hope this useful for anyone who wants to learn Linux and build a powerful server.


Leave a Reply