

Nextcloud is a free and open source file storage and sharing server. With this program, you can have a powerful, reliable and rich features cloud storage and file sharing service with full control. If you ever tried Dropbox, Owncloud has similar features (if not better) as Dropbox. But, you do have a full control to the server. This tutorial is going to show you how to install Nextcloud on Fedora 27. The current version of Nextcloud 12.0.3 is available. Please visit the Nextcloud official website for more information. In this tutorial, we are going to show you every installation steps and we hope at the end you can have a fully working Nextcloud on your Fedora 27. Continue reading to see how to install Nextcloud on Fedora 27.
On this example, I am running Fedora 27 on a Linode cloud instance. You can either install it on your local network, or any other cloud service such as Linode, AWS EC2, DigitalOcean or any other.
Steps to Install Nextcloud on Fedora 27
There are several steps that we will explain on this article, such as:
- Install LAMP (Apache, MariaDB and PHP). Please read our tutorial to install LAMP Server on Fedora 27. But we will also explain on this tutorial as well.
- Download Nextcloud
- Install and Configure Nextcloud
- Securing Nextcloud with https
- Testing
Let’s jump to the first step to install Nextcloud on Fedora 27
Step 1. Install LAMP on Fedora 27
First, we are going to install our web server with LAMP. Open Terminal or connect your Fedora 27 via ssh client such as Putty (windows) or Termius (Google Chrome app).
A. Install Apache Web Server
The following command will install Apache web server on Fedora 27
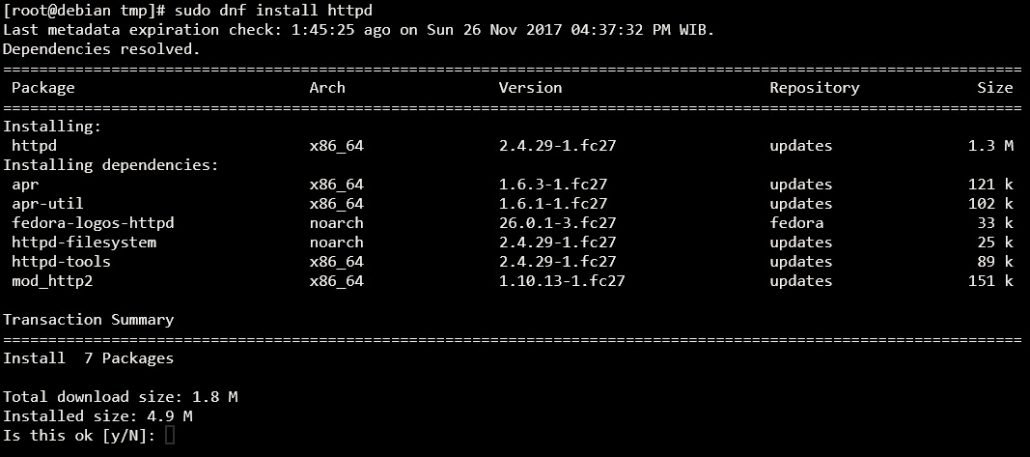
sudo dnf install httpd
Output
Now start and enable the Apache web server.
sudo systemctl start httpd
Our Apache web server is now installed and running. But, it won’t be accessible from outside unless you execute the following commands.
firewall-cmd --add-service=http --permanent
firewall-cmd --add-service=https --permanent
firewall-cmd --reload
B. Install MariaDB
Now we need to install MariaDB on Fedora 27. MariaDB is a powerful database server. To install MariaDB, please use the following command as root
dnf install mariadb-server
Now start the server
systemctl start mariadb
Now secure the MariaDB installation
mysql_secure_installation
Follow on screen wizard until completed
[root@debian ~]# mysql_secure_installation

NOTE: RUNNING ALL PARTS OF THIS SCRIPT IS RECOMMENDED FOR ALL MariaDB
      SERVERS IN PRODUCTION USE!  PLEASE READ EACH STEP CAREFULLY!

In order to log into MariaDB to secure it, we'll need the current
password for the root user.  If you've just installed MariaDB, and
you haven't set the root password yet, the password will be blank,
so you should just press enter here.

Enter current password for root (enter for none):
OK, successfully used password, moving on...

Setting the root password ensures that nobody can log into the MariaDB
root user without the proper authorisation.

Set root password? [Y/n] y
New password:
Re-enter new password:
Password updated successfully!
Reloading privilege tables..
 ... Success!


By default, a MariaDB installation has an anonymous user, allowing anyone
to log into MariaDB without having to have a user account created for
them.  This is intended only for testing, and to make the installation
go a bit smoother.  You should remove them before moving into a
production environment.

Remove anonymous users? [Y/n] y
 ... Success!

Normally, root should only be allowed to connect from 'localhost'.  This
ensures that someone cannot guess at the root password from the network.

Disallow root login remotely? [Y/n] n
 ... skipping.

By default, MariaDB comes with a database named 'test' that anyone can
access.  This is also intended only for testing, and should be removed
before moving into a production environment.

Remove test database and access to it? [Y/n] y
 - Dropping test database...
 ... Success!
 - Removing privileges on test database...
 ... Success!

Reloading the privilege tables will ensure that all changes made so far
will take effect immediately.

Reload privilege tables now? [Y/n] y
 ... Success!

Cleaning up...

All done!  If you've completed all of the above steps, your MariaDB
installation should now be secure.

Thanks for using MariaDB!
At this point, we have successfully installed MariaDB Server on Fedora 27.
C. Install PHP
Now it’s time to install PHP and some module for Nextcloud support
dnf install php php-gd php-json php-curl php-mbstring php-intl php-mcrypt php-imagick php-xml php-zip
When completed, our LAMP Server should be ready for use.
Step 2. Download Nextcloud
Once we’ve setup the LAMP Server, we can continue to download the Nextcloud package. Download Nextcloud zip package with this command:
cd /tmp
wget https://download.nextcloud.com/server/releases/nextcloud-12.0.3.zip
For newer version, you may check the Nextcloud download page. Once you download, unzip it
unzip nextcloud-12.0.3.zip
Change the permission
chown -R apache:apache nextcloud
Move the nextcloud directory to /var/www/html/
mv nextcloud /var/www/html/
After that, we need to configure the Apache web server with our Nextcloud installation. We are going to create new virtual host.
nano /etc/httpd/conf.d/nextcloud.conf
Now paste the following lines
Alias /nextcloud “/var/www/html/nextcloud/”
<Directory /var/www/html/nextcloud/>
Options +FollowSymlinks
AllowOverride All<IfModule mod_dav.c>
Dav off
</IfModule>SetEnv HOME /var/www/html/nextcloud
SetEnv HTTP_HOME /var/www/html/nextcloud</Directory>
Close and save the file.
Step 3. Configure SELinux
This is a crucial step. On Fedora 27 Server, the default value of the SELinux is enforcing. This will block our connection to our Nextcloud installation. We need to set the SELinux to “permissive” or disable it if you want to. To set the SELINUX mode permanently even after reboot, you need to edit the file /etc/selinux/config
nano /etc/selinux/config
Now find the following line
SELINUX=enforcing
Change it to
SELINUX=permissive
Close and save the file.
Step 4. Create new MySQL Database and user
We need to create new MySQL/MariaDB database and user. To do this, login to MySQL Server with this command
mysql -u root -p
After logged in, you are now in the MySQL Console. Now create new database ‘nextcloudDB’ or any name you like.
MariaDB [(none)]> CREATE DATABASE nextcloudDB;
Query OK, 1 row affected (0.00 sec)
Create New user
MariaDB [(none)]> CREATE USER nextcloud@localhost IDENTIFIED BY ‘12345’;
Query OK, 0 rows affected (0.00 sec)
Grant user to the nextcloud database
MariaDB [(none)]> GRANT ALL PRIVILEGES ON nextcloudDB.* to nextcloud@localhost IDENTIFIED BY ‘12345’;
Query OK, 0 rows affected (0.00 sec)
Flush privileges and exit
MariaDB [(none)]> FLUSH PRIVILEGES;
Query OK, 0 rows affected (0.00 sec)MariaDB [(none)]> EXIT;
Bye
At this point, our Nextcloud database is ready.
Step 5. Configure Nextcloud via Web Browser
Now open a web browser and type the server IP address as follow: http://192.168.1.10/nextcloud. Change the IP address with your Fedora Server IP address.

Enter the MySQL database and user information created from the previous step. You will also need to create new admin user and password for Nextcloud. Click Finish to start the process. In few moments, if there is no error, you will see the following on your web browser.

Finally my Nextcloud 12 is now installed on my Fedora 27 Server. Thanks for reading this How to install Nextcloud on Fedora 27. I hope this tutorial is useful for you.
HELP, IM NEW TO LINUX AND HAVE IVE TRIED THIS INSTALL TWICE. AFTER COMPLETEING THE ABOVE, AND BEFORE REBOOTING THE SYSTEM I GET THE BELOW:
(CAPS ARE JUST TO DIFFERENTIATE THE QUESTION FROM THE RESULT)
AFTER I REBOOT THE SERVER, IC CAN NOT REACH THE SITE AT ALL.