

Hello everyone, welcome to another Ubuntu tutorial. In this article, we are going to install Microsoft SQL Server 2019 on Ubuntu 21.04. Microsoft SQL Server is one of the most largely used RDBMS database systems together with Oracle database, MySQL as well as PostgreSQL. A few years ago, the SQL Server can only be installed on Windows-based machines. But recently, technology has moved forward. Now Linux users can install and deploy Microsoft SQL Server on Linux based system.
Steps to Install Microsoft SQL Server 2019 on Ubuntu 21.04
Most of the installation steps will be done from the Terminal since there is no GUI installer available, But don’t worry, this won’t hurt.
Step 1. Update System
It is important to update Ubuntu prior the SQL Server installation. We can do this using this command
sudo apt update && sudo apt upgrade
Step 2. Import Public GPG Key
Use this command to import the public GPG key
wget -qO- https://packages.microsoft.com/keys/microsoft.asc | sudo apt-key add -

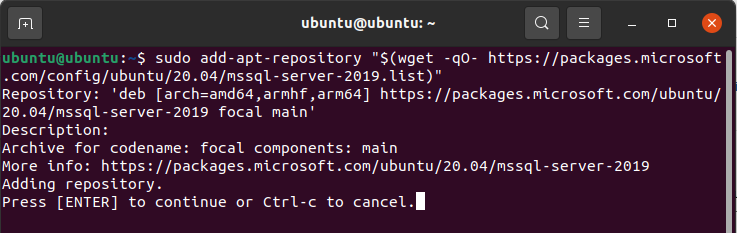
Step 3. Add the Repository
Now we need to add the repository to Ubuntu
sudo add-apt-repository "$(wget -qO- https://packages.microsoft.com/config/ubuntu/20.04/mssql-server-2019.list)"
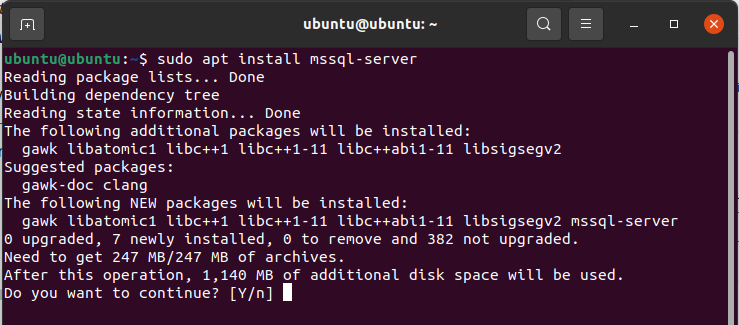
Step 4. Install SQL Server
Now let’s install the Microsoft SQL Server with this command
sudo apt update
sudo apt install mssql-server
In some cases, you may end up with the following error:
The following packages have unmet dependencies:
mssql-server : Depends: libc++1 but it is not installable
E: Unable to correct problems, you have held broken packages.
This error mostly caused by the Universe repository is not enabled. Let’s try to enable it with this command
sudo add-apt-repository "deb http://archive.ubuntu.com/ubuntu $(lsb_release -sc) universe"
Now let’s install SQL server again and this should works
Wait until the installation is completed.
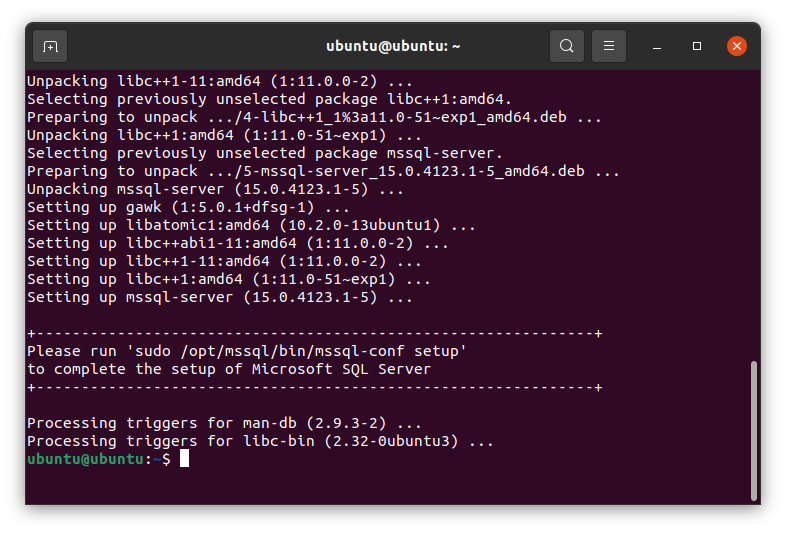
Step 5. Configure SQL Server
Now we need to configure the SQL Server. Use this command to start configuring SQL Server
sudo /opt/mssql/bin/mssql-conf setup
First, we need to choose the SQL Server edition. In this case, I will use the developer edition (free)
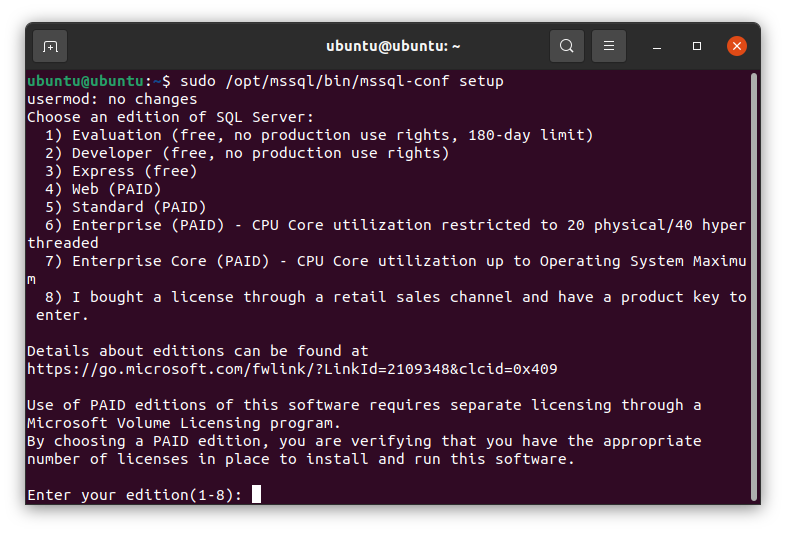
Follow the next step shown on the Terminal window. You will also need to provide the SA password.
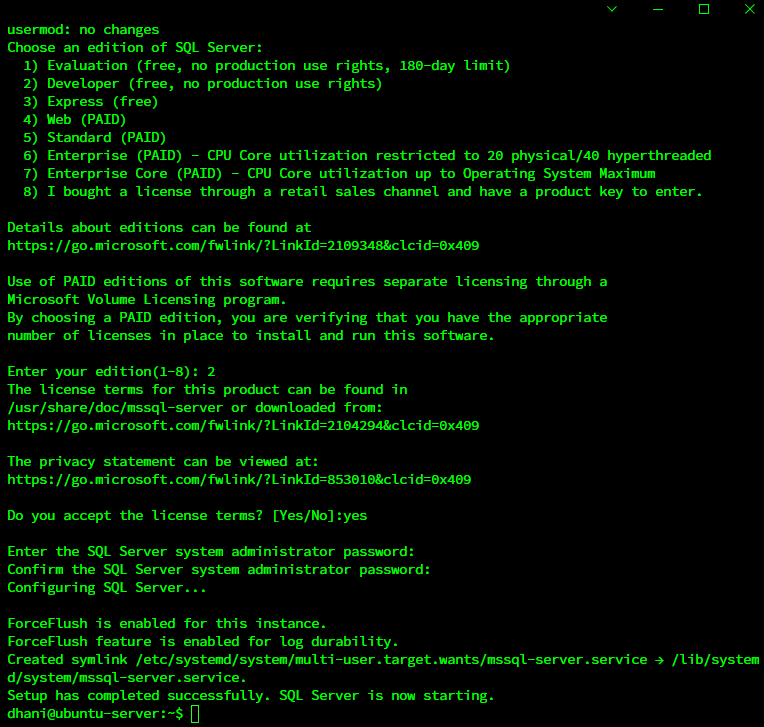
Once finished, start the service
sudo systemctl start mssql-server
Now ensure the service is up and running
sudo systemctl status mssql-server
At this point, we have successfully installed the MS SQL Server 2019 on Ubuntu 21.04. But, you may want to continue below to enable the remote connection to the SQL Server.
Step 6. Enable Remote Connection to SQL Server 2019
In case you have the Firewall enabled on your Ubuntu 21.04, you will need to enable port 1433 on the firewall. Otherwise, the SQL Server will not accessible from your network. But if you don’t have a firewall enabled, then you can connect to the server straight away.
To allow port 1433 through the firewall, do the following
sudo ufw enable
sudo ufw allow 1433
Output:
dhani@ubuntu-server:~$ sudo ufw enable
Command may disrupt existing ssh connections. Proceed with operation (y|n)? y
Firewall is active and enabled on system startup
dhani@ubuntu-server:~$ sudo ufw allow 1433
Rule added
Rule added (v6)
Done.
Step 7. Connect to SQL Server 2019 using Microsoft SQL Server Management Studio
Microsoft SQL Server Management Studio (SSMS) is a GUI software runs on Windows platform to connect and manage the SQL Server database. It can connect to the remote SQL Server 2019 installed on Ubuntu 21.04. You can download the latest version of this software using the link below.
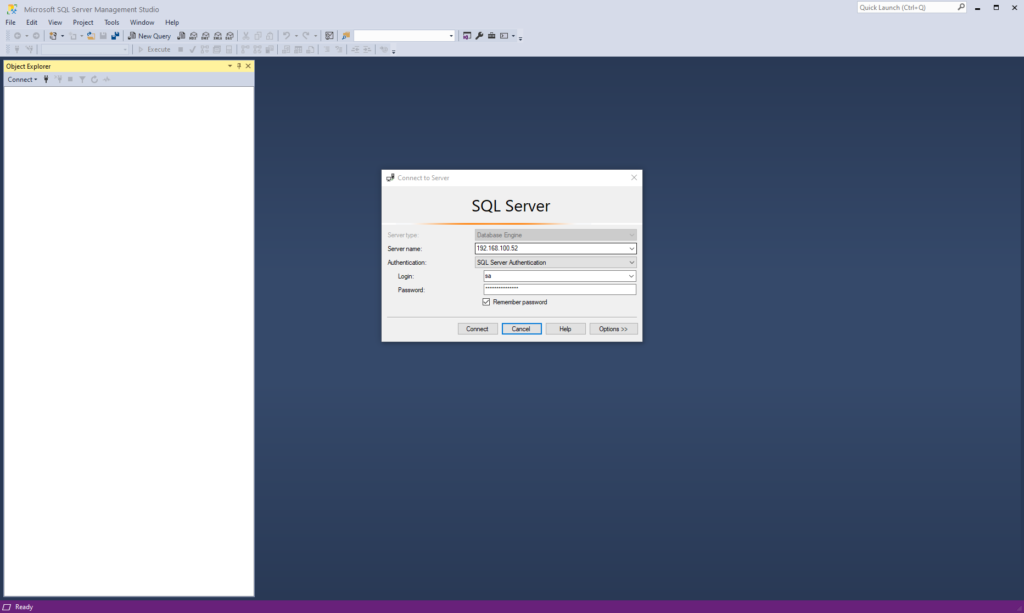
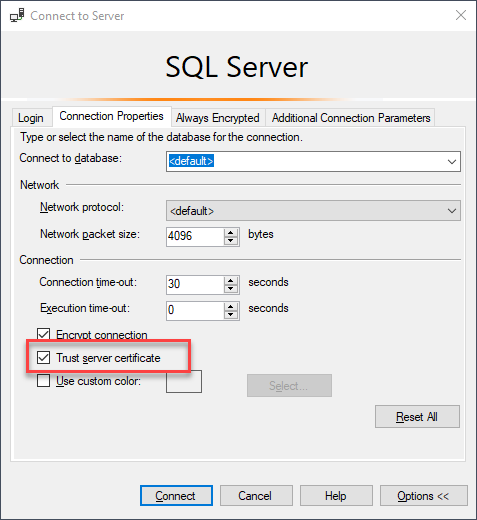
Run the software and then enter the SQL Server details as shown above. In some cases, you will get this error: “A connection was successfully established with the server, but then an error occured during the login process….The certificate chain was issued by an authority that is not trusted“.
To fix this, click the Option button and then click Connection Properties and then enable Trust server certificate as shown below.
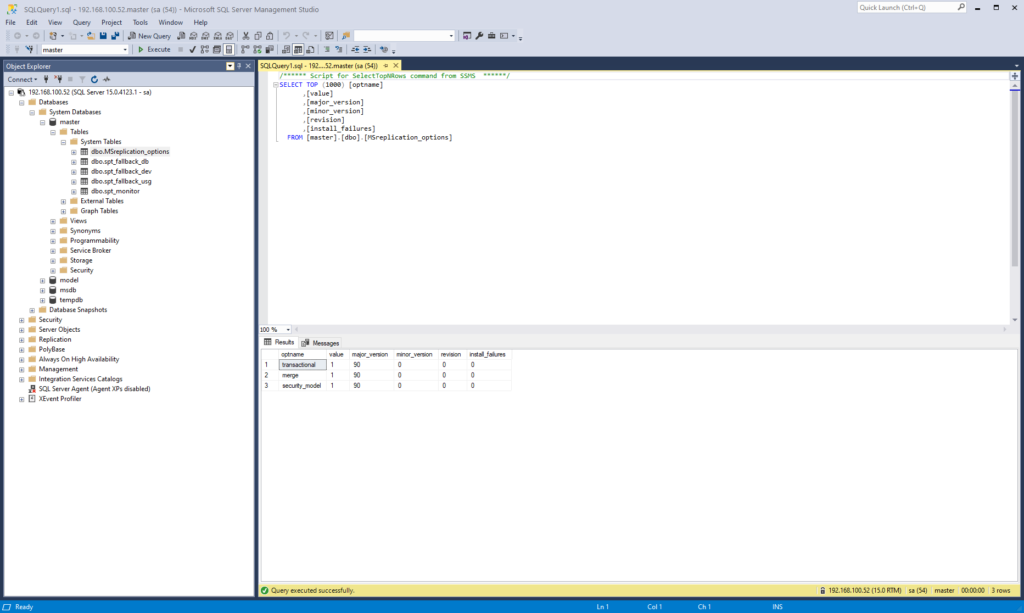
Now click Connect and then you should be able to login and enjoy the program
Leave a Reply