Hello everyone, in this article I am going to show you how I create iSCSI target on TrueNAS server. I am running TrueNAS version 12.0. As you know, TrueNAS is a storage server that has so many features including the iSCSI block share. If you are new to iSCSI, please visit this page to learn more about the iSCSI. In the following example, I will create a new iSCSI block share. So, let’s get started.
Steps to Create iSCSI Target on FreeNAS
Step 1. Create a New Zvol
There are two extents supported by TrueNAS iSCSI. In this example, I am going to use the “Device” extent. You can use the “File” extent if you want. But for now, I will use the Device extent. First, let’s create a new zvol. In order to create a new zvol, you must have a Pool. Create it if you don’t have it yet.
To create a new zvol, go to Storage >> Pools. Click the Dataset actions on the right side and click Add zvol.
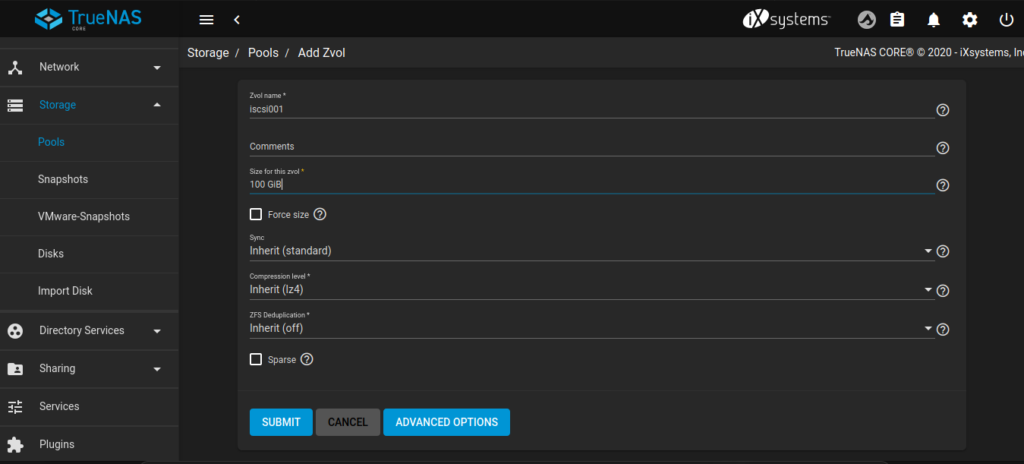
Enter the Zvol name and enter the desired size. In this example, I put 100 GiB for the size. I leave everything else as is. Click Submit.
Step 2. Create a New iSCSI Block Share
Create or choose block device
Now go to Sharing >> Block Shares (iSCSI) and then click Wizard. First, give a new name for the share, select Device from the extent type.
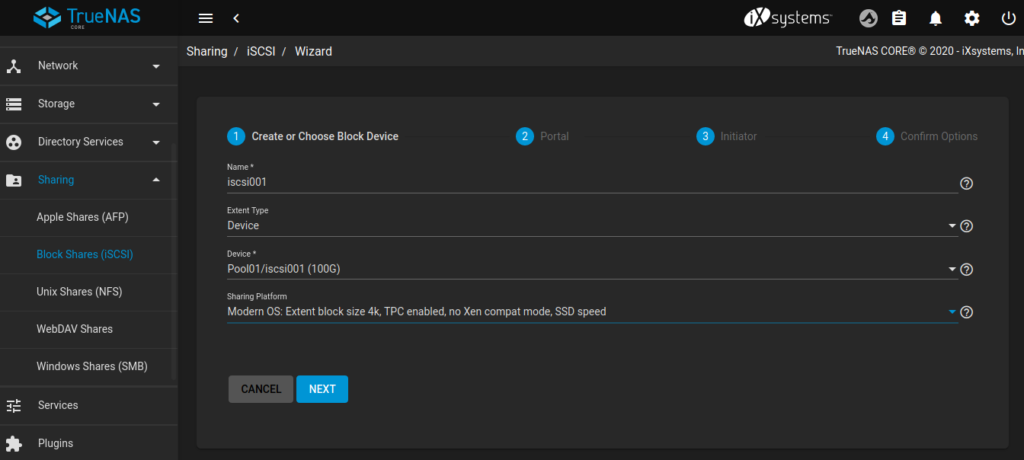
And then select the new Zvol we created earlier. You should see this Zvol in the drop-down list. For the sharing platform, choose Modern OS. Click Next.
Create Portal
On the Portal section, click Create New. And then choose the Discovery Authentication Mode. You may choose CHAP, Mutual CHAP or None. In this case, I choose None. If we choose None, we will not need the user and password to connect to the iSCSI shares.
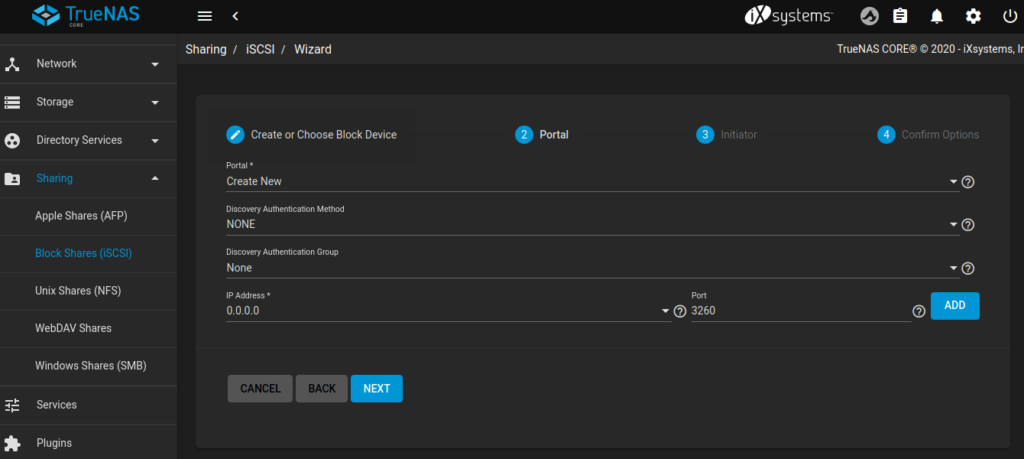
Choose 0.0.0.0 from the IP address list. Click Next
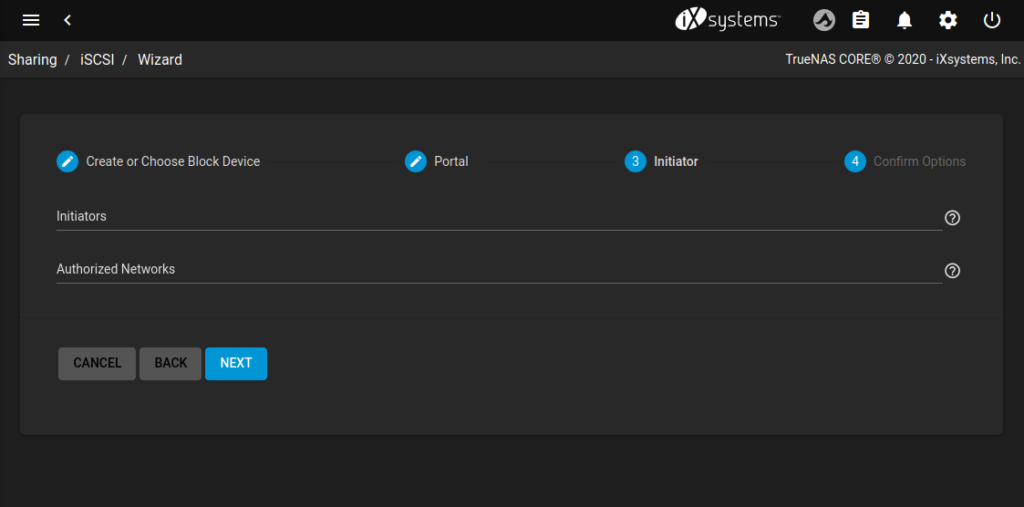
On the Initiator page above, leave the default value. Click Next.
Here is the summary of our new iSCSI block. Please review and click SUBMIT.
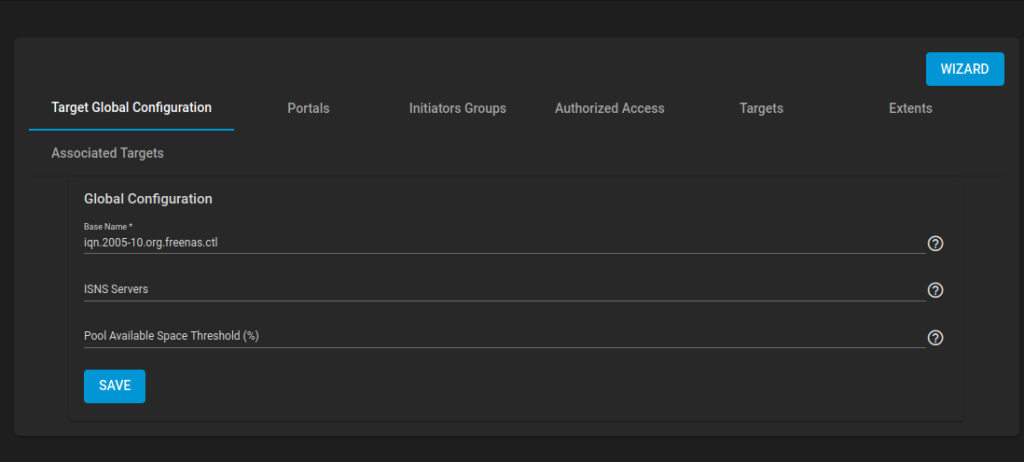
Make a note of the Global Configuration Base Name. In this example, my Base Name is: iqn.2005-10.org.freenas.ctl. You can change this name but make sure it meets the required name format.
Step 3. Enable iSCSI Service
Usually, the service will automatically be started after we finish configuring the iSCSI block. But to make sure, check it on the Service page.
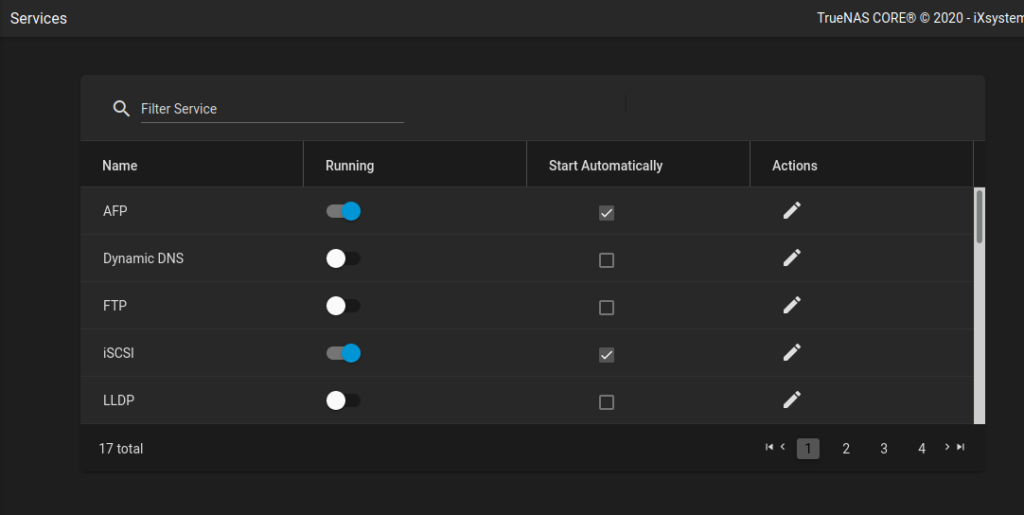
Done. At this point, we have successfully created an iSCSI target on TrueNAS. You can repeat the steps to create another target/blocks.


Leave a Reply