

Hello everyone, welcome to my FreeNAS Tutorial. In this article, I am going to show you how to add disks to FreeNAS 11.2. FreeNAS is capable to handle multiple hard disks with ease. We can easily manage our hard disks from the web management UI. I assume you already connected your hard disks to the FreeNAS server physically. Or, if you run FreeNAS on a virtual machine, you can easily add more disks to the virtual machine.
In this tutorial, you will learn the following:
- Check the disks from FreeNAS web UI
- Create a New Pool
Boot the FreeNAS 11.2 up and then login to the web management UI.

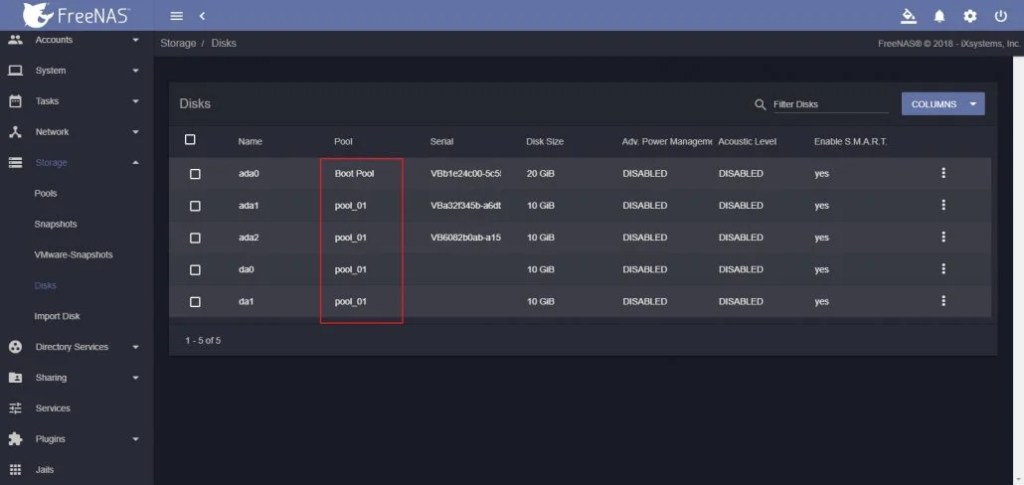
Next, go to Storage >> Disks to see all connected disks. Here you can see all the hard disks connected to FreeNAS.

Create a New Pool
Before we can actually use the hard disk to store stuff, we need to create Pool. Before we start creating a new Pool, you may want to read the official documentation here. It’s a great way to start.
Go to Storage >> Pool

Click Add button to start create or import Pool. Since this is our first pool, select create new pool and press Create Pool.

Now give the new pool a distinct name and then move the disks to the Data VDevs area. Then, select the RAID, Mirror or Stripe feature. In this example, I use the RAID-z2 which needs 4 disks.

Click CREATE and then confirm it. Please note that this step will erase the entire disks data.

Wait until the process completes. Now your new Pool is ready for use.

Now go back to Storage >> Disks. You will see that your disks now has pool information.
OK that’s it. Now we have successfully add disks to FreeNAS 11.2 and create a new Pool for data storage. Thanks for reading and I hope you enjoy it.
Leave a Reply