

I am always interested when it comes to virtualization or backup solution. And today, we will discuss a free but powerful bare-metal backup and restore solution. Redo Rescue 4.0 is a long-live free bare-metal backup solution. It has been around for several years now. The development of this software was stopped due to some reasons. But now it comes back with more good features. EASEUS and Acronis are well-known backup solutions but they are not free. If you are only looking for a full system backup, Redo Backup could be your go-to software.
Redo Rescue 4.0 is developed based on Debian Linux. It is lightweight and comes with a pretty simple user interface. Create Redo Backup bootable USB and then boot your PC using the USB. Create the backup and done. It supports various file systems including NTFS, Ext3, Ext4, and many more. So, basically, you can back up Windows 10, 11, and Linux without issues.
Last but not least, Redo Rescue also supports VNC connection. This means we can connect to the computer we want to back up remotely. It’s good to assist someone who needs our help to back up their computer remotely.
Steps to Backup Using Redo Backup
Step 1. Create Bootable USB
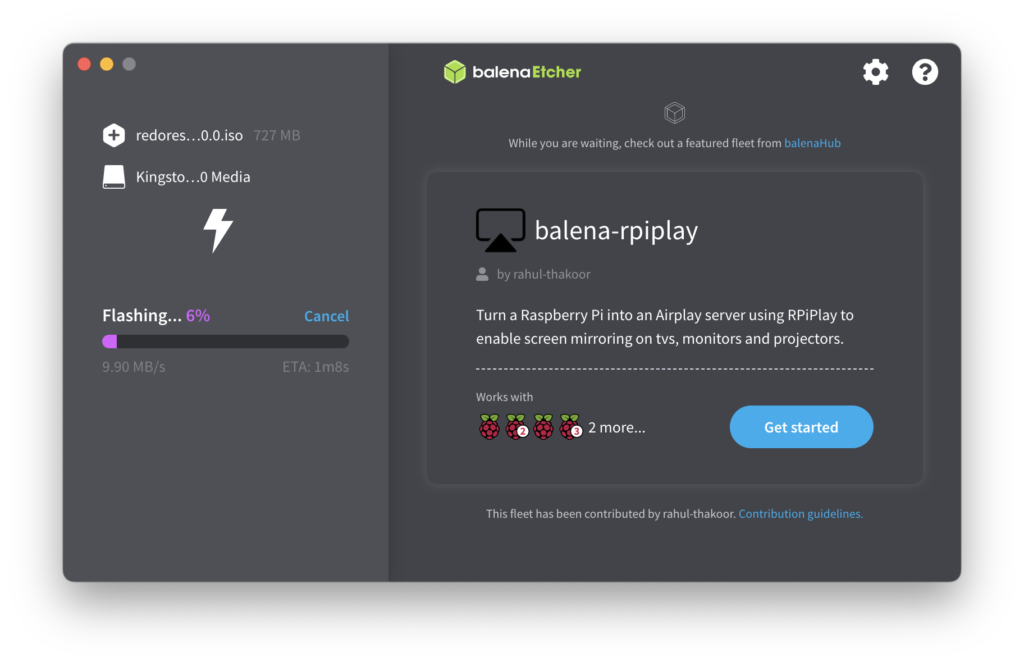
First, download the Redo Backup ISO and then burn it into a flash drive. You can use a Balena Etcher or Rufus to create the bootable USB.
Step 2. Backup Process
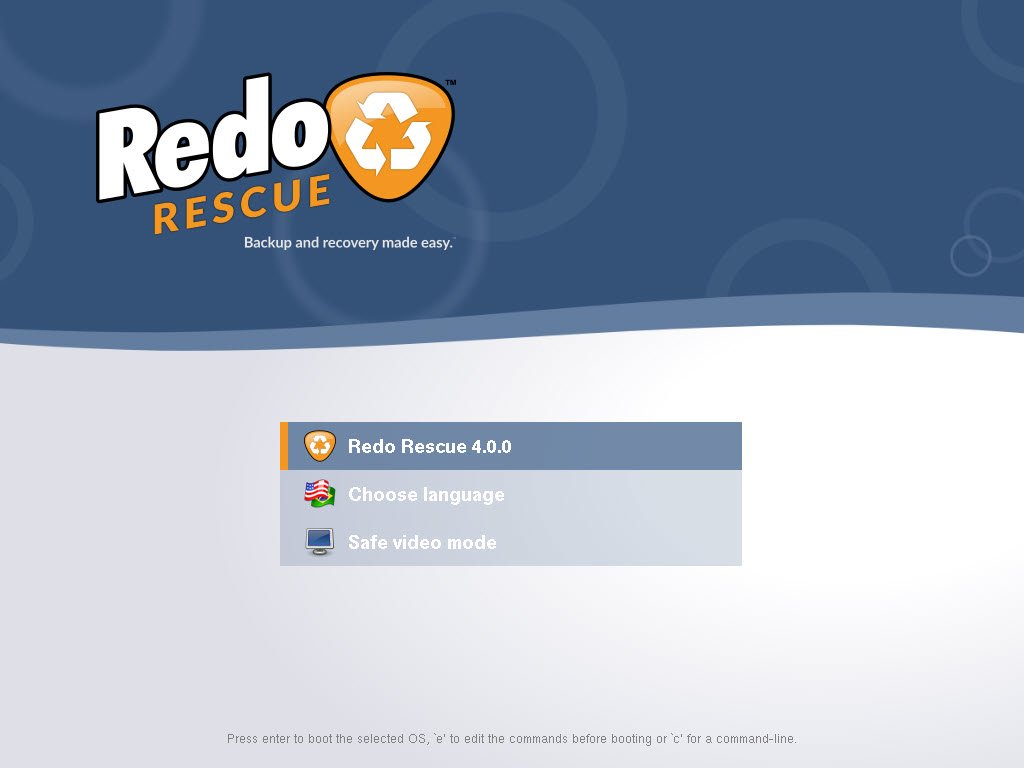
Boot your computer using the USB disk we created earlier. From the main window, select Redo Rescue 4.0 and press Enter. You can change the language or choose the safe video mode as well.
In a few moments, you will see the Redo Rescue main window.
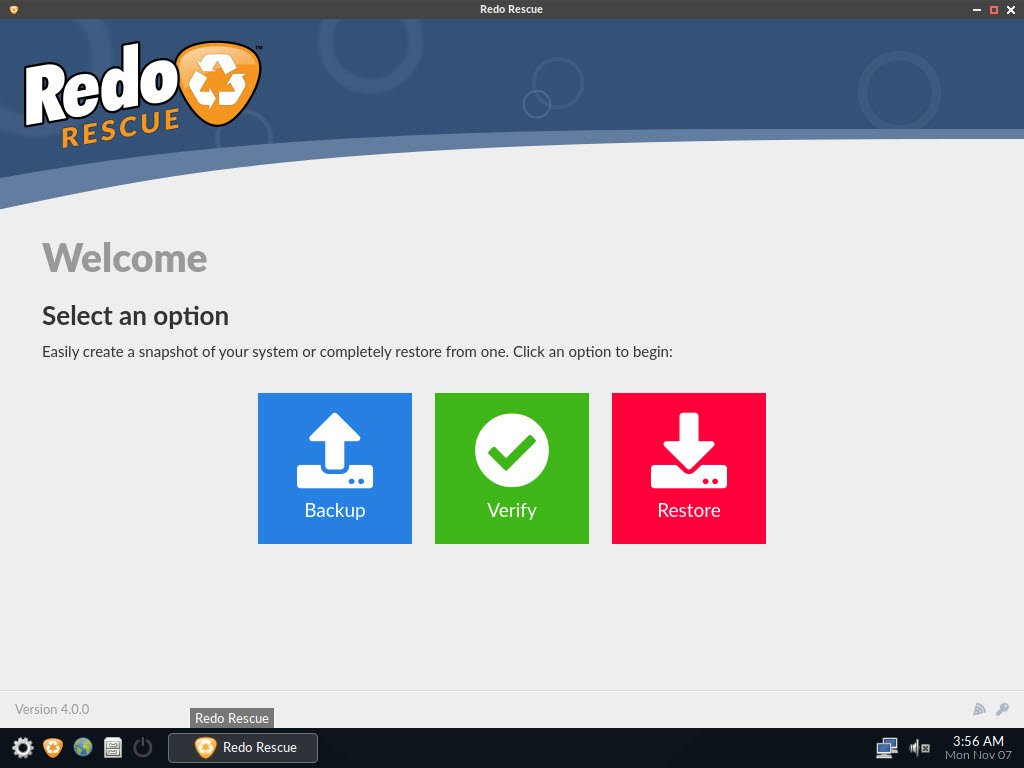
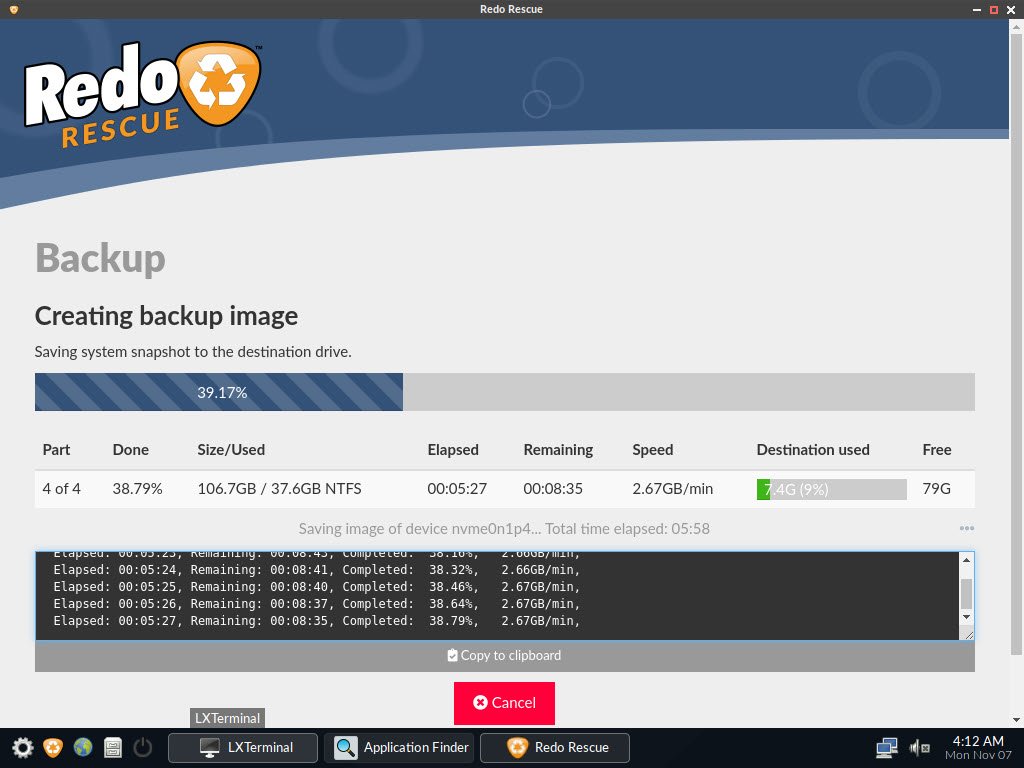
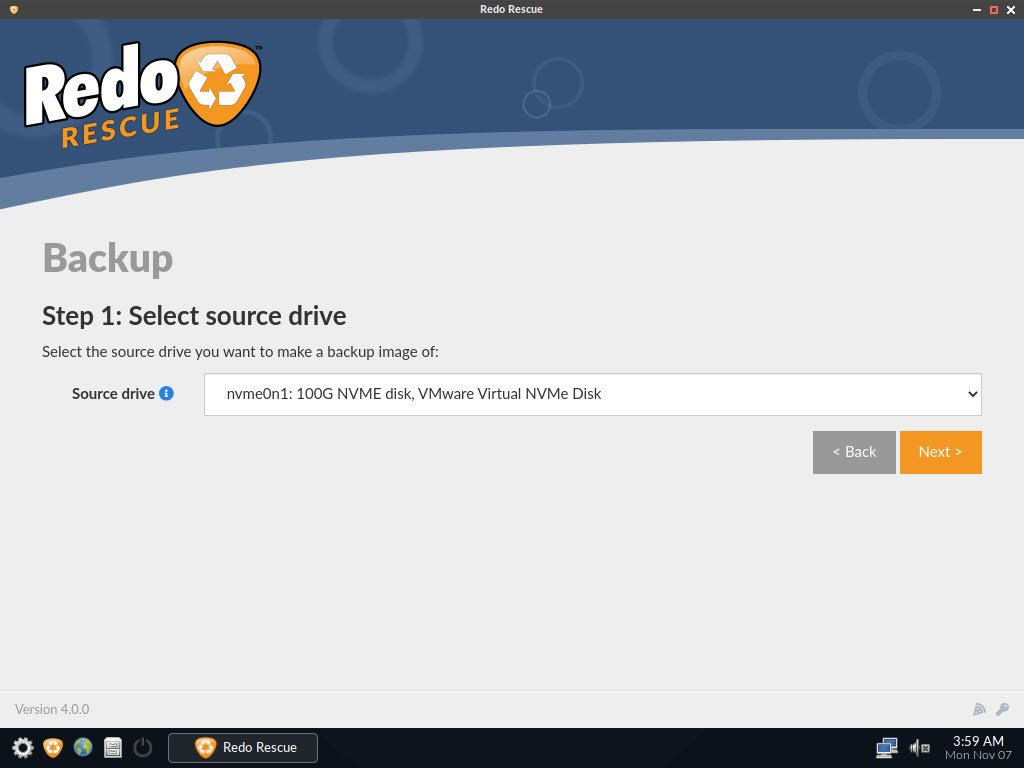
Click Backup to start the backup wizard. Select the backup source. This is the hard disk or SSD that we want to back up.
Click Next to select the partitions. Redo Rescue can be used to backup selected partitions only (optional). In this case, I will choose all the partitions.

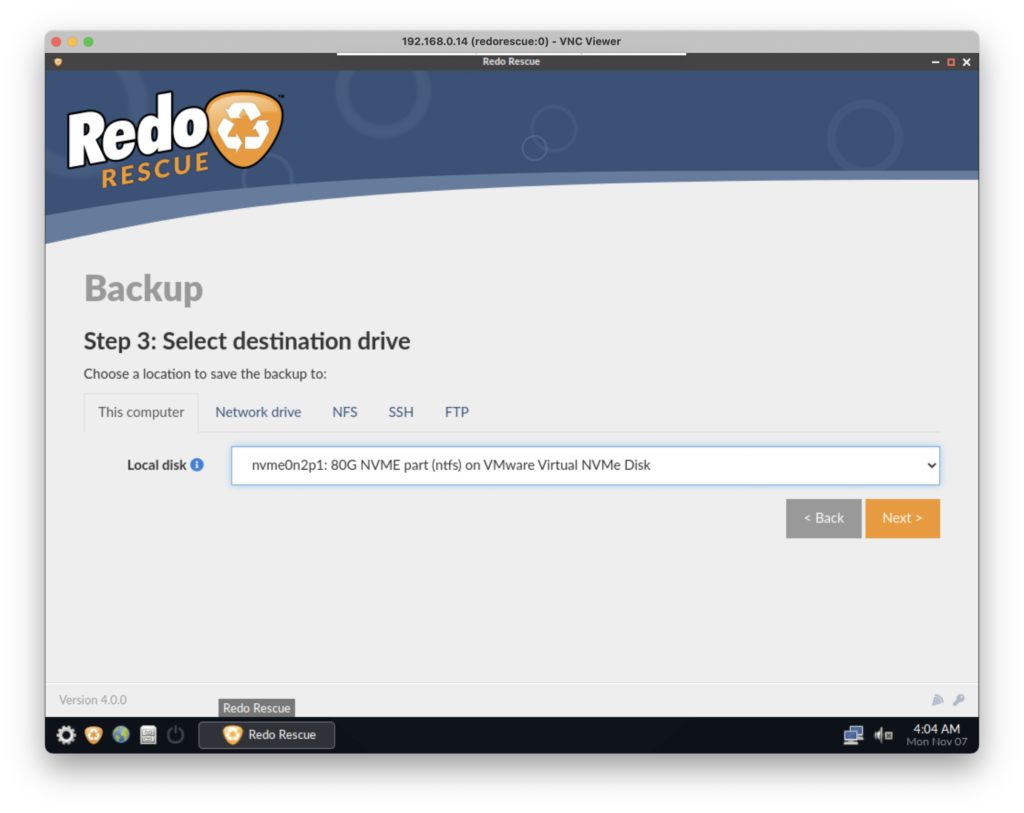
Click next to choose the backup destination drive. Redo Rescue supports various backup destinations: local disk, network drive, NFS, SSH, as well as FTP.
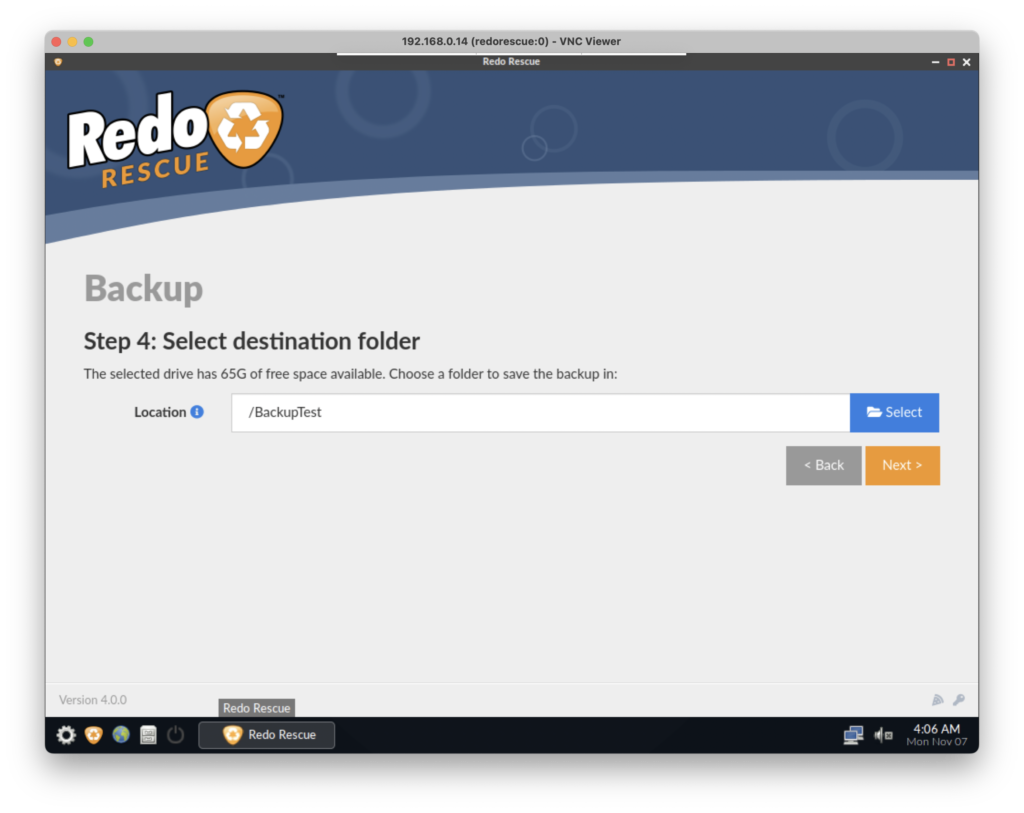
After we specify the backup destination drive, we need to choose the folder where we want to save the backup.
Next, give our backup a name

Click Next and the actual backup will start.

How to Restore from the Backup
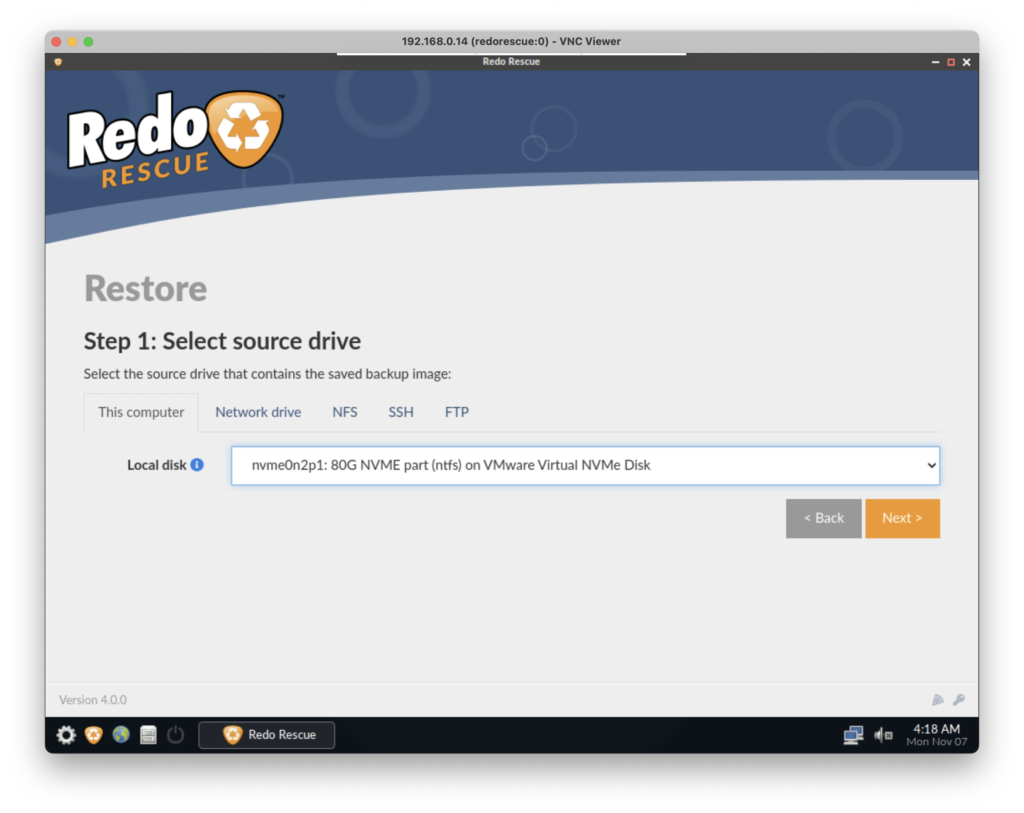
The Restore steps are also very easy. Boot up your computer using the same bootable USB disk and then choose Restore from the main menu.

Next, select the drive where we save the backup.
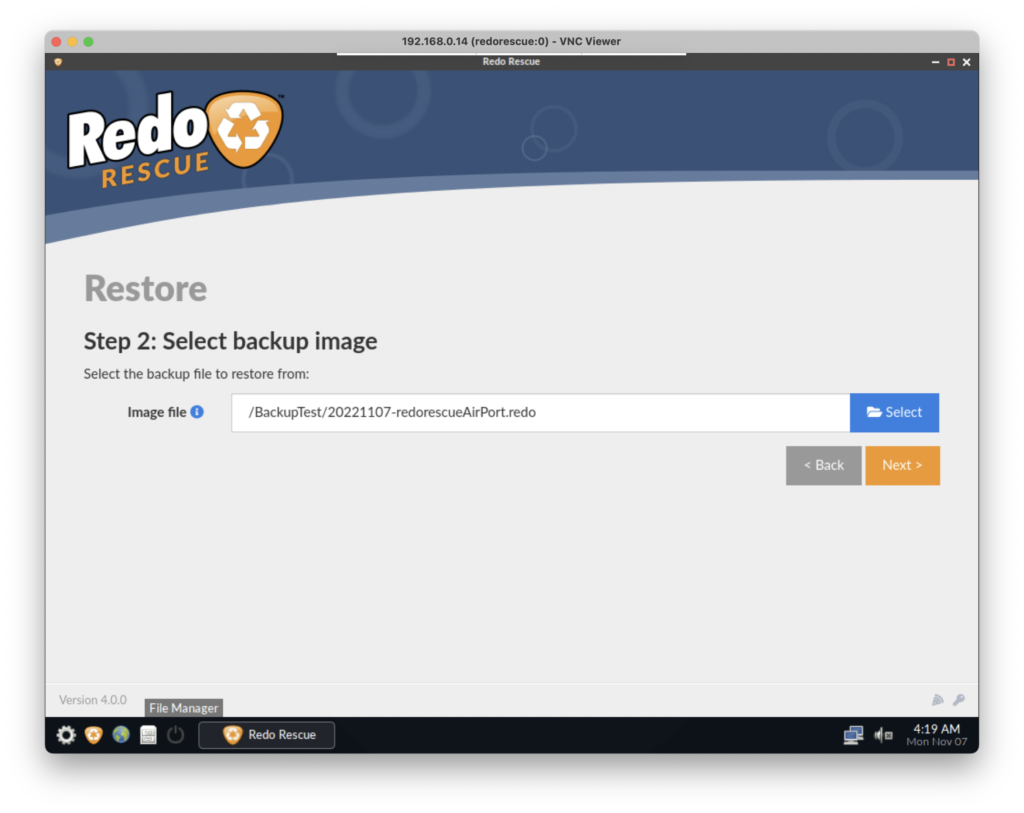
And then, select the backup file
Select the destination drive. This is the drive which we want to restore our backup into.

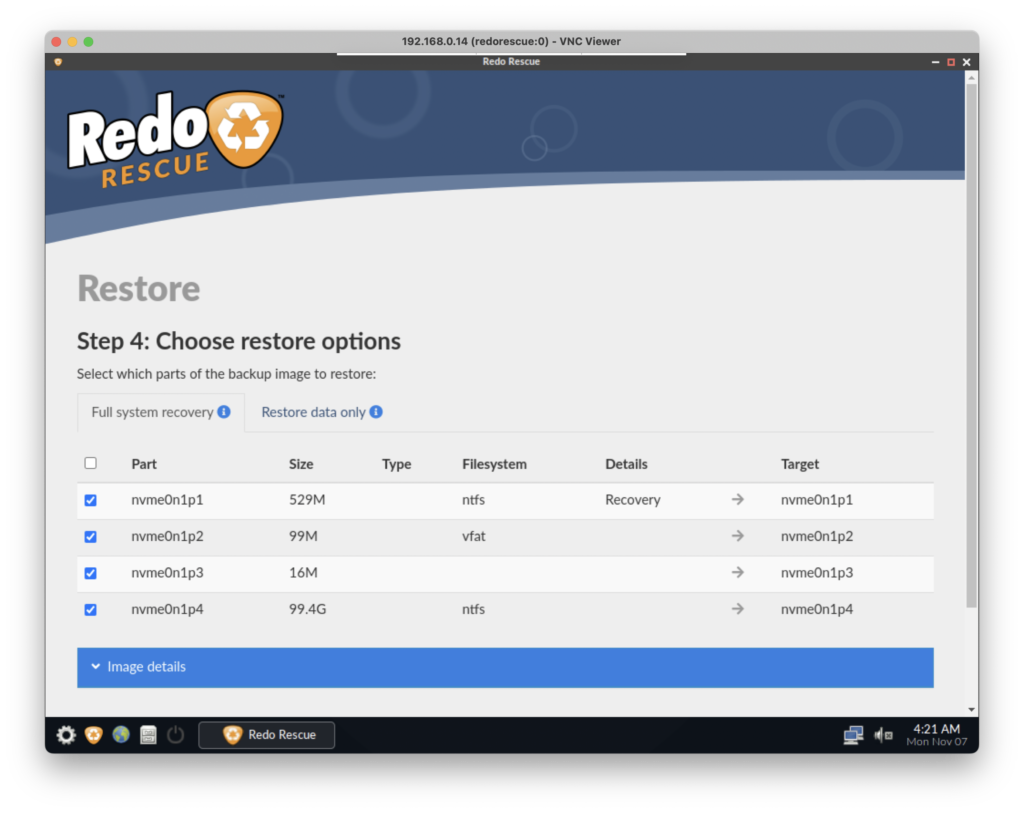
Next, we can select which partitions we want to restore. You may choose to restore all the partitions.
Hit Next and the restore process will begin. This will some time to complete. Reboot your PC to complete the restore process.
Final Thought
Bare-Metal backup is important to back up entire drives or partitions. Redo Rescue 4.0 is really good for doing this task. No need to pay a hundred bucks just to get this backup feature. It is simple and easy to use. Great for everyone.
Leave a Reply