Hello everyone, welcome to Manjaro.site. In this article, you will learn how to install macOS Big Sur 11 on Proxmox 6.3. I am now running Proxmox 6.3 on an Intel Core i5 machine. If you want to install Big Sur on Proxmox with an AMD processor, you can follow my previous guide below. This will be a pretty long article. But don’t worry, I will try to make it as clear as possible.
Why installing macOS on a Virtual Machine?
Well, if you are new or think that Proxmox is the same as VirtualBox or VMware Workstation, then you are wrong. At some points, it still a virtual machine. But, the good thing about Proxmox is the fact that we can enable GPU Passthrough on our macOS virtual machine. This means we will have a great GPU performance because the power of our graphic card will be assigned to the macOS. So we can then run some heavy rendering software, games, and more.
Hardware Specifications
Here is my hardware spcification of the Proxmox server I use. It’s an old Intel Haswell based.
- Motherboard: Gigabyte H81M
- Processor: Intel Core i5 4590
- RAM: DDR3 16 GB
- Graphic card: Radeon RX570 8 GB
- SSD 256 GB
- Hard disk 1 TB
What you need to build a macOS Big Sur Hackintosh on Proxmox
- A running Proxmox server with Intel or AMD processor. A more powerful processor with higher core count would benefit more.
- A supported VGA graphic card. I would recommend AMD Radeon RX series.
- Linux desktop or a Mac, or a working Hackintosh to download the Big Sur installer
Steps to Install macOS Big Sur 11 on Proxmox 6.3
Step 1. Download macOS Big Sur 11 from Ubuntu Linux
If you have a working Hackintosh or a Mac, you can easily download the macOS Big Sur from macOS. But if you don’t you can boot up any PC with Ubuntu and then download the macOS Big Sur from the Ubuntu machine. So the following step, I am using Ubuntu 20.04 to prepare my Big Sur 11 ISO file.
Install required packages:
sudo apt install g++ git qemu-utils libxml2-dev libssl-dev zlib1g-dev cmake libbz2-dev libfuse-dev fuse autoconf unzip
Next is to download OSX-KVM Tool. This is a great utility to create and convert the macOS Big Sur ISO. Extract the zip file and then run the fetch-macOS-v2.py script inside the OSX-KVM-master folder.
./fetch-macOS-v2.py
It will download files from the internet and when finished you will see a new file called BaseSystem.dmg. Next we need to convert this .dmg file into .img format. To do this, use this command
qemu-img convert BaseSystem.dmg -O raw BaseSystem.img
Now upload the BaseSystem.img file to Proxmox using ISO file uploader.
Step 2. Download OpenCore
OpenCore is a modern boot loader for Hackintosh. We need to download the OpenCore ISO from the link below. Thanks to OpenCore team and someone who compile and provide this OpenCore for Proxmox.
https://github.com/thenickdude/KVM-Opencore/releases
Extract the zip file and upload the ISO to Proxmox server.
Step 3. Get the OSX Authentication Key
This step requires a real Mac or a Hackintosh. macOS checks that it runs the real Mac hardware. To bypass this, we need to do this. First, download the file smc_read.c using the link below
https://nextcloud.manjaro.site/index.php/s/omCBp93ejECMfGY
And then open Terminal and change into the same directory as the smc_read.c file. And then run this command
xcode-select --install # If you don't already have gcc
gcc -o smc_read smc_read.c -framework IOKit
./smc_read
It will print the OSK key. If you are facing difficulties, you can visit this Forum and the OSK key is printed there. I am not sure if it is safe to write down the OSK key here. So, better visit this page.
Step 4. Create a New macOS Big Sur VM
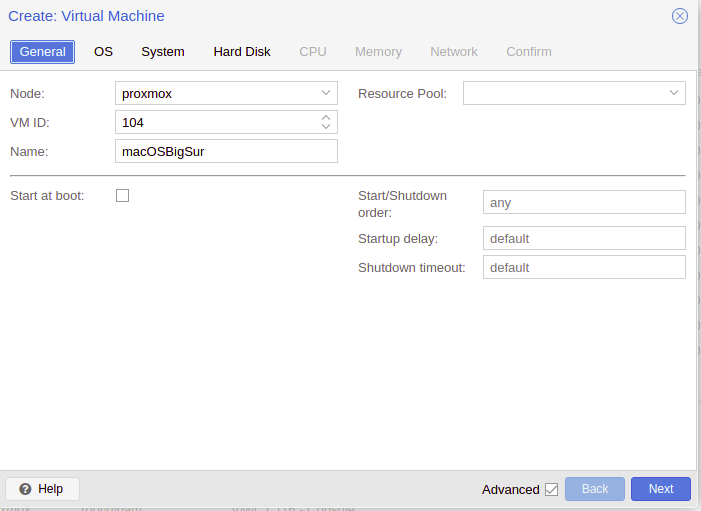
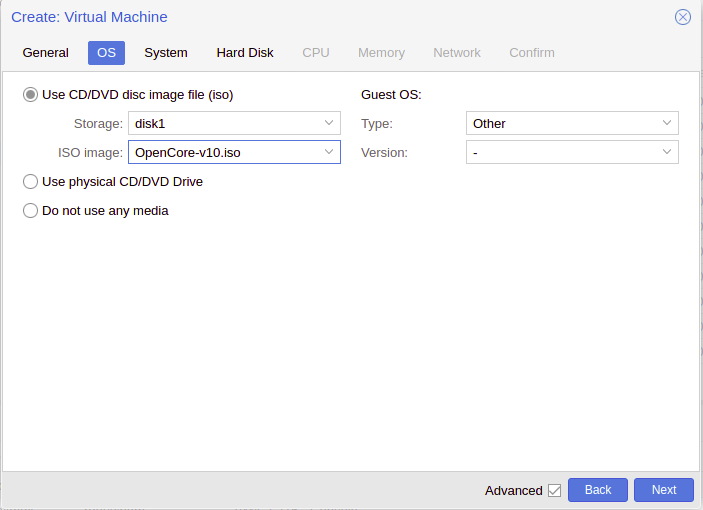
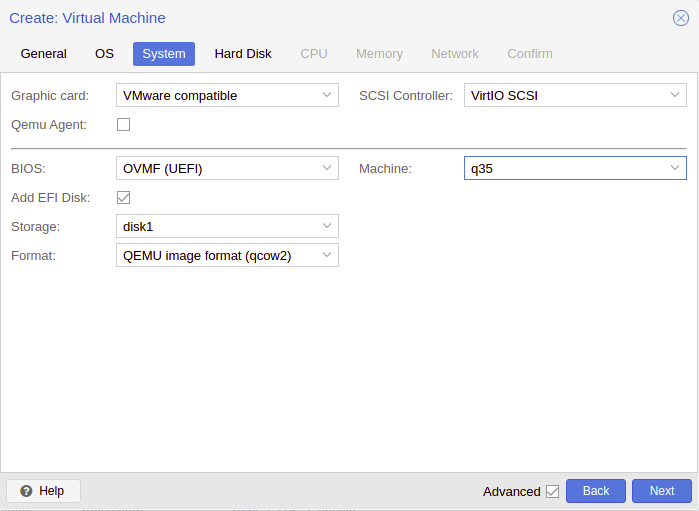
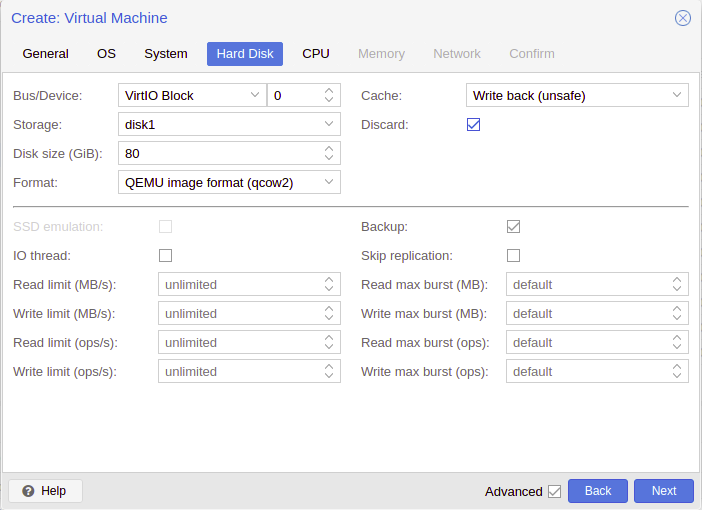
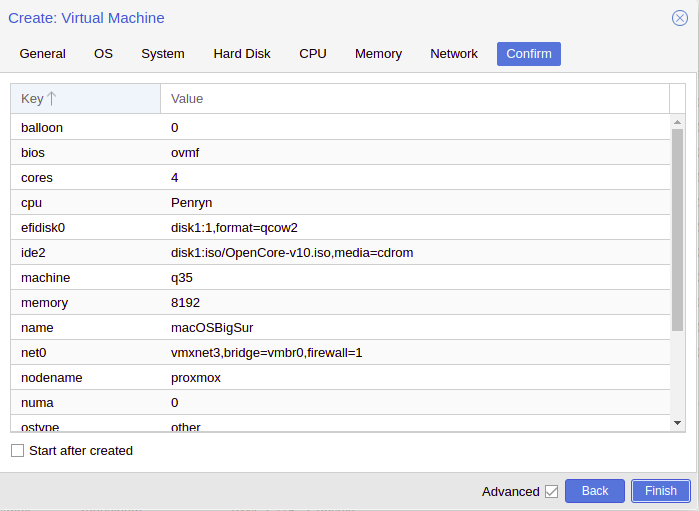
Now let’s create a new VM for macOS Big Sur. There are couple of notes before you create the VM.
- OS type: Other
- BIOS set to OVMF
- Machine: q35
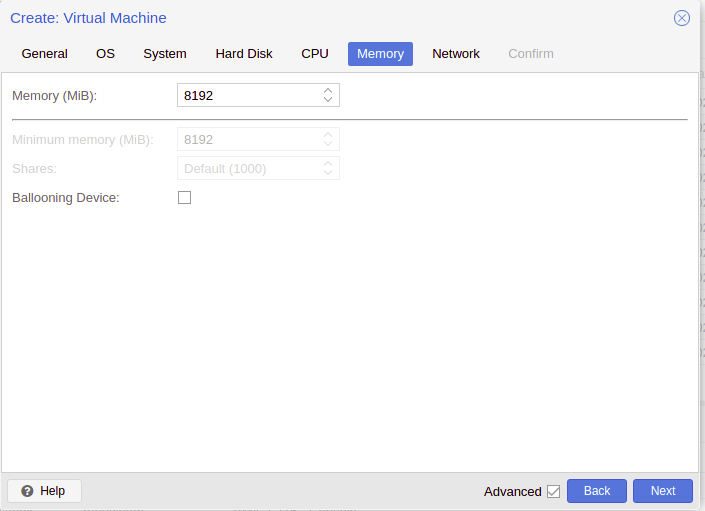
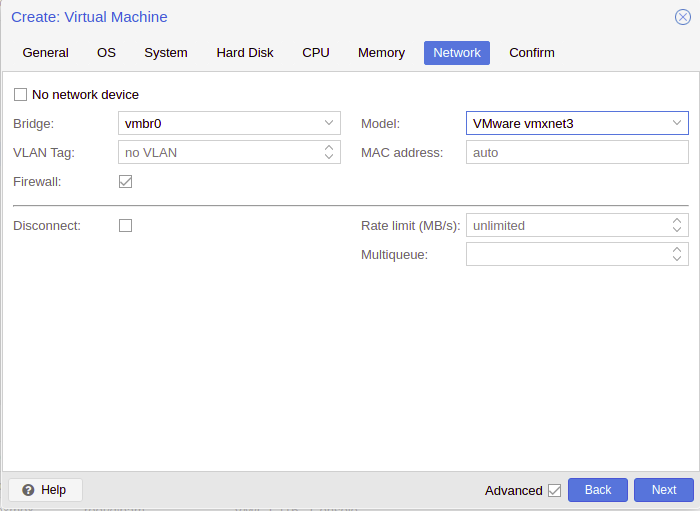
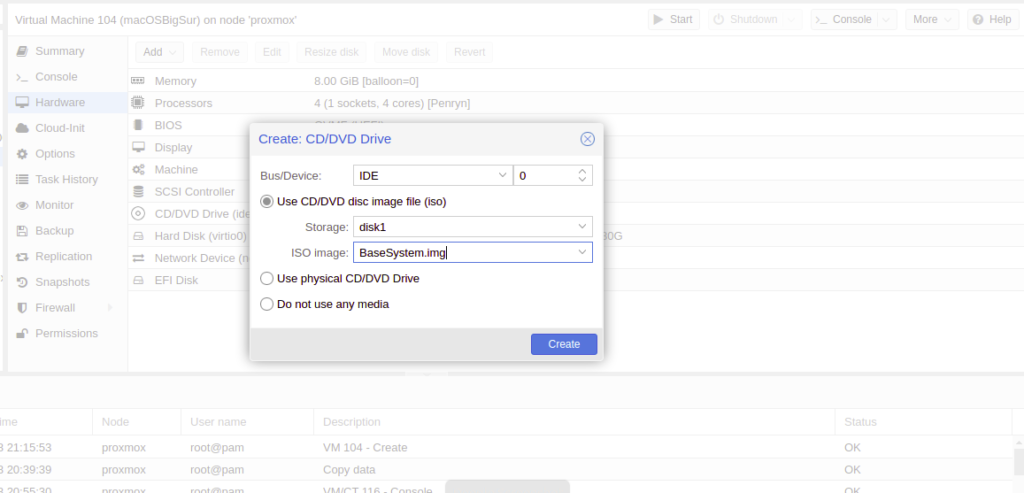
Next, go to Hardware section of the new VM and add a new CDROM and then select the BaseImage.img
Step 5. Configure VM config
Now we need to edit the config of the new VM. In this case, we need to connect to the Proxmox server via SSH. We need to edit the file called 104.conf. where 104 is my VM ID. Your VM ID may differ.
ssh root@192.168.100.100
nano /etc/pve/qemu-server/104.conf
Now add the following line in the top of the conf file
args: -device isa-applesmc,osk="THE-OSK-YOU-EXTRACTED-GOES-HERE" -smbios type=2 -device usb-kbd,bus=ehci.0,port=2
Of course you will need to replace THE-OSK-YOU-EXTRACTED-GOES-HERE with the actual OSK key you generated from the previous step.
For Intel users, add this line:
-cpu host,kvm=on,vendor=GenuineIntel,+kvm_pv_unhalt,+kvm_pv_eoi,+hypervisor,+invtsc
For AMD users, add this line:
-cpu Penryn,kvm=on,vendor=GenuineIntel,+kvm_pv_unhalt,+kvm_pv_eoi,+hypervisor,+invtsc,+pcid,+ssse3,+sse4.2,+popcnt,+avx,+avx2,+aes,+fma,+fma4,+bmi1,+bmi2,+xsave,+xsaveopt,check
Next, find the ide0 and ide2 (the CDROM section). We need to change the text from “media=CDROM” to “cache=unsafe“
My final config file will looks like this
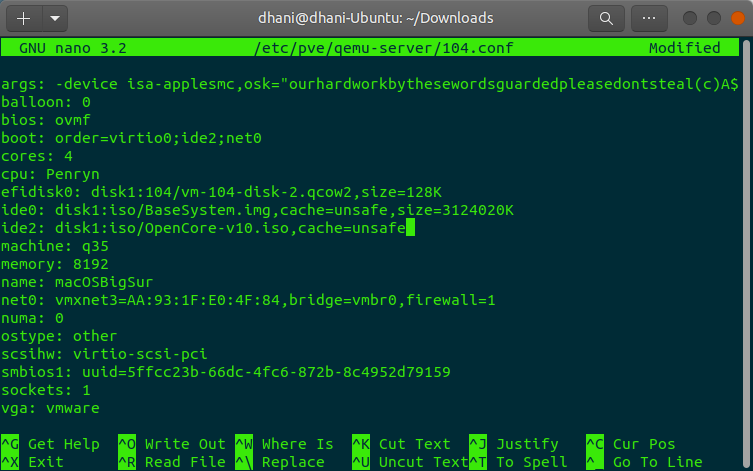
Now close and save the file.
Finally, run this command on Proxmox server to avoid boot looping during macOS boot.
echo 1 > /sys/module/kvm/parameters/ignore_msrs
And make it permanent during boot with this command
echo "options kvm ignore_msrs=Y" >> /etc/modprobe.d/kvm.conf && update-initramfs -k all -u
Step 6. Boot the VM
Now boot the VM. You will be greeted with the following window. Choose macOS Base System and press Enter. Now we are ready to install macOS Big Sur 11 on Proxmox.
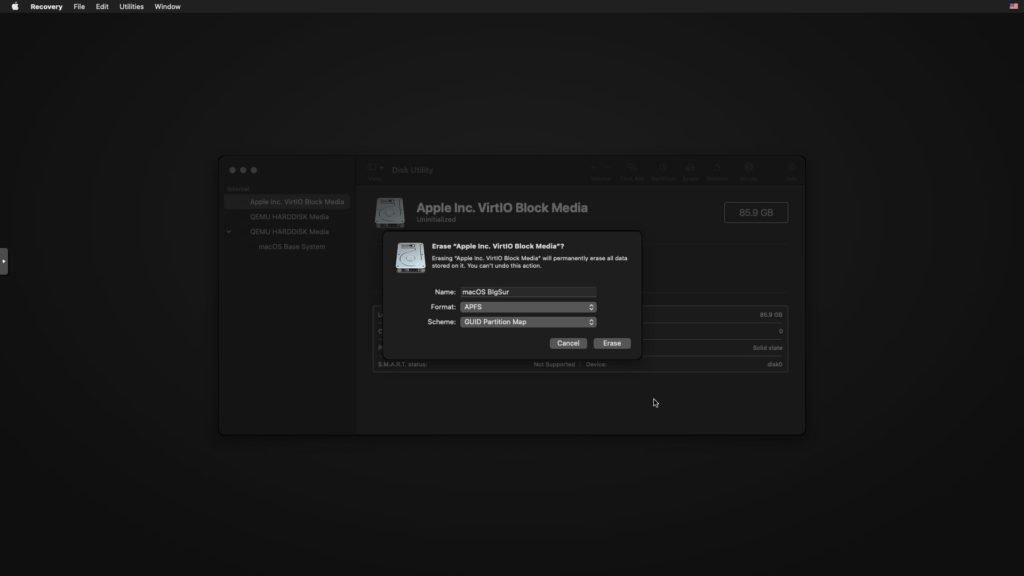
Next, choose Disk Utility and we need to format our disk. Use APFS format as shown below. Click Erase to format the disk.
Next, close the Disk Utility and select Reinstall macOS Big Sur from the list
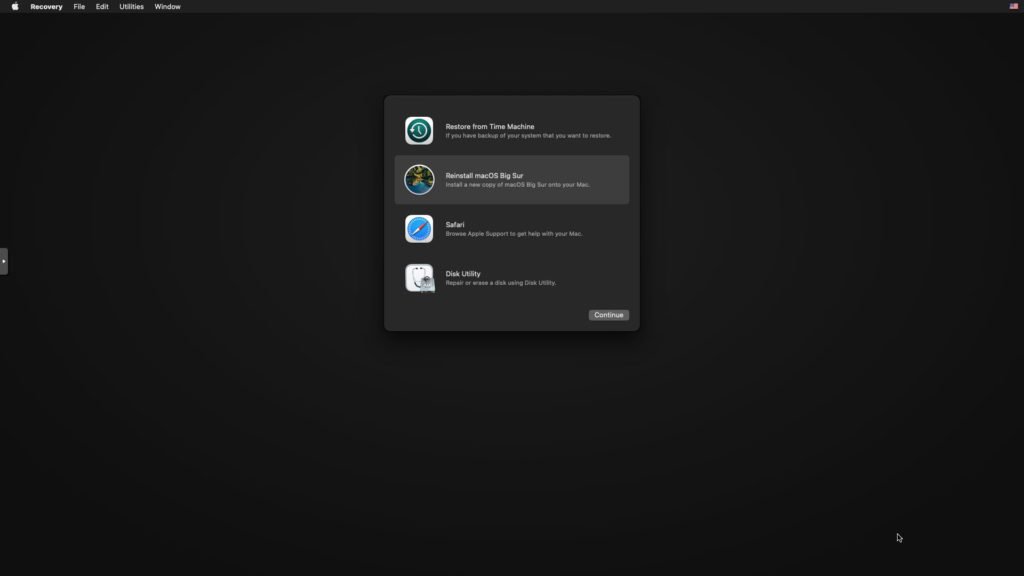
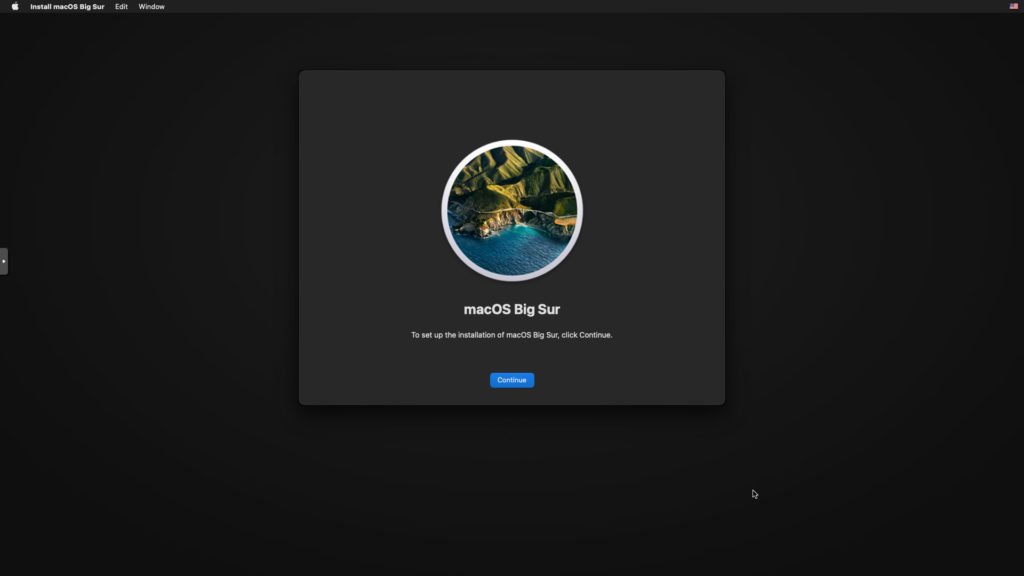
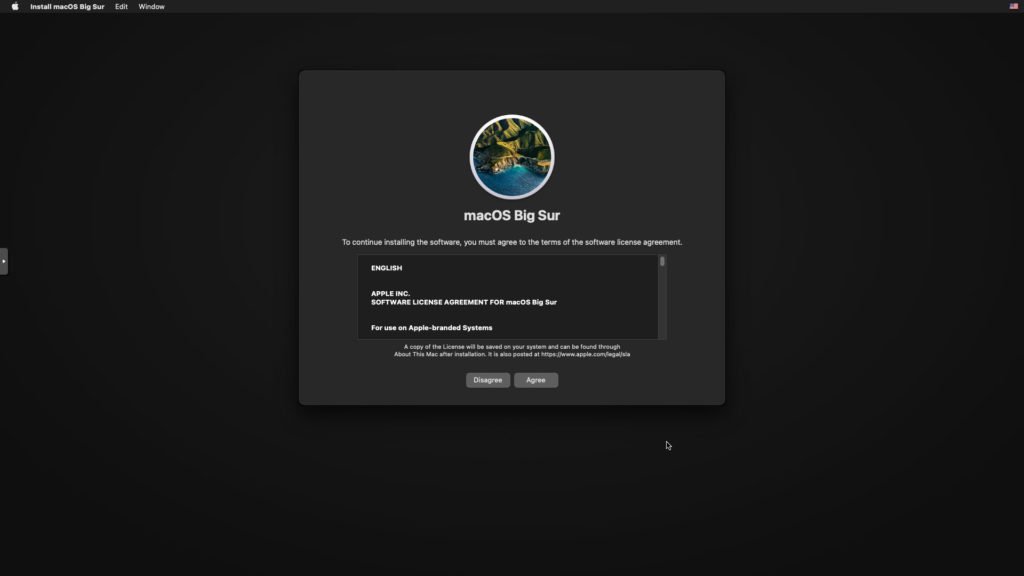
Accept license agreement
Choose the disk we have formatted earlier
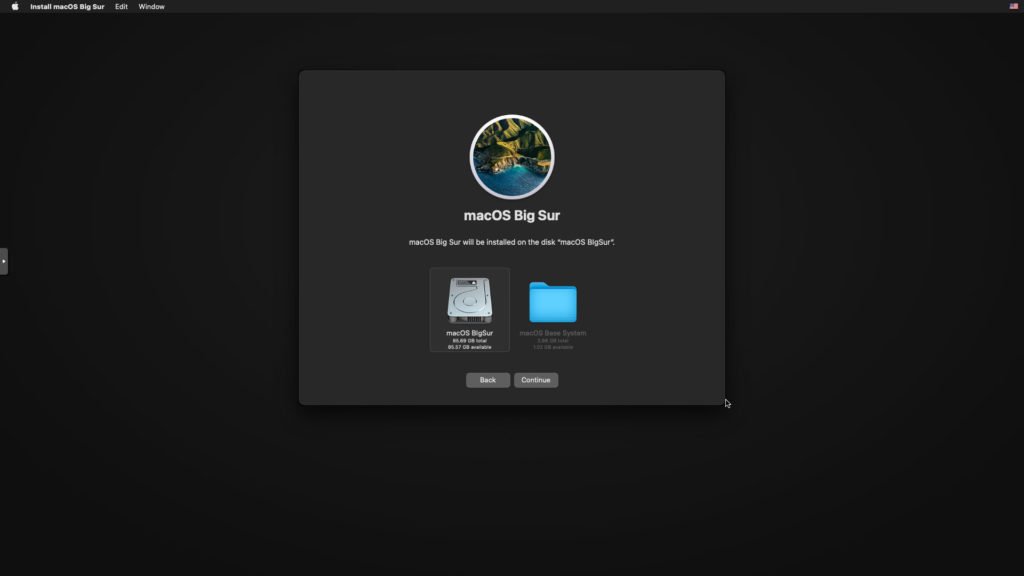
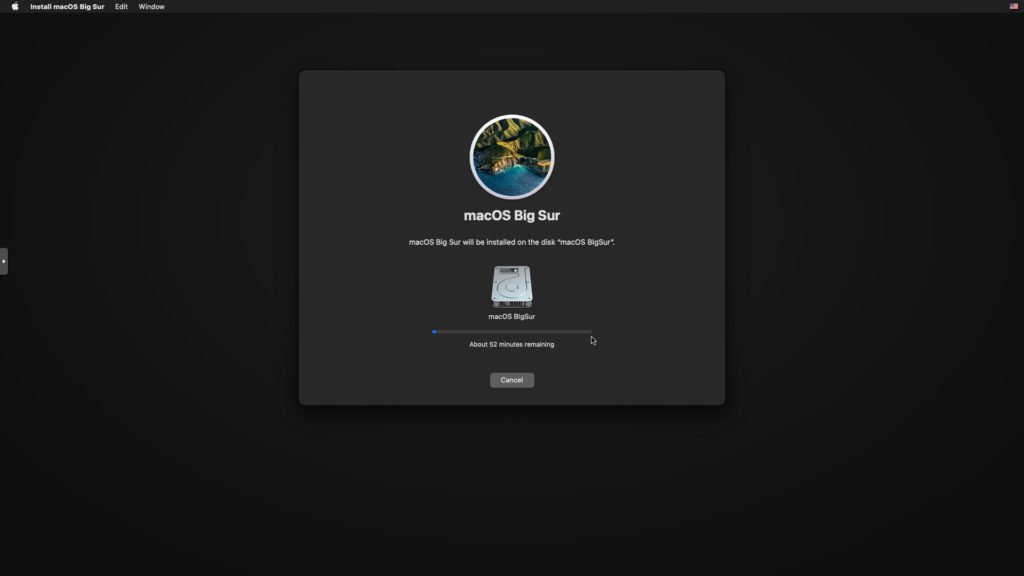
Now the installation will start. Please wait because it will download files from the internet so it may take a bit long.
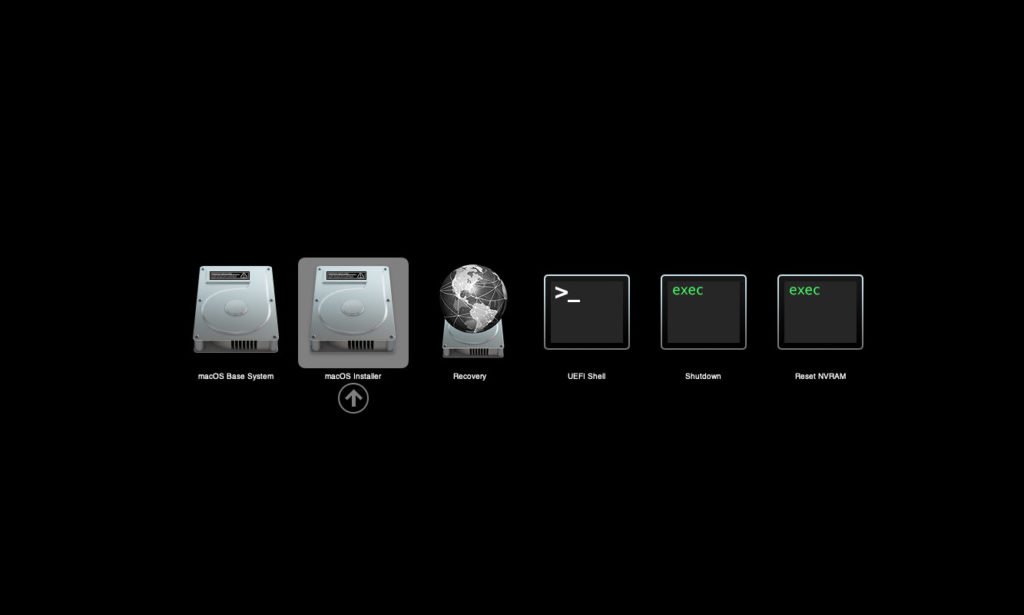
The installer will restart the VM several times, upon restart, make sure you choose macOS installer as shown below.
The installation will continue. After several restart, where we go, the macOS Big Sur. There still some steps to complete.
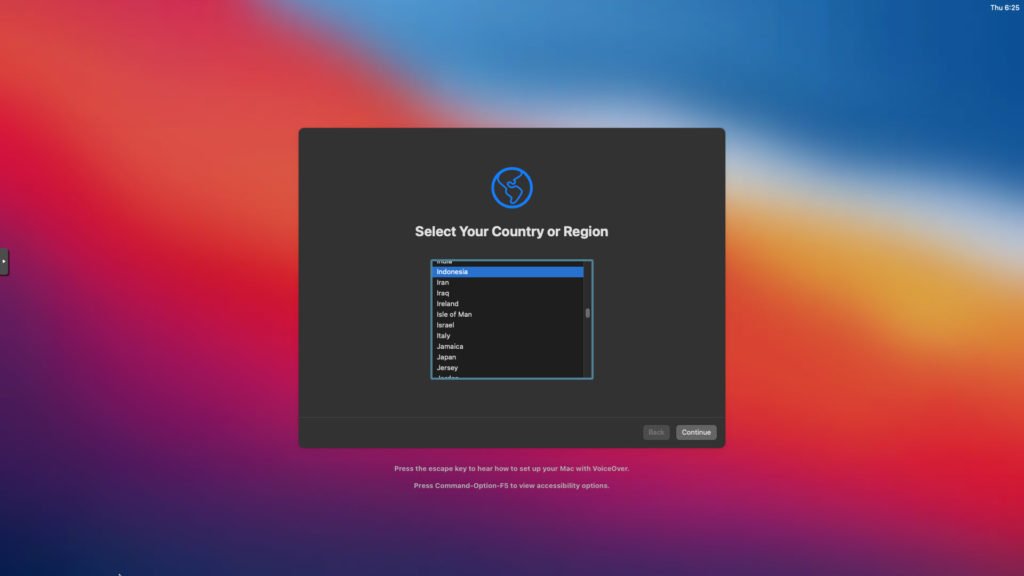
Now finally, success install macOS Big Sur 11 on Proxmox 6.3 on Intel Haswell processor.
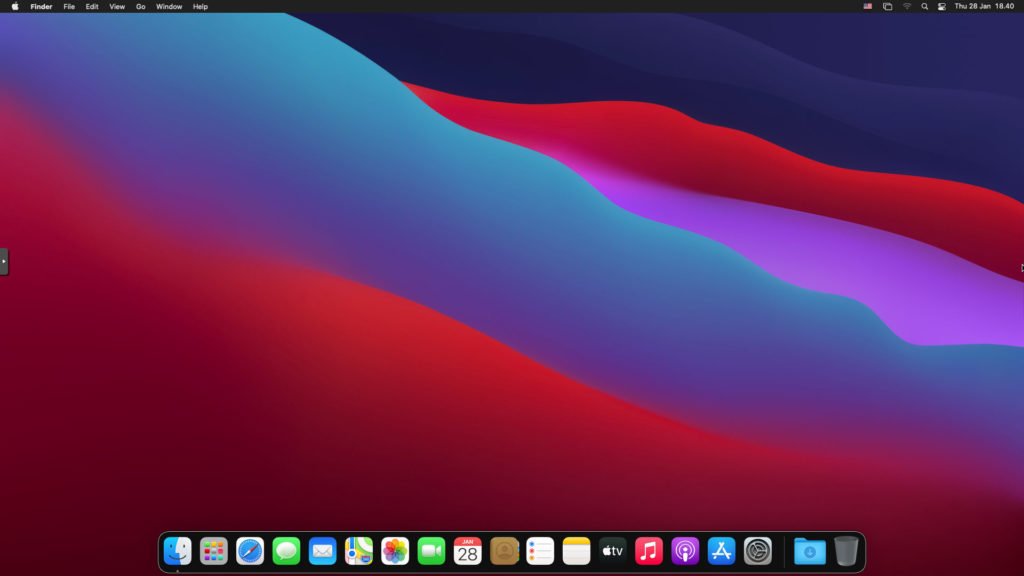
Great. At the moment, macOS Big Sur VM still running with the default graphic card and the performance is still very bad. Next, we will learn how to run macOS Big Sur with the GPU Passthrough and we will see the differences.
Step 7. CleanUp
Now we have macOS Big Sur installed on Proxmox. At the moment, the macOS VM still needs the OpenCore ISO to boot. Now we are going to modify it so we can boot macOS without the OpenCore ISO.
All you need is to download and install Clover Configurator in the macOS VM. This program is used to mount the EFI partition on the macOS. Run Clover Configurator and then mount the EFI partition from the EFI disk, not your macOS disk.
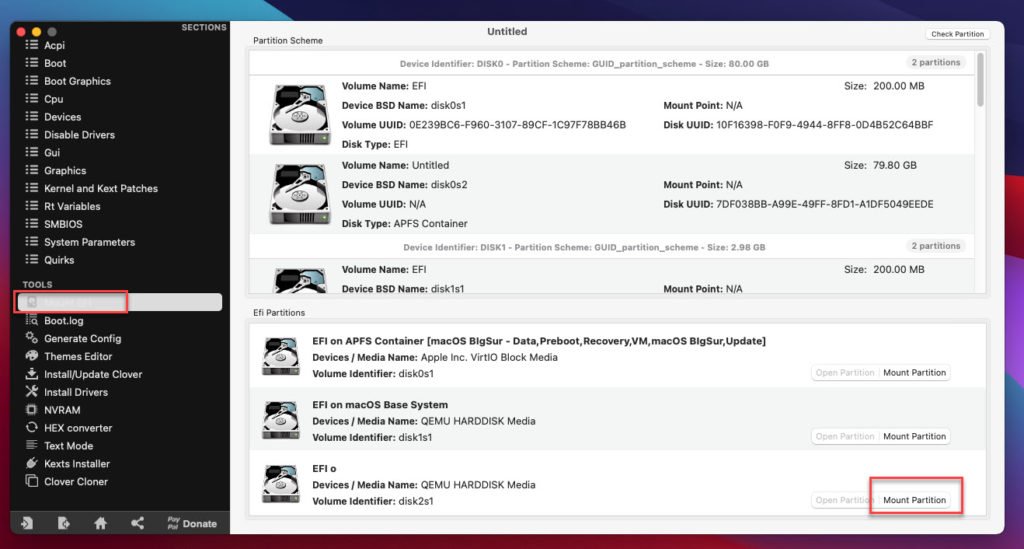
Now open the partition and then copy the EFI folder to Desktop. Next, mount the EFI partition on the macOS Big Sur disk.
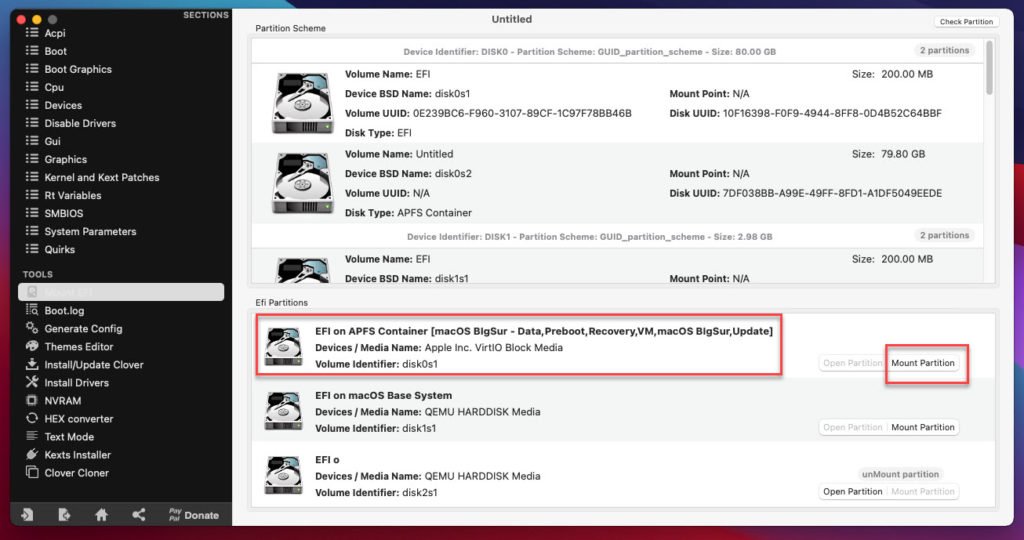
Now open the EFI partition and copy paste the EFI folder from the previous step to this partition.
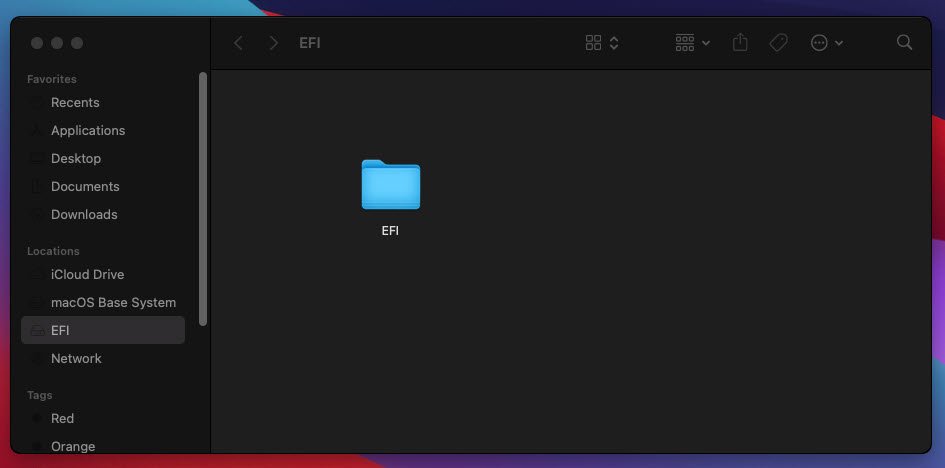
Now we don’t need the OpenCore ISO anymore to boot the VM. You can remove the OpenCore ISO from the Hardware settings of the VM.
Thanks for reading this article, see you on the next tutorial. Cheers



Leave a Reply