Welcome to Ubuntu Tutorial. Today we are going to show you how to install LAMP Server on Ubuntu 17.10. We are using Ubuntu 17.10 Server edition on this tutorial. Please read our previous tutorial if you want to see how to install Ubuntu 17.10 Server. LAMP is a combination between Linux, Apache, MySQL/MariaDB and PHP. These combination provides a powerful web server with database back end and PHP. Install LAMP Server on Ubuntu 17.10 is pretty easy.
Steps to install LAMP Server on Ubuntu 17.10 Server
- Install Apache Web Server
- MySQL/MariaDB Installation
- PHP Installation
- Clean up things
Step 1. Install Apache Web Server
I assume you have a direct connection to the Ubuntu Server. You can also use ssh to connect to your server. On this tutorial, we are installing LAMP on Ubuntu Server with IP address : 10.34.0.218
Connect to the server via ssh
ssh dhani@10.34.0.218
Install Apache web server
sudo apt install apache2
Output sample
dhani@ubuntu:~$ sudo apt install apache2
Reading package lists... Done
Building dependency tree
Reading state information... Done
The following additional packages will be installed:
  apache2-bin apache2-data apache2-utils libapr1 libaprutil1
  libaprutil1-dbd-sqlite3 libaprutil1-ldap liblua5.2-0 ssl-cert
Suggested packages:
  www-browser apache2-doc apache2-suexec-pristine | apache2-suexec-custom
  openssl-blacklist
The following NEW packages will be installed:
  apache2 apache2-bin apache2-data apache2-utils libapr1 libaprutil1
  libaprutil1-dbd-sqlite3 libaprutil1-ldap liblua5.2-0 ssl-cert
0 upgraded, 10 newly installed, 0 to remove and 0 not upgraded.
Need to get 1,627 kB of archives.
After this operation, 6,663 kB of additional disk space will be used.
Do you want to continue? [Y/n]
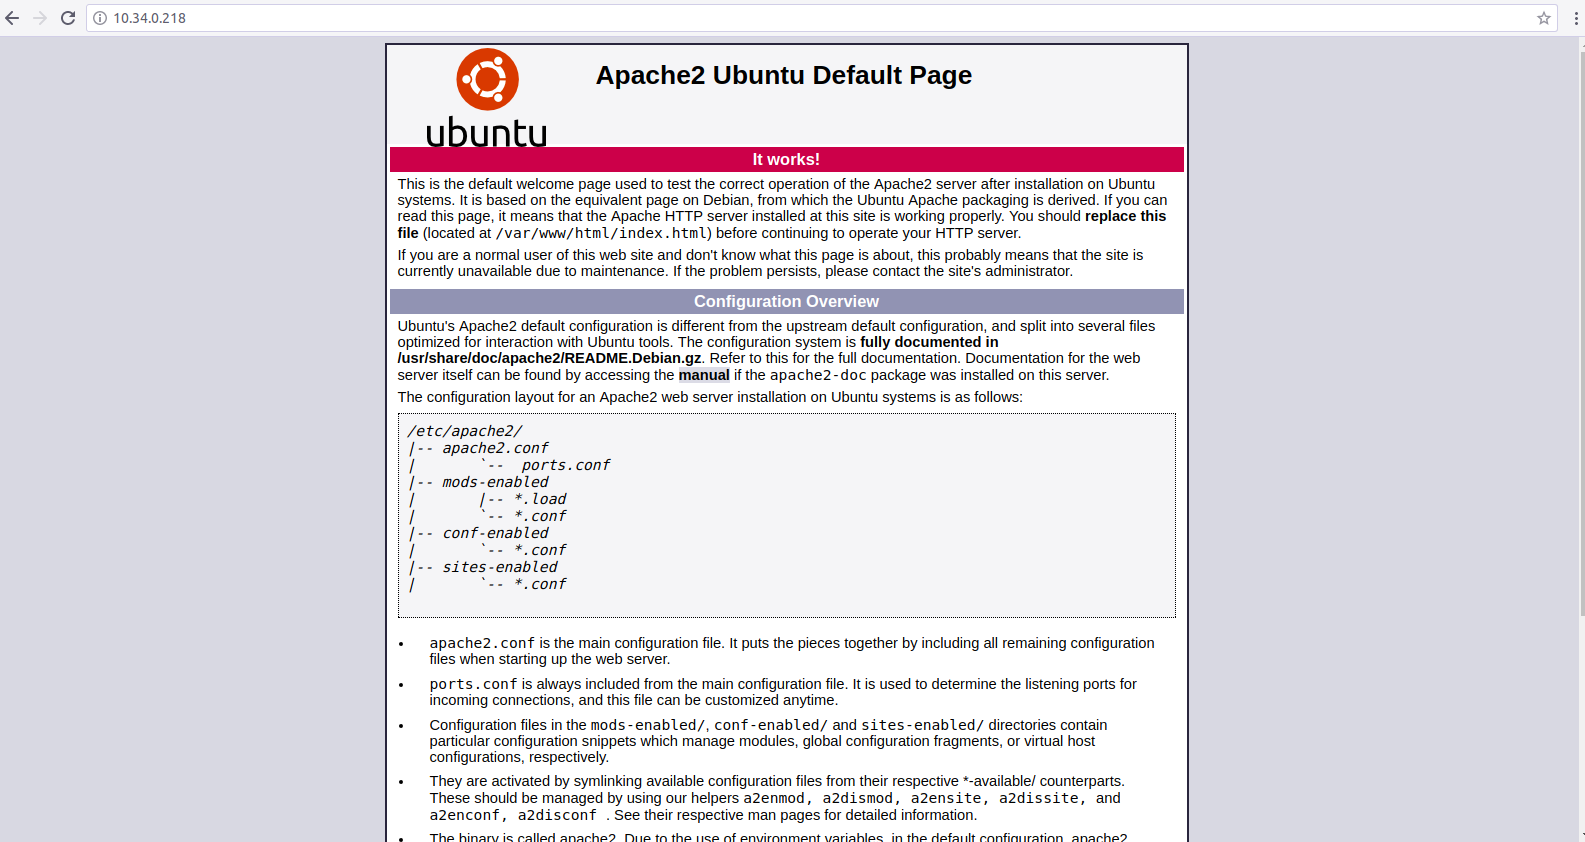
Afterward, check if the web server is running. Type the server IP address. In my case it would be the following:
http://10.34.0.218
Step 2. Install MySQL/MariaDB
Now, that we have our web server is up and running. Now we continue to install MySQL. MySQL is a well known database system.
Install MySQL on Ubuntu 17.10
sudo apt install mysql-server
Output sample
dhani@ubuntu:~$ sudo apt install mysql-server
Reading package lists... Done
Building dependency tree
Reading state information... Done
The following additional packages will be installed:
  libaio1 libcgi-fast-perl libcgi-pm-perl libencode-locale-perl
  libevent-core-2.1-6 libfcgi-perl libhtml-parser-perl libhtml-tagset-perl
  libhtml-template-perl libhttp-date-perl libhttp-message-perl libio-html-perl
  liblwp-mediatypes-perl libtimedate-perl liburi-perl mysql-client-5.7
  mysql-client-core-5.7 mysql-common mysql-server-5.7 mysql-server-core-5.7
Suggested packages:
  libdata-dump-perl libipc-sharedcache-perl libwww-perl mailx tinyca
The following NEW packages will be installed:
  libaio1 libcgi-fast-perl libcgi-pm-perl libencode-locale-perl
  libevent-core-2.1-6 libfcgi-perl libhtml-parser-perl libhtml-tagset-perl
  libhtml-template-perl libhttp-date-perl libhttp-message-perl libio-html-perl
  liblwp-mediatypes-perl libtimedate-perl liburi-perl mysql-client-5.7
  mysql-client-core-5.7 mysql-common mysql-server mysql-server-5.7
  mysql-server-core-5.7
0 upgraded, 21 newly installed, 0 to remove and 0 not upgraded.
Need to get 20.9 MB of archives.
After this operation, 162 MB of additional disk space will be used.
Do you want to continue? [Y/n]
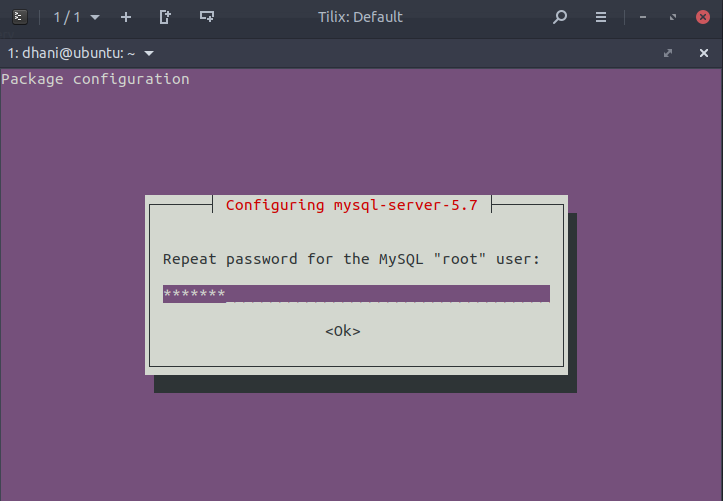
During installation, you will need to enter a password for root user.
Secure MySQL Installation
Now we need to perform a command to secure our MySQL installation.
mysql_secure_installation
Follow on screen wizard to complete this step
Enable and start MySQL service
sudo systemctl enable mysql
sudo systemctl start mysql
Step 3. Install PHP
Now we are going to install PHP and some other modules
sudo apt install php libapache2-mod-php php-mcrypt php-mysql mcrypt php-pear libmcrypt-dev
Output sample:
dhani@ubuntu:~$ sudo apt install php libapache2-mod-php php-mcrypt php-mysql mcrypt php-pear libmcrypt-dev
Reading package lists... Done
Building dependency tree
Reading state information... Done
The following additional packages will be installed:
  libapache2-mod-php7.1 libmcrypt4 libmhash2 php-common php-xml php7.1
  php7.1-cli php7.1-common php7.1-json php7.1-mcrypt php7.1-mysql
  php7.1-opcache php7.1-readline php7.1-xml
The following NEW packages will be installed:
  libapache2-mod-php libapache2-mod-php7.1 libmcrypt-dev libmcrypt4 libmhash2
  mcrypt php php-common php-mcrypt php-mysql php-pear php-xml php7.1
  php7.1-cli php7.1-common php7.1-json php7.1-mcrypt php7.1-mysql
  php7.1-opcache php7.1-readline php7.1-xml
0 upgraded, 21 newly installed, 0 to remove and 0 not upgraded.
Need to get 4496 kB of archives.
After this operation, 18.9 MB of additional disk space will be used.
Do you want to continue? [Y/n]
In most cases, we need to modify the Apache serves files when a directory is requested by users. We are going to modify the apache configuration to look for an index.php first.
sudo nano /etc/apache2/mods-enabled/dir.conf
Your current configuration should looks like this
<IfModule mod_dir.c>
DirectoryIndex index.html index.cgi index.pl index.php index.xhtml inde$
</IfModule># vim: syntax=apache ts=4 sw=4 sts=4 sr noet
We are going to move index.php in front of the line. Now it looks like this
<IfModule mod_dir.c>
DirectoryIndex index.php index.html index.cgi index.pl index.xhtml inde$
</IfModule># vim: syntax=apache ts=4 sw=4 sts=4 sr noet
Now restart apache2
sudo systemctl restart apache2
sudo systemctl status apache2
Make sure Apache status is active(running) and no errors detected.
Test PHP on web browser
We are going to create a new file called info.php. We put this file inside the web server directory which is /var/www/html
sudo nano /var/www/html/info.php
Paste these lines
<?php
phpinfo();
?>
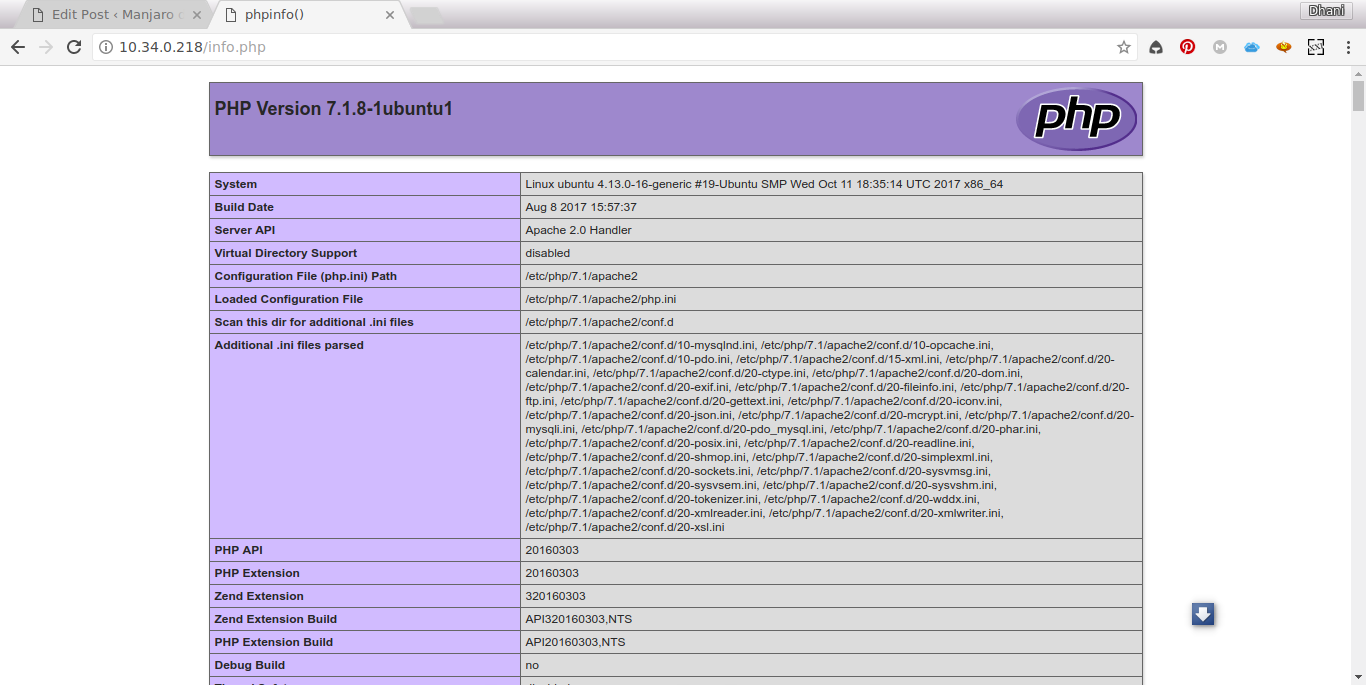
Close the file and now open web browser and type the server IP address with the following format
http://your-server-ip-address/info.php
You should see something like this
Conclusion
LAMP Server is a great way to build a powerful web application server. With this tool we can turn our Ubuntu 17.10 into a powerful web server. Its not difficult to install LAMP Server on Ubuntu 17.10. With a little efforts we can have this things done in few minutes.


Leave a Reply