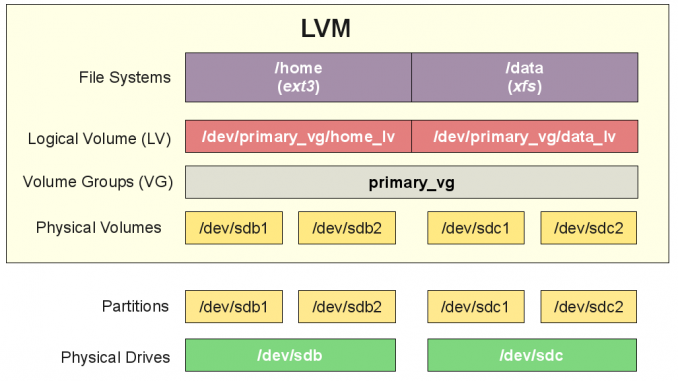
Ubuntu Tutorial – On this short tutorial, I will show you how to add new disk to existing volume group. By adding more disks to the pool, we can have an extensive size of a volume group. This can be useful when we are running out of disk space on a logical volume and need to expand its size.
Scope
This tutorial will guide you the following:
- Create new physical volume
- Add PV to existing Volume Group
Create Physical Volume
Before we can add the disk to the VG, we need to create a PV(Physical Volume). On the previous tutorial, I have shown how to create physical volume. The following command will create new physical volume on /dev/vdc disk. Check your disk using fdisk -l command.
pvcreate /dev/vdc
Add Physical Volume to Existing Volume Group
After we created the new PV on the new disk, now we can add this PV to existing VG.
root@ubuntu-server:~# vgextend manjaro_lvm /dev/vdc
  Volume group "manjaro_lvm" successfully extended
manjaro_lvm is the VG name, and /dev/vdc is my new physical volume. Now our VG has been extended with new hard disk. We can check it using vgdisplay command
Before extended:
--- Volume group ---
  VG Name               manjaro_lvm
  System ID
  Format                lvm2
  Metadata Areas        1
  Metadata Sequence No  1
VG Access             read/write
  VG Status             resizable
  MAX LV                0
  Cur LV                0
  Open LV               0
  Max PV                0
  Cur PV                1
  Act PV                1
  VG Size               20.00 GiB
  PE Size               4.00 MiB
  Total PE              5119
  Alloc PE / Size       0 / 0
  Free  PE / Size       5119 / 20.00 GiB
  VG UUID               2RTcyM-yHcM-qgrc-NZjs-ydf9-ZIRF-tZ5wJy
After Extended
--- Volume group ---
  VG Name               manjaro_lvm
  System ID
  Format                lvm2
  Metadata Areas        2
  Metadata Sequence No  3
  VG Access             read/write
  VG Status             resizable
  MAX LV                0
  Cur LV                1
  Open LV               1
  Max PV                0
  Cur PV                2
  Act PV                2
  VG Size               44.99 GiB
  PE Size               4.00 MiB
  Total PE              11518
  Alloc PE / Size       1280 / 5.00 GiB
  Free  PE / Size       10238 / 39.99 GiB
  VG UUID               2RTcyM-yHcM-qgrc-NZjs-ydf9-ZIRF-tZ5wJy
You can see the VG size is now changed to 44.99 GiB.

Leave a Reply