In this article, we will learn how to create macOS Monterey ISO. In the previous article, I have shown how to download the macOS Monterey without developer account. By the end of the process you will get a new file called Install macOS 12 Beta in your Applications folder. In case you need this installer to be available in other formats, we will need to convert it first. For example, if we want to install macOS Monterey on a Proxmox , then we need to create the macOS Monterey ISO. Otherwise the Proxmox system won’t be able to use the installer properly.

Steps to Create macOS Monterey ISO
Step 1. Download the installer
On a Mac, or Hackintosh, download the macOS Monterey installer. As I mentioned above, you can use the trick below to download macOS 12 Monterey Beta without developer account.
https://manjaro.site/how-to-download-macos-12-monterey-beta-without-developer-account/
Step 2. Create a drive and attach it
Open Terminal in macOS and then execute this command to create a new temporary drive.
hdiutil create -o /tmp/monterey.cdr -size 15000m -layout SPUD -fs HFS+J
The command will create a new drive called Monterey.cdr under the /tmp directory. Now we need to attach the new drive.
hdiutil attach /tmp/monterey.cdr.dmg -noverify -mountpoint /Volumes/monterey_disk
Output

Step 3. Create Installation Media in the new drive
From the step 1, we have a new bundle app called Install macOS 12 Beta. Now we will create an installation media from this bundle app.
sudo /Applications/Install\ macOS\ 12\ Beta.app/Contents/Resources/createinstallmedia --volume /Volumes/monterey_disk
Enter your password when asked. This process will take sometime. Please be patient.

As you can see, at the end of the process it says: Install media now available at “/Volumes/Install macOS 12 Beta”
Step 4. Convert to ISO
Now move the disk to the desktop for ease of use
mv /tmp/monterey.cdr.dmg ~/Desktop/InstallSystem.dmg
Now you should see the InstallSystem.dmg is available in your Desktop. Next, let’s detach the drive
hdiutil detach /Volumes/Install\ macOS\ 12\ Beta
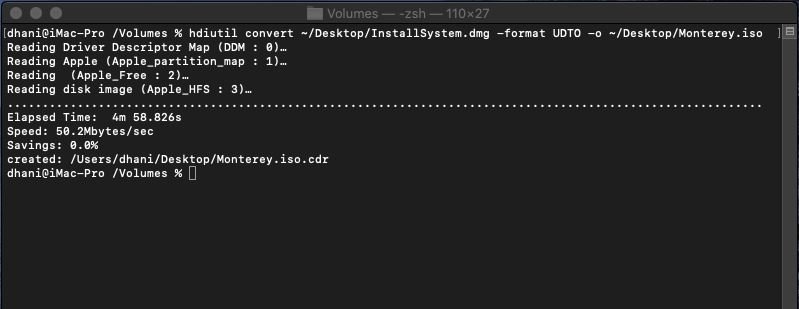
Now convert the InstallSystem.dmg to iso with this command
hdutil convert ~/Desktop/InstallSystem.dmg -format UDTO -o ~/Desktop/Monterey.iso
This process will take some time, so be patient.

Finally, rename the Monterey.iso.cdr to Monterey.iso with this command
mv ~/Desktop/Monterey.iso.cdr ~/Desktop/Monterey.iso
Done. Now you should have Monterey.iso in your Desktop. Thanks for reading this tutorial how to create macOS Monterey ISO.

Leave a Reply