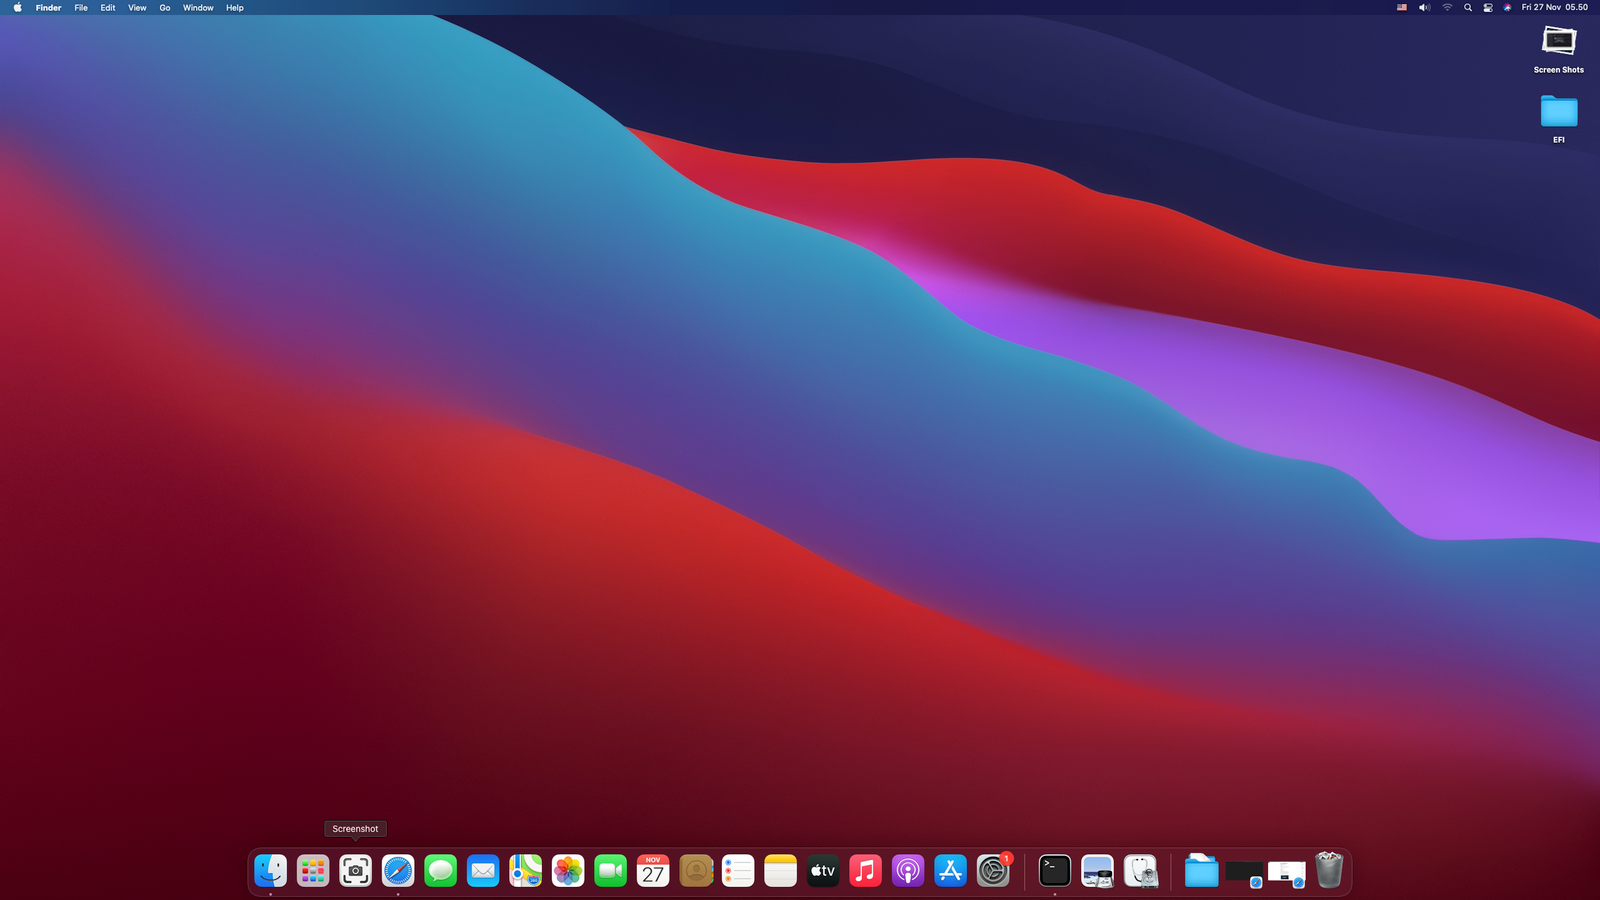
Hello Hackintosh lovers. I am very excited to write this article. After 6 hours of waiting, now I run the latest macOS Big Sur 11.0.1 on my AMD FX PC. Thanks to OpenCore team the made this possible. I spent hours to test and troubleshoot the EFI folder for this macOS Big Sur. But the wait is paid off. I have successfully replaced my macOS Catalina with the new macOS Big Sur on AMD FX processor.
At the end of this post, you can download my EFI folder and you can test it on your PC. But before we jump into that part, I will explain every steps to successfully install macOS Big Sur on AMD FX. Be patient because this will be a pretty long article. Thanks to Dortania and the team behind it who made this possible. I highly recommended you read the guide on the Dortania page. It is boring but very important.
What works:
Basically almost every hardware works as expected including:
- Graphic accelerator (Radeon RX 570)
- Shutdown, Restart
- Audio
- Ethernet
Not Working:
- Sleep
- Safari keep crashing when playing YouTube videos (Switch to Google Chrome is recommended)
Steps to Install macOS Big Sur on AMD FX using OpenCore
Prerequisites
- 16 GB or 32 GB USB stick
- Fast internet connection (to download macOS Big Sur)
- Patience – The Big Sur installation itself took me about 4-5 hours. That is insane.
- A Mac or Hackintosh (the Windows version tutorial will be available soon after this).
My System Configuration
- AMD FX 8350
- Gigabyte GA-970A-D3P
- Realtek Ethernet
- RAM 16 GB DDR3
- MSI AMD Radeon RX 570 8 GB graphic card
Step 1. Create macOS Big Sur USB installer
There are several ways to create the macOS Big Sur installation media. If you are running Windows, you can follow the steps here. But if you have a Mac or a Hackintosh, you can use the method I explain below.
Step 2. Configure the EFI
The following guide is for Mac or Hackintosh users only. The Windows version will be available soon on this website.
Mount the EFI partition on the USB
After you have successfully created the USB Installer, now download MountEFI. It is a command-line tool to mount the EFI partition in the USB installer.
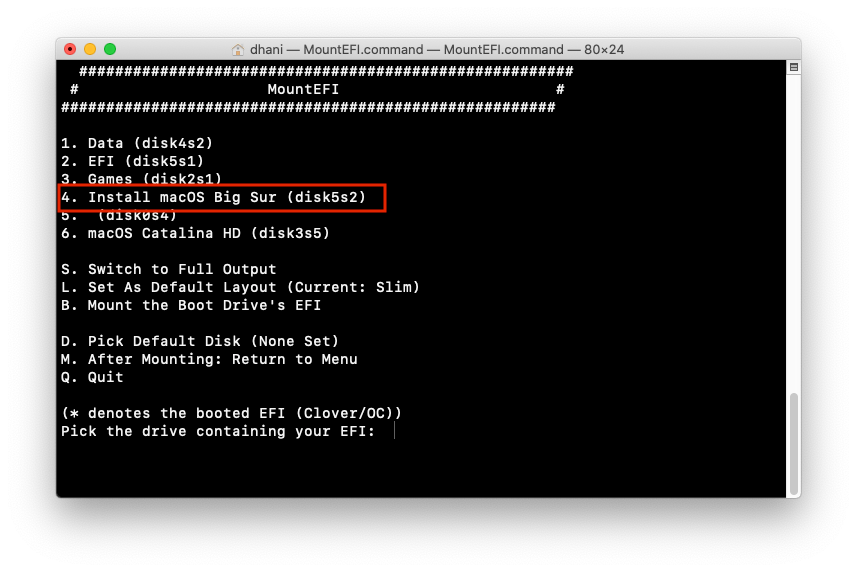
In my case, I typed 4 and press Enter. And then the EFI partition showing up on my Desktop. This partition is empty and we will configure it.
Download EFI Folder for AMD FX
I got this EFI folder from AMD OSX Forum but unfortunately, I cannot check which OpenCore version this is. I made some adjustments to my build to work with this EFI. Thanks to the one who made this EFI. I tried to use the latest OpenCore 0.6.3 but my keyboard doesn’t work and still needs some adjustment. I will post it later when I have finished configuring it.
This OpenCore EFI already configured for most AMD FX systems. All the drivers, ACPI, Kexts files are already included.
Download EFI for AMD FX BigSur
Extract the ZIP file and then copy the EFI folder to the EFI partition of your USB Installer. So now, your EFI folder will look like this
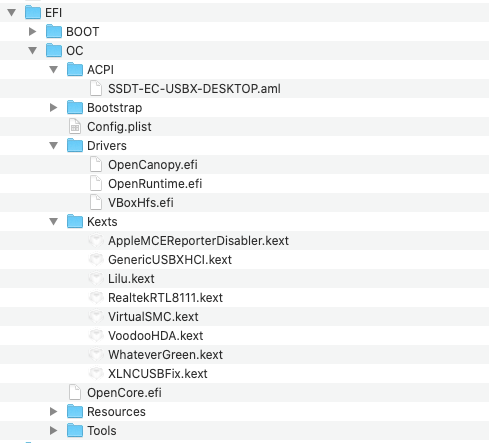
Basically, now you can try to boot your PC with the USB installer if your system is similar to mine. Jump to Step 3, the BIOS Settings.
If you have a non-Realtek ethernet chipset on the motherboard
The following steps are needed if your motherboard has an ethernet chipset other than Realtek. First, download the ethernet kexts that match with your motherboard chipset. You can grab it from the following link
https://dortania.github.io/OpenCore-Install-Guide/ktext.html
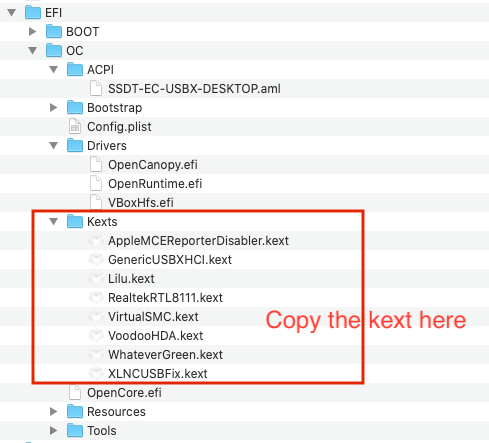
Scroll down to the Ethernet section and you should see a list of different chipsets there. Download the kext and then copy it to the Kexts folder in the EFI folder. Don’t forget to remove the RealtekRTL8111.kext from the Kexts folder because we don’t need it.
Perform OC Clean Snapshot
Open ProperTree software and then open the config.plist file inside the OC folder.
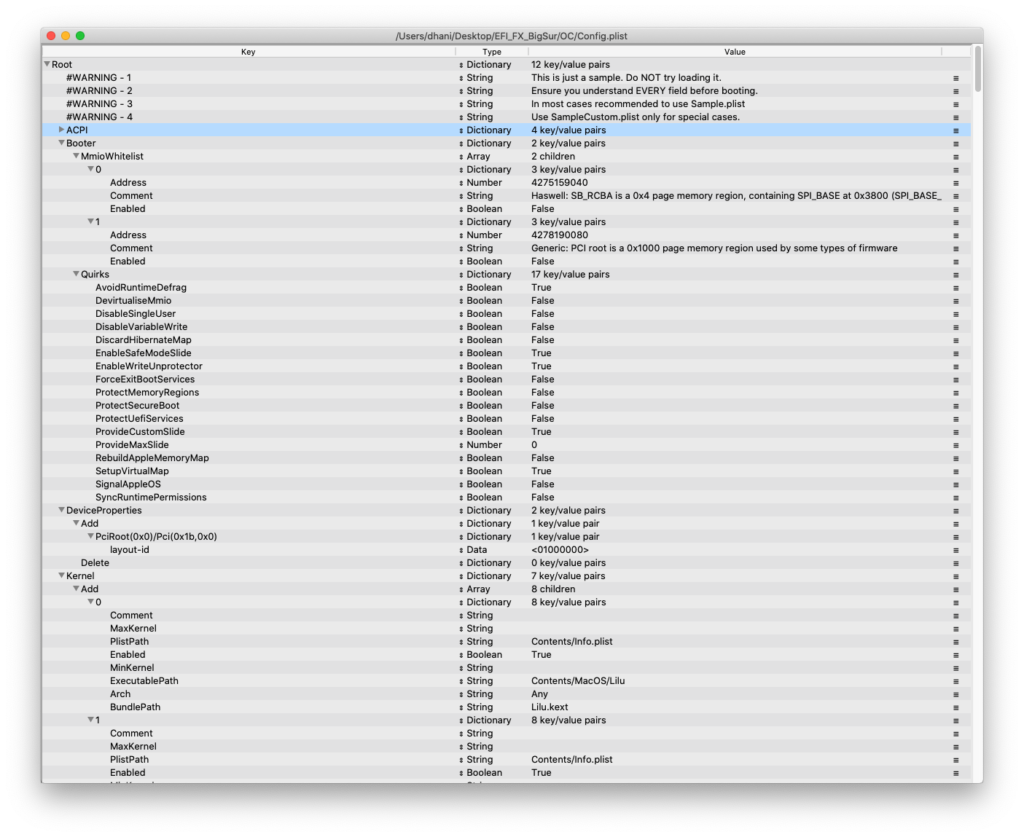
Now go to File >>OC Clean Snapshot and select the OC folder in the EFI folder.
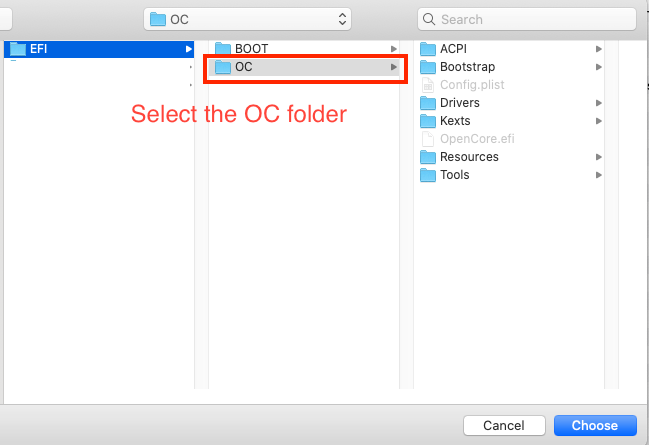
Click Choose and you are done.
Step 3. BIOS Settings
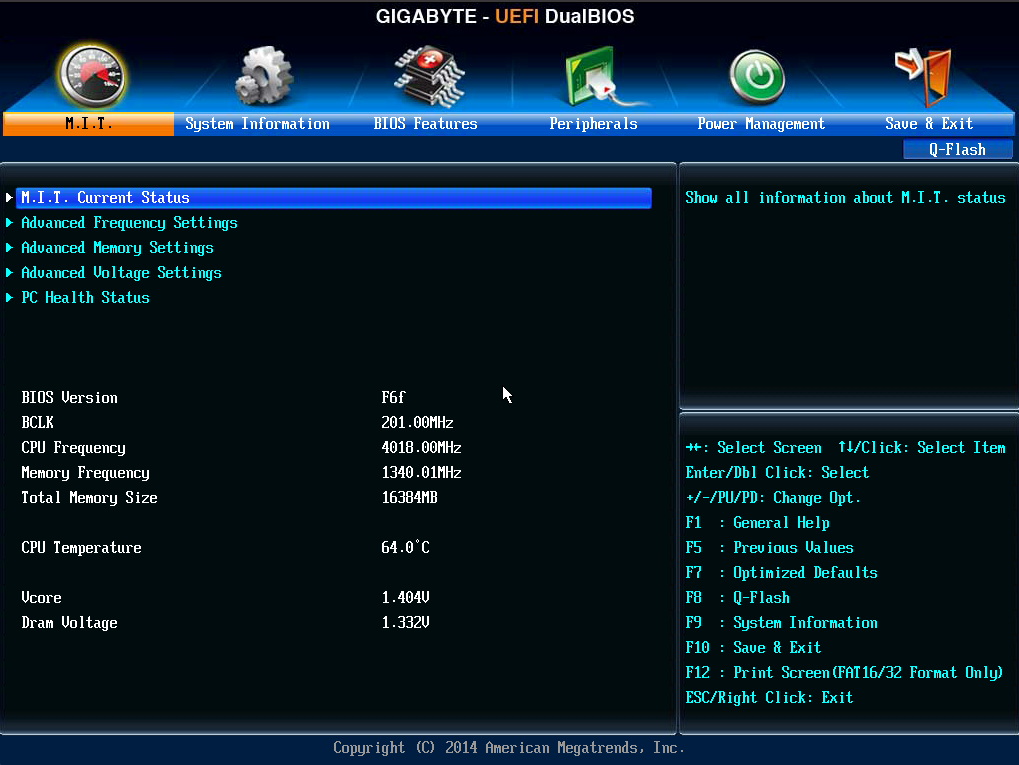
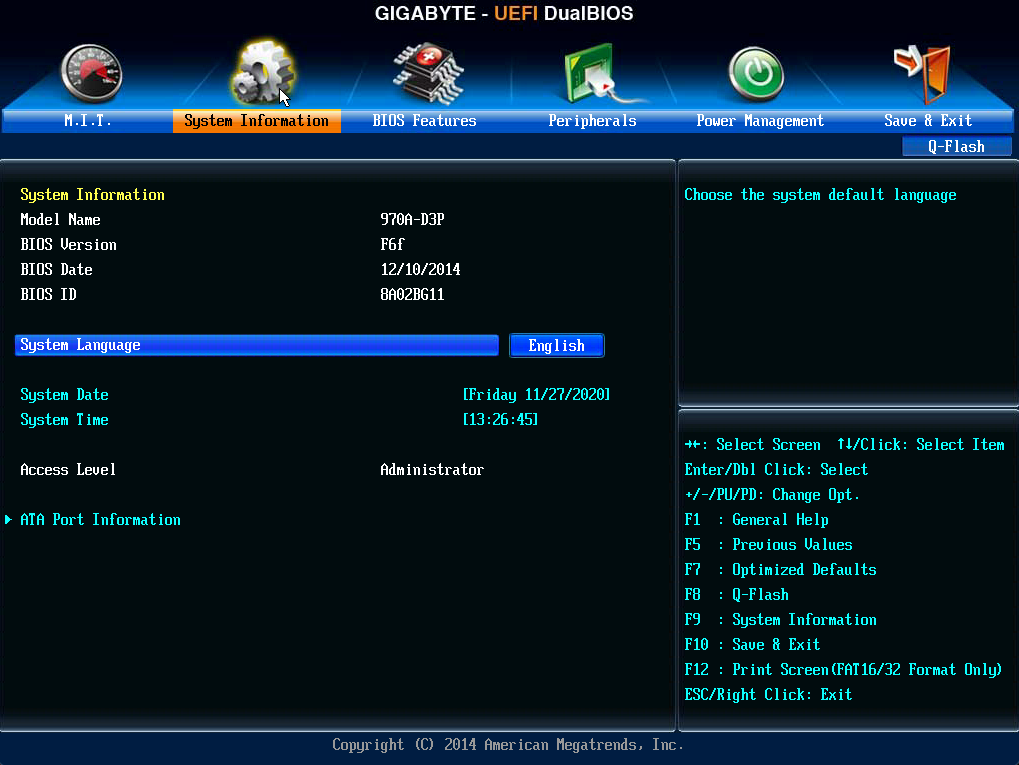
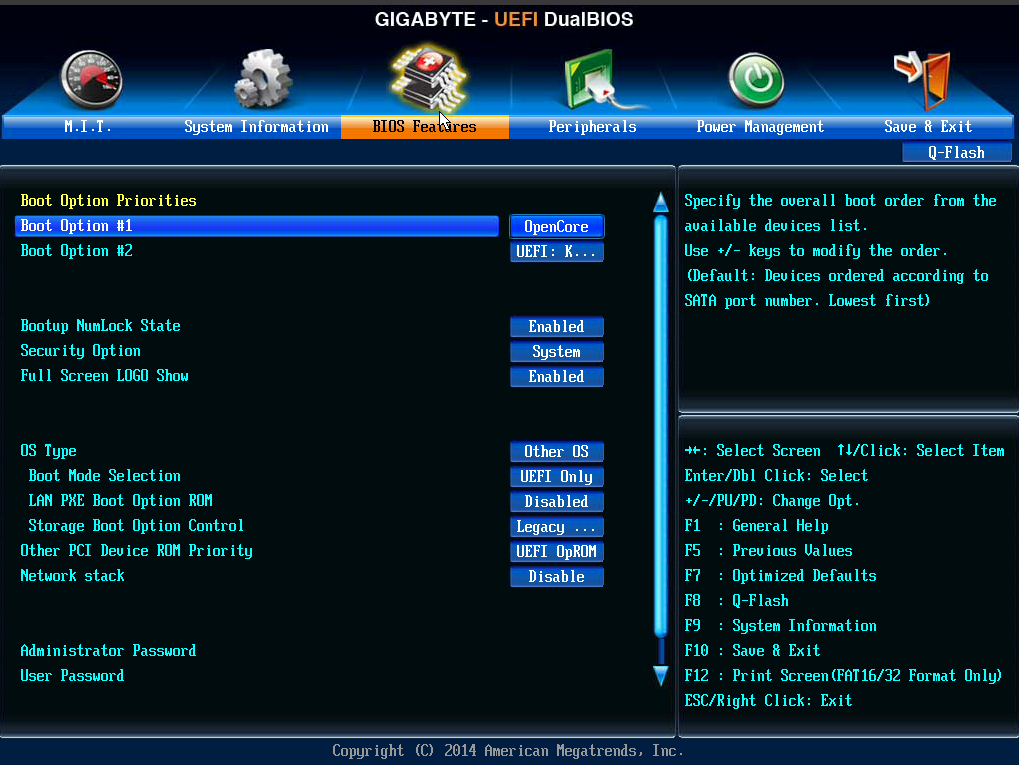
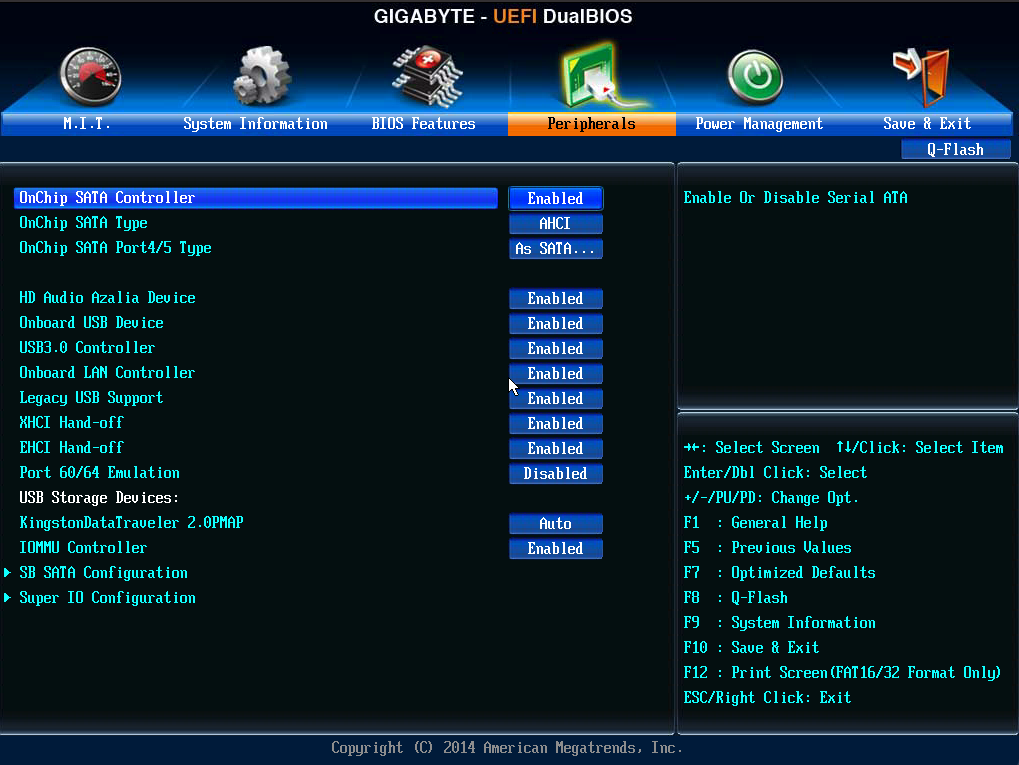
It is essential to correctly set up the BIOS for Hackintosh. Based on the official OpenCore guide, we need to enable and disable some BIOS features as follow
Disable
- Fast Boot
- Secure Boot
- Serial/COM Port
- Parallel Port
- Compatibility Support Module (CSM)(Must be off, GPU errors like
gIOare common when this option in enabled)
Enable
- Above 4G decoding(This must be on if you can’t find the option then add
npci=0x2000to boot-args. Do not have both this option and npci enabled at the same time) - EHCI/XHCI Hand-off
- OS type: Windows 8.1/10 UEFI Mode
- SATA Mode: AHCI
Here are some screenshots of my BIOS
Step 4. Install macOS Big Sur
After setting the BIOS, now boot the PC with the USB. Make sure you boot from the USB. Choose Install macOS Big Sur and wait until it reached the graphical menu. I am not going to explain every steps here because it is pretty straight-forward. The only thing that needs your attention is formatting the disk.
Format the disk using Disk Utility
Select your disk from the list. Click Show All Devices to see the hard disks connected to your PC.
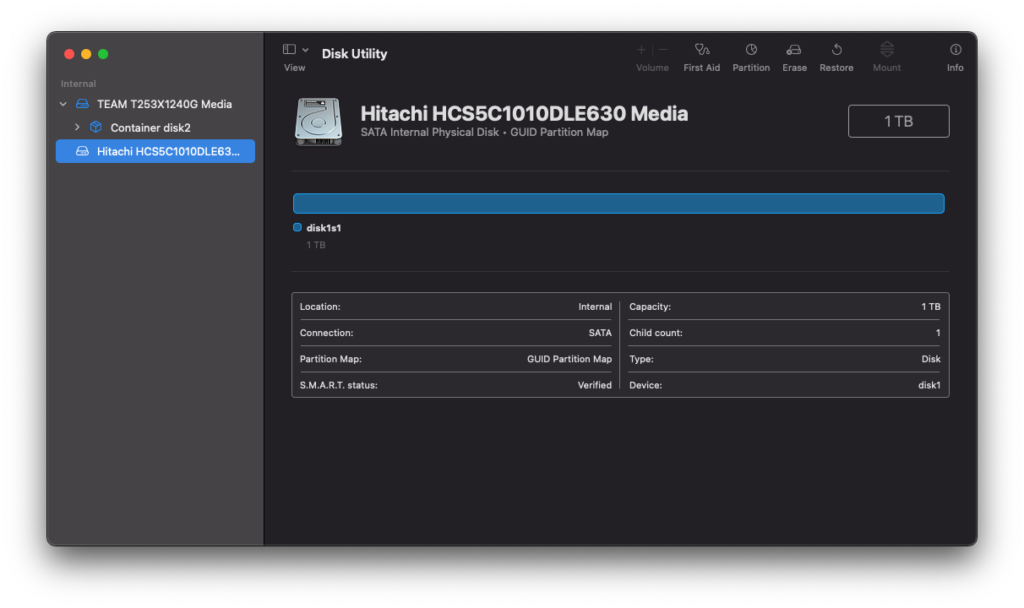
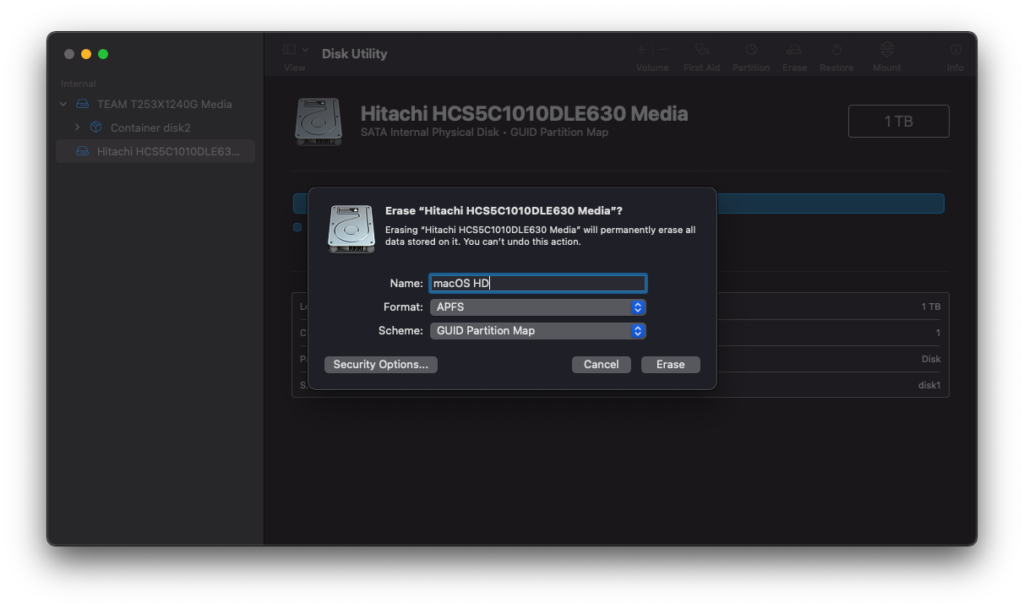
Next, click Erase and give the disk a name. Make sure you choose APFS and GUID Partition Format as shown below
Next, close the Disk Utility and then choose Install macOS Big Sur. Please be patient. macOS Big Sur installation is very long. It took me more than 5 hours. At about 14 minutes remaining, it will take longer than 14 minutes. So, don’t skip or cancel it. The computer will restart few times.
Step 5. Copy the EFI Folder to the Big Sur Hard Disk
After the macOS Big Sur is installed, you will need to copy the EFI folder from the EFI partition from the USB drive to the EFI partition on the hard drive. To do this, you will need the MountEFI software to mount the EFI partitions. Simply copy the folder and you are done. By doing this, you will not need the USB Installer in order to boot macOS Big Sur.
Thanks for reading this article. I hope you find it useful to build your own macOS Big Sur Hackintosh on AMD FX using OpenCore.

download link offline
Download EFI for AMD FX BigSur
Link Offline please fix bro.