Hello everyone, it’s time to install Oracle Database 18c on Oracle Linux 7.6. This tutorial will guide you to install Oracle Database 18c Express Edition (XE) on Oracle Linux 7.6. You can also use this tutorial to install on a CentOS 7 Linux.
Installing Oracle Database on Linux is not as simple as installing MySQL or PostgreSQL database. There are a lot of things to take care of. I hope you already have a basic experiences of using Terminal in Linux because most of the installation steps are done via Terminal. So, get ready to get your hands dirty 🙂
Step 1. Download Installation Files
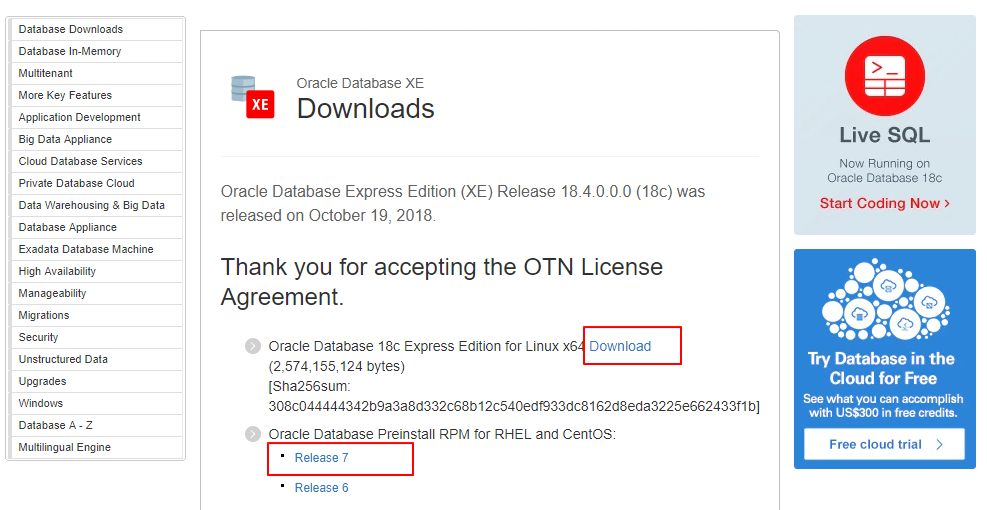
First, we need to download the Oracle 18c XE installation file for Linux (RPM) and also the Oracle pre-install file (RPM). You can obtain these two files from the following links:

Save the two files in your download directory for example /home/oracle/Downloads
Step 2. Installation
Install Oracle Database PreInstall package
Next, we need to install the Oracle Database PreInstall RPM file. In this case, my file name would be: oracle-database-preinstall-18c-1.0-1.el7.x86_64.rpm.
Logon as oracle user and then type su – to become root from Terminal.
[oracle@server Downloads]$ su -
Password:
[root@server Downloads]#
Now install it using the following command
yum -y localinstall oracle-database-preinstall-18c-1.0-1.el7.x86_64.rpm
Make sure the installation is complete with no errors

Install Oracle Database 18c XE
Use this command as root to install the Oracle Database package. Make sure the installation finish completely with no errors.
su -
yum -y localinstall oracle-database-xe-18c-1.0-1.x86_64.rpm

Step 3. Create and Configure Database
Now we are going to create a new database and configure it. Logon as oracle and then run “su -” to switch to root.
[oracle@server ~]$ su -
Password:
Last login: Mon Jan 21 11:26:10 WIB 2019 on pts/1

[root@server ~]# /etc/init.d/oracle-xe-18c configure
Please monitor your Terminal because you will be asked to create a new password for sys, system and

At this point, we now have an Oracle Database 18c which we can connect to. But, we still have something to do to complete the Oracle Database 18c XE installation steps.
Configure the database
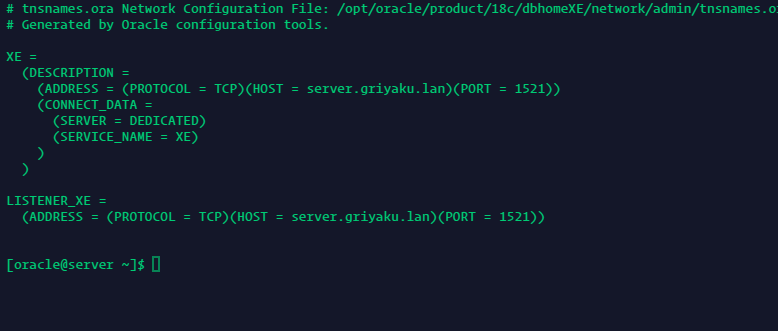
Let’s check the content of the tnsnames.ora file in the following folder
/opt/oracle/product/18c/dbhomeXE/network/admin
cat /opt/oracle/product/18c/dbhomeXE/network/admin/tnsnames.ora
Content:

Now let’s edit this file and add our pluggable database into it.
 cp /opt/oracle/product/18c/dbhomeXE/network/admin/tnsnames.ora /opt/oracle/product/18c/dbhomeXE/network/admin/tnsnames.bak

nano
/opt/oracle/product/18c/dbhomeXE/network/admin/tnsnames.ora
Now add the following lines to the end of the tnsnames.ora:
XEPDB1 =
  (DESCRIPTION =
    (ADDRESS = (PROTOCOL = TCP)(HOST = server.griyaku.lan)(PORT = 1521))
    (CONNECT_DATA =
      (SERVER = DEDICATED)
      (SERVICE_NAME = XEPDB1)
    )
  )
Don’t forget to change the domain server.griyaku.lan with your domain name. Or, you can also use the server IP address.
Now, let’s edit the ./bash_profile file.
nano ~/.bash_profile
Add the following lines:
export ORACLE_BASE=/opt/oracle/
export LD_LIBRARY_PATH=/opt/oracle/product/18c/dbhomeXE/lib
export ORACLE_HOME=/opt/oracle/product/18c/dbhomeXE
export PATH=$ORACLE_BASE/product/18c/dbhomeXE/bin:$PATH
export PATH=/usr/bin:$PATH
export ORACLE_SID=XE
Now execute this command to activate it
source ~/.bash_profile
Connect to Database using SQLPlus
Now let’s try to connect to the database using SQLPlus tool. Use the following command to connect to the database
[oracle@server ~]$ sqlplus

 SQL*Plus: Release 18.0.0.0.0 - Production on Tue Jan 22 22:41:56 2019
 Version 18.4.0.0.0
 Copyright (c) 1982, 2018, Oracle.  All rights reserved.
 Enter user-name: sys as sysdba
 Enter password:

 Connected to:
 Oracle Database 18c Express Edition Release 18.0.0.0.0 - Production
 Version 18.4.0.0.0

 SQL>
Restart the Database
Now it’s time to test the database restart. This ensure the database will run automatically after system restart. To enable the Oracle XE database to start automatically during system boot, use this command below
su -
systemctl daemon-reload
systemctl enable oracle-xe-18c
You can also use the Oracle SQL command to start and stop the database. Login to Oracle using SQLPlus and then use the following command.
$ sqlplus
Enter user-name: sys as sysdba
Enter password:
To stop the database use this command:
SQL> shutdown immediate
To Start the database use this command:
SQL> startup
Step 4. Configure Oracle Enterprise Manager
By default we can only open or access the Enterprise Manager from the localhost. To access the EM web interface from the network client, we need to execute this SQL command.
Login to Oracle using SQLPlus
sqlplus sys as sysdba
EXEC DBMS_XDB.SETLISTENERLOCALACCESS(FALSE);
exit;
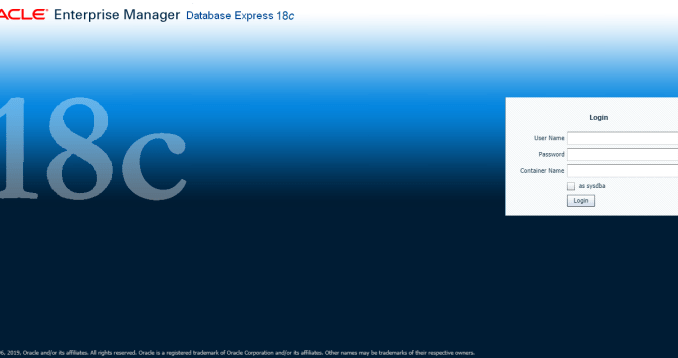
Now open a web browser and type the following address. Don’t forget to change the domain with your server domain name/ip address.
https://192.168.100.99:5500/em
Closing Word
With some efforts, finally I can install and run Oracle Database 18c XE on my Oracle Linux. Thanks for coming and I hope you enjoy this article. See you on the next tutorials.

excellent