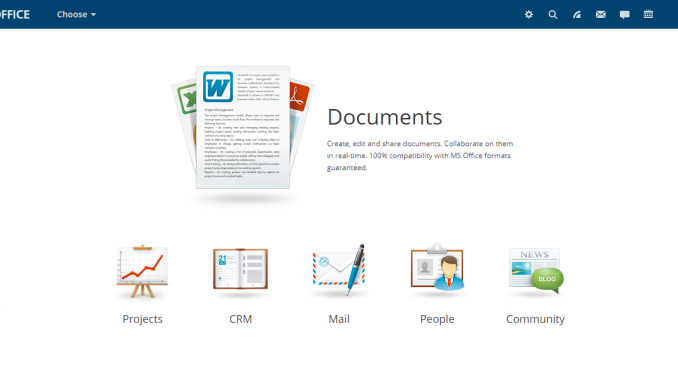
Hello everyone, welcome to my personal blog. Today, we are going to discuss
Today, I am going to show you how to install OnlyOffice Community Server on CentOS 7. Please note that the OnlyOffice Community Server does not comes with online editor. Which means, we cannot edit the documents via web browser. If you want this editor features, we need to install the OnlyOffice Document Server. I will discuss this near in the future.
Prerequisites
Before we go through the installation, we need the following in hands:
- Root privileges
- Internet connection
- Basic understanding of Terminal commands
Steps to Install OnlyOffice Community Server on CentOS 7
Step 1. Installing software dependencies
OnlyOffice needs some packages such as NGINX, Mono and Node.js. So, we need to install these software prior to OnlyOffice installation.
Install Mono
To install Mono on CentOS 7, first add the repository. Run the following commands on Terminal
rpm --import "http://keyserver.ubuntu.com/pks/lookup?op=get&search=0x3FA7E0328081BFF6A14DA29AA6A19B38D3D831EF"
yum-config-manager --add-repo http://download.mono-project.com/repo/centos/
Now let’s install mono with this command
yum install mono-complete
For more information installing Mono on CentOS or other system, please visit the official website. Check the Mono installation by using this command
mono --version
Output:
[root@server oracle]# mono --version
Mono JIT compiler version 5.18.0.240 (tarball Thu Jan 17 08:37:29 UTC 2019) Copyright (C) 2002-2014 Novell, Inc, Xamarin Inc and Contributors.
www.mono-project.com
TLS:           __thread
SIGSEGV:       altstack
Notifications: epoll
Architecture:  amd64
Disabled:      none
Misc:          softdebug
Interpreter:   yes
LLVM:          yes(600)
Suspend:       preemptive
GC:            sgen (concurrent by default)
Install NginX
We are going to create a new repo for nginx and install nginx web server. Create a new repo file nginx.repo under /etc/yum.repos.d
nano /etc/yum.repos.d/nginx.repo
Now paste these lines
[nginx]name=nginx repobaseurl=http://nginx.org/packages/centos/$releasever/$basearch/gpgcheck=0enabled=1
Now install nginx with this command
yum install nginx
For more information, I would recommend you to visit this page.
Install MySQL Server Community Edition
You will need to download a file from this link. Select the correct package for CentOS 7 (.rpm). And then install the rpm package. Or, simply use these command to download and install it
wget https://repo.mysql.com//mysql80-community-release-el7-2.noarch.rpm
yum localinstall mysql80-community-release-el7-2.noarch.rpm
yum install mysql-community-server
The command will install MySQL Community Server. For more information about installing MySQL on CentOS, please visit this page. Once the installation complete, let’s continue configuring the MySQL Server.
systemctl start mysqld
After starting the MySQL Server, we need to change the password for the MySQL root user. First, we need to get the default password
grep 'temporary password' /var/log/mysqld.log
You will see the password generated for the root user. Copy the password and we need to change it immediately.
mysql -u -root -p
alter user 'root'@'localhost' identified by 'YourNewPasswordHere';
So now, we have MySQL up and running.
Step 2. Install OnlyOffice Community Server
After completing the prerequisites installation, we can continue to install the OnlyOffice Community Server.
Add the GPG key
rpm --import "http://keyserver.ubuntu.com/pks/lookup?op=get&search=0x8320CA65CB2DE8E5"
Add repository
Now create a new onlyoffice.repo file in /etc/yum.repos.d directory.
nano /etc/yum.repos.d/onlyoffice.repo
Paste these lines
[onlyoffice]name=onlyoffice repobaseurl=http://download.onlyoffice.com/repo/centos/main/noarch/gpgcheck=1enabled=1
Now install the OnlyOffice Community Server with this command
yum install onlyoffice-communityserver
Now continue configure the Community Server
bash communityserver-configure.sh
You will need to supply your MySQL host and MySQL root password during this process. This process will take some times. After completes, open the web browser and type the server IP address or domain. For example:
http://localhost
or
http://server.griyaku.lan
We need to create a password for the administrator user.

Now enjoy the OnlyOffice Community Server

Thank you for reading this tutorial how to install OnlyOffice Community Server on CentOS. I hope you enjoy it and see you next time.

Incomplete, missing directory, missing most important things…..
hello
please your help
where is the communityserver-configure.sh file, i can not find it out
thanks in advance for your help