Even Ubuntu 17.04 is not LTS version, some of you might wonder if this version can be used for server purposes. I personally not recommended to use Ubuntu 17.04 for a main server in a production machine because the official support to this release is only 9 month until January 2018 (Ubuntu Wiki). Regardless the support and life span of Ubuntu 17.04, I will show you how to use Ubuntu 17.04 as a LAMP Stack. You may want to take a look at my previous post on video tutorial to install Ubuntu 17.04.
Steps to install LAMP on Ubuntu 17.04
Step 1. Update Ubuntu
It is recommended to have the most recent packages installed on your system.
sudo apt update && sudo apt upgrade
Step 2. Install Apache Web server
This step will install Apache web server on Ubuntu 17.04.
ubuntu@ubuntu-server:~$ sudo apt install apache2
[sudo] password for ubuntu:
Reading package lists... Done
Building dependency tree
Reading state information... Done
The following additional packages will be installed:
  apache2-bin apache2-data apache2-utils libapr1 libaprutil1 libaprutil1-dbd-sqlite3 libaprutil1-ldap liblua5.2-0 ssl-cert
Suggested packages:
  www-browser apache2-doc apache2-suexec-pristine | apache2-suexec-custom openssl-blacklist
The following NEW packages will be installed:
  apache2 apache2-bin apache2-data apache2-utils libapr1 libaprutil1 libaprutil1-dbd-sqlite3 libaprutil1-ldap liblua5.2-0 ssl-cert
0 upgraded, 10 newly installed, 0 to remove and 0 not upgraded.
Need to get 1,597 kB of archives.
After this operation, 6,594 kB of additional disk space will be used.
Do you want to continue? [Y/n]
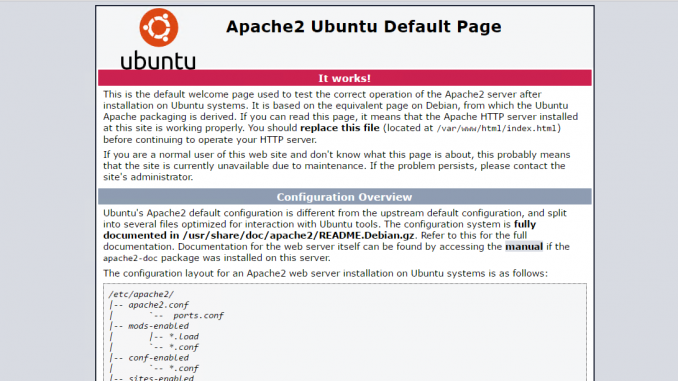
Check the web server
Open a web browser from other computer and type the server IP address. It should shows something like this

Enable Apache on boot
sudo systemctl enable apache2
Step 3. Install MySQL
The following step will install MySQL Server on Ubuntu 17.04
ubuntu@ubuntu-server:~$ sudo apt install mysql-server
Reading package lists... Done
Building dependency tree
Reading state information... Done
The following additional packages will be installed:
  libaio1 libcgi-fast-perl libcgi-pm-perl libencode-locale-perl libevent-core-2.0-5 libfcgi-perl libhtml-parser-perl libhtml-tagset-perl libhtml-template-perl
  libhttp-date-perl libhttp-message-perl libio-html-perl liblwp-mediatypes-perl libtimedate-perl liburi-perl mysql-client-5.7 mysql-client-core-5.7 mysql-common
  mysql-server-5.7 mysql-server-core-5.7
Suggested packages:
  libdata-dump-perl libipc-sharedcache-perl libwww-perl mailx tinyca
The following NEW packages will be installed:
  libaio1 libcgi-fast-perl libcgi-pm-perl libencode-locale-perl libevent-core-2.0-5 libfcgi-perl libhtml-parser-perl libhtml-tagset-perl libhtml-template-perl
  libhttp-date-perl libhttp-message-perl libio-html-perl liblwp-mediatypes-perl libtimedate-perl liburi-perl mysql-client-5.7 mysql-client-core-5.7 mysql-common
  mysql-server mysql-server-5.7 mysql-server-core-5.7
0 upgraded, 21 newly installed, 0 to remove and 0 not upgraded.
Need to get 22.0 MB of archives.
After this operation, 172 MB of additional disk space will be used.
Do you want to continue? [Y/n]
During installation, you will be asked to enter/provide root password for MySQL server. This password can be different with the system root password.
Now start and enable MySQL Server
root@ubuntu-server:~# systemctl start mysql
root@ubuntu-server:~# systemctl enable mysql
Synchronizing state of mysql.service with SysV service script with /lib/systemd/systemd-sysv-install.
Executing: /lib/systemd/systemd-sysv-install enable mysql
root@ubuntu-server:~# systemctl status mysql
● mysql.service - MySQL Community Server
   Loaded: loaded (/lib/systemd/system/mysql.service; enabled; vendor preset: enabled)
   Active: active (running) since Sun 2017-06-04 06:00:58 WIB; 2min 8s ago
 Main PID: 3901 (mysqld)
   CGroup: /system.slice/mysql.service
           └─3901 /usr/sbin/mysqld

Jun 04 06:00:57 ubuntu-server systemd[1]: Starting MySQL Community Server...
Jun 04 06:00:58 ubuntu-server systemd[1]: Started MySQL Community Server.
Step 4. Install PHP
ubuntu@ubuntu-server:~$ sudo apt install php php-mysql
[sudo] password for ubuntu:
Reading package lists... Done
Building dependency tree
Reading state information... Done
The following additional packages will be installed:
  libapache2-mod-php7.0 php-common php7.0 php7.0-cli php7.0-common php7.0-json php7.0-mysql php7.0-opcache
  php7.0-readline
Suggested packages:
  php-pear
The following NEW packages will be installed:
  libapache2-mod-php7.0 php php-common php-mysql php7.0 php7.0-cli php7.0-common php7.0-json php7.0-mysql
  php7.0-opcache php7.0-readline
0 upgraded, 11 newly installed, 0 to remove and 0 not upgraded.
Need to get 3,610 kB of archives.
After this operation, 14.6 MB of additional disk space will be used.
Do you want to continue? [Y/n]
Now we can check the PHP version
ubuntu@ubuntu-server:~$ php --version
PHP 7.0.18-0ubuntu0.17.04.1 (cli) (built: Apr 26 2017 23:59:48) ( NTS )
Copyright (c) 1997-2017 The PHP Group
Zend Engine v3.0.0, Copyright (c) 1998-2017 Zend Technologies
    with Zend OPcache v7.0.18-0ubuntu0.17.04.1, Copyright (c) 1999-2017, by Zend Technologies
At this point our LAMP Server on Ubuntu 17.04 is ready. We can then install various web applications such as WordPress, Owncloud, Pydio and some others.

THNX BRO YOU SAVED ME
Hi!
How would I upgrade for instance PHP to a higher version?