
Hello everyone, welcome to Manjaro.site. Today, I am going to show you how to uninstall Oracle Database 12c from Windows 10. Not like many other software, you will not be able to remove or uninstall Oracle Database using Add/Remove Programs feature on Windows 10. It needs a little efforts to completely remove the Oracle database and software. So, let’s get started.
So basically, I will show you the manual way to uninstall Oracle. It’s working very well on my case. This method can be used on any Windows version not only Windows 10.
Steps to Uninstall Oracle Database 12c from Windows 10
Step 1. Delete Oracle Environment Variable from Windows 10
To do this, right-click on “This PC” from the Explorer window and then click Properties. Then, click Advanced Settings from that window.
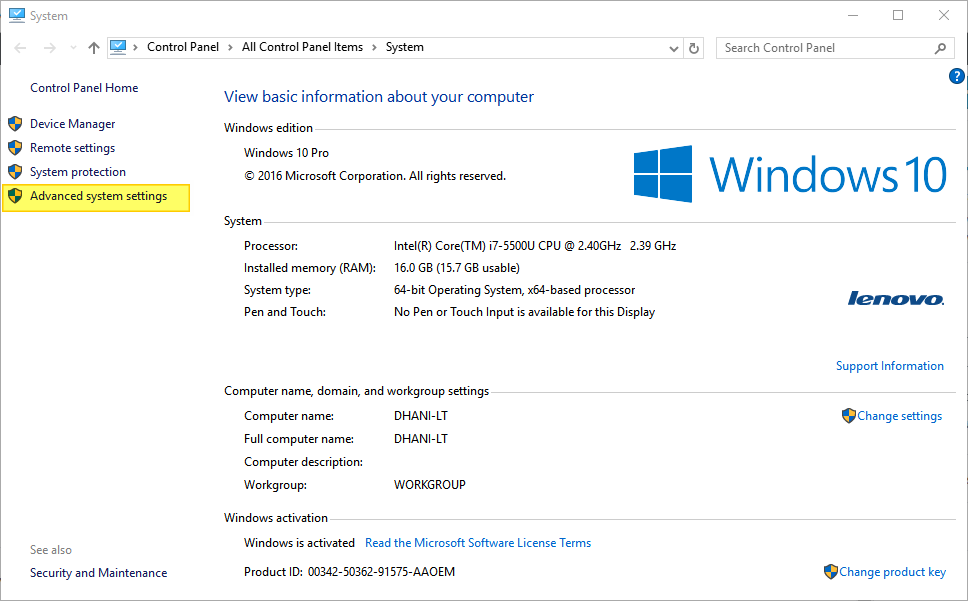
Next, you should see the Advanced Settings window as follow.
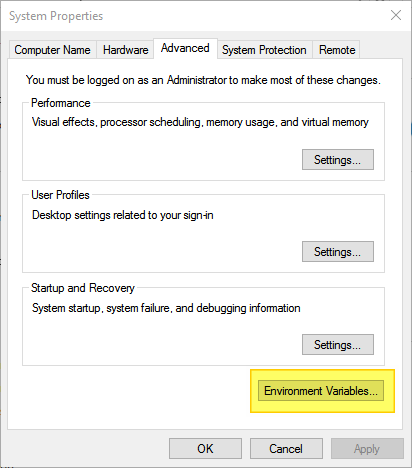
Click the Environment variables and then in the System Variables, you should see Path.
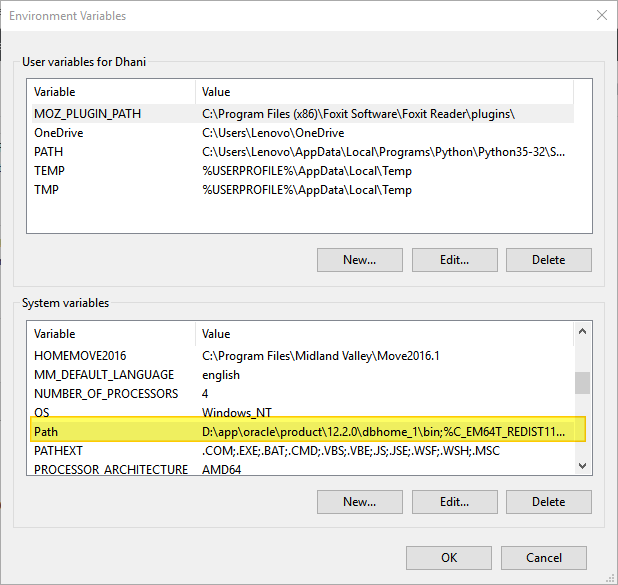
Click Edit on the Path. And the following window will open up
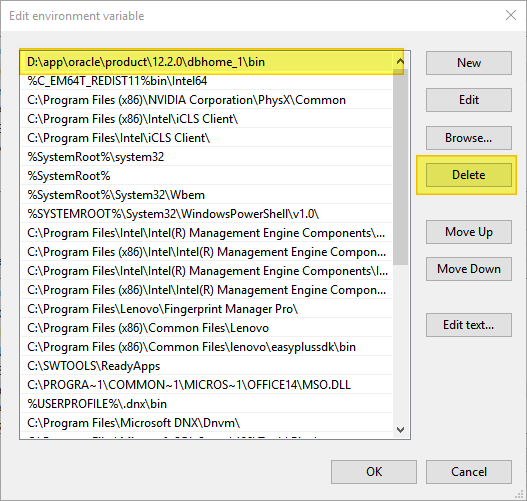
Find the Oracle path, and then click Delete. In my case, I install Oracle under D:\app\oracle\xxx. This value could be different with yours. Click OK when finish.
Step 2. Delete the Oracle Registry Entries from Windows 10
The next step is to delete all the Oracle registry entries from Windows. To do this, open Registry Editor. Click Windows button and type regedit. Since we are going to edit the Windows registry, we would recommend to backup your registry prior to edit it.
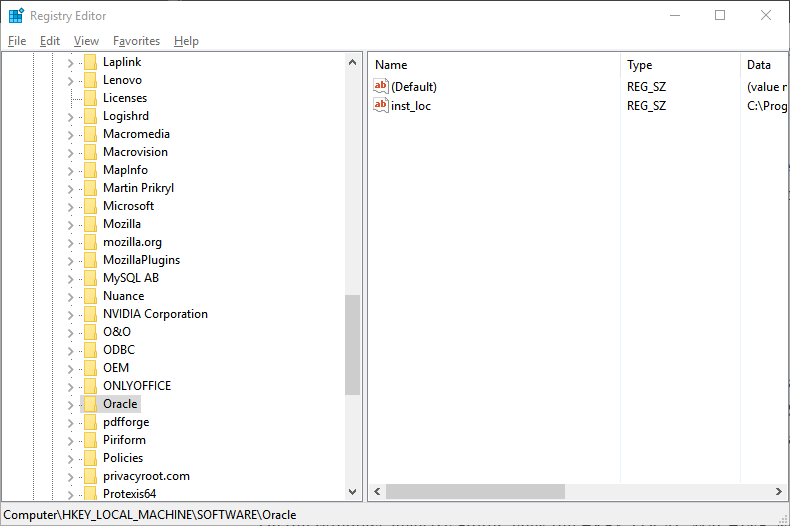
On the Windows Registry Editor, click the HKEY_LOCAL_MACHINE. Next, click Software and then find the Oracle directory as shown below.
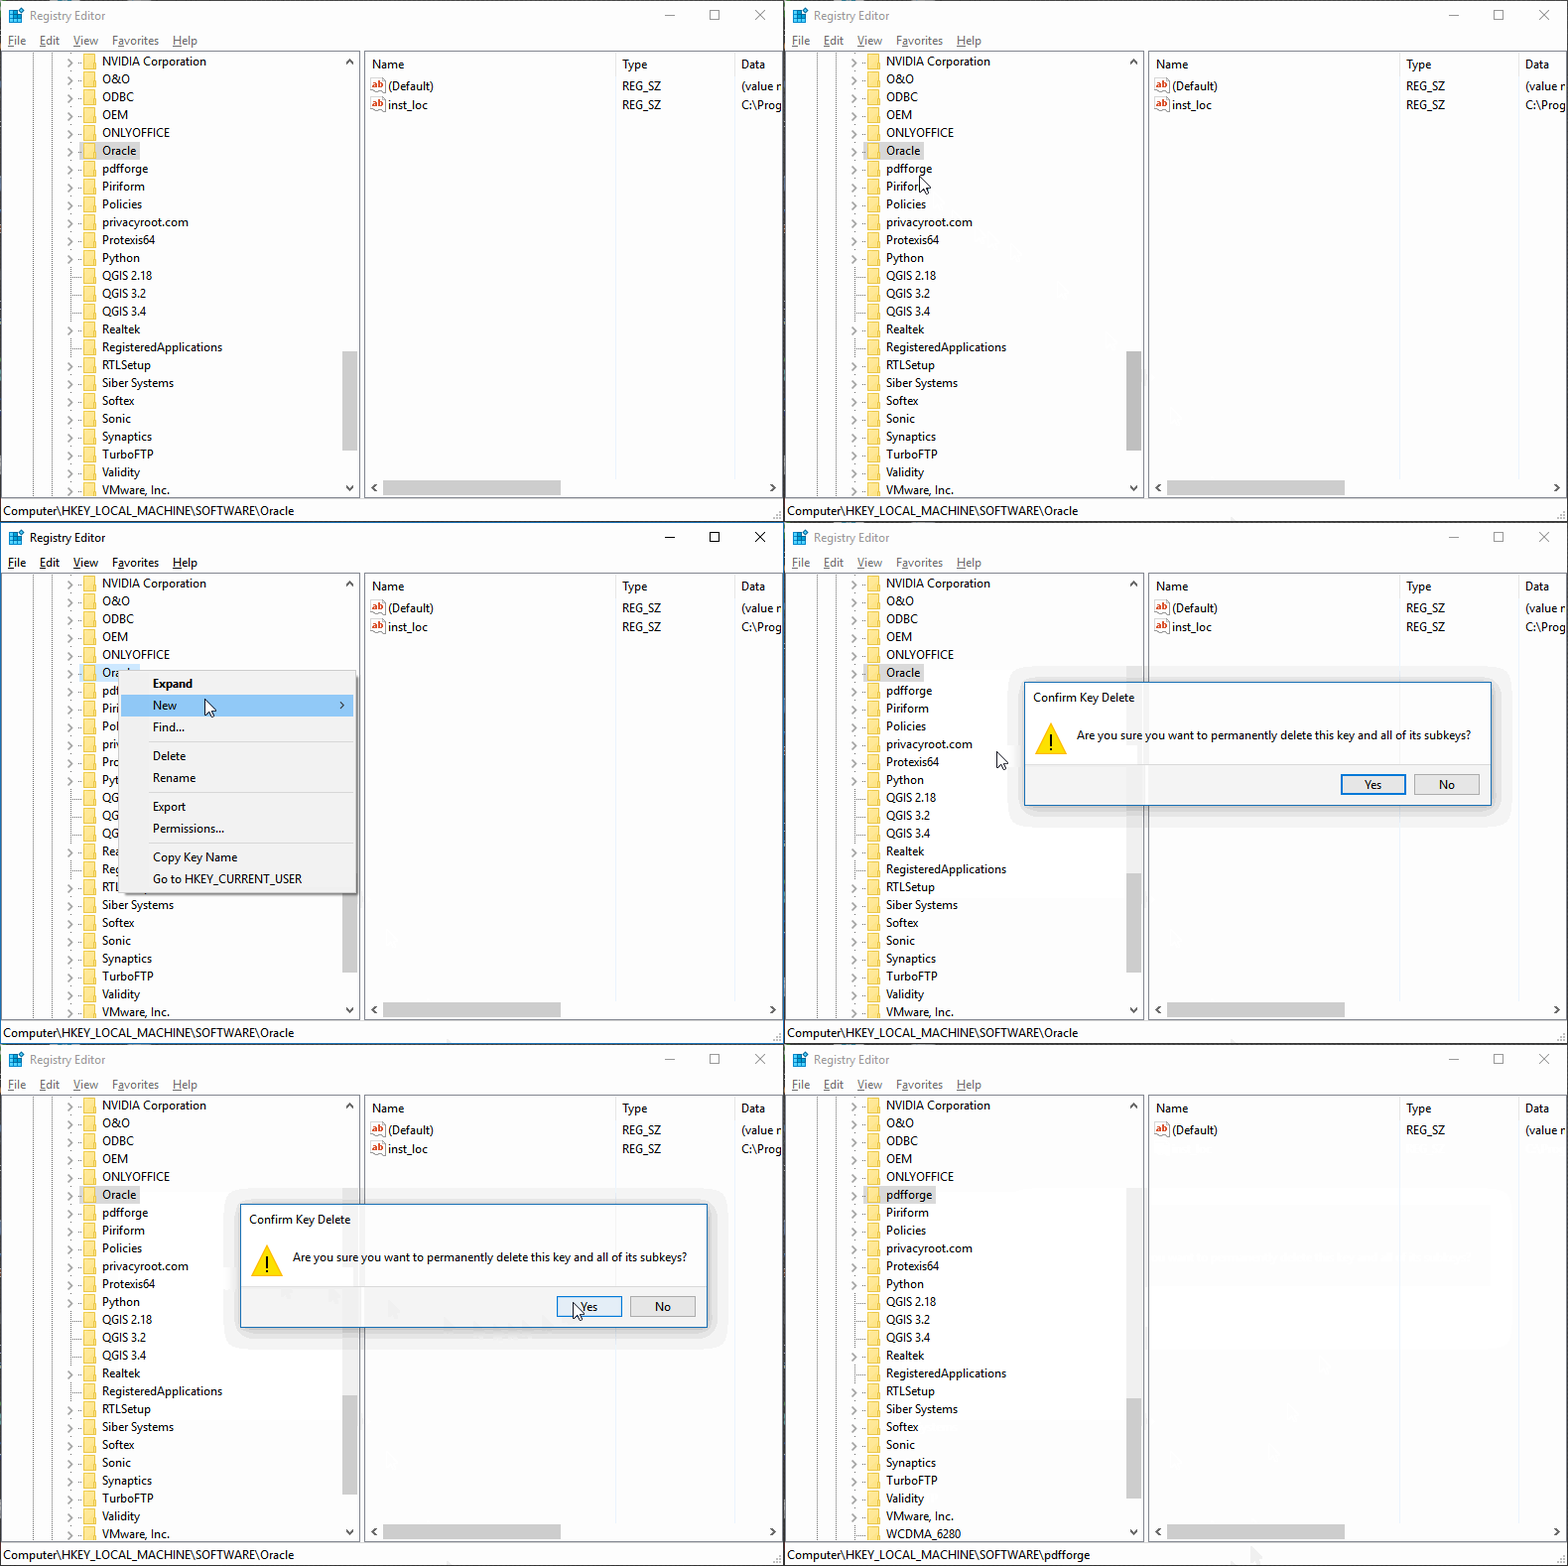
Right-click the Oracle directory and then click Delete.
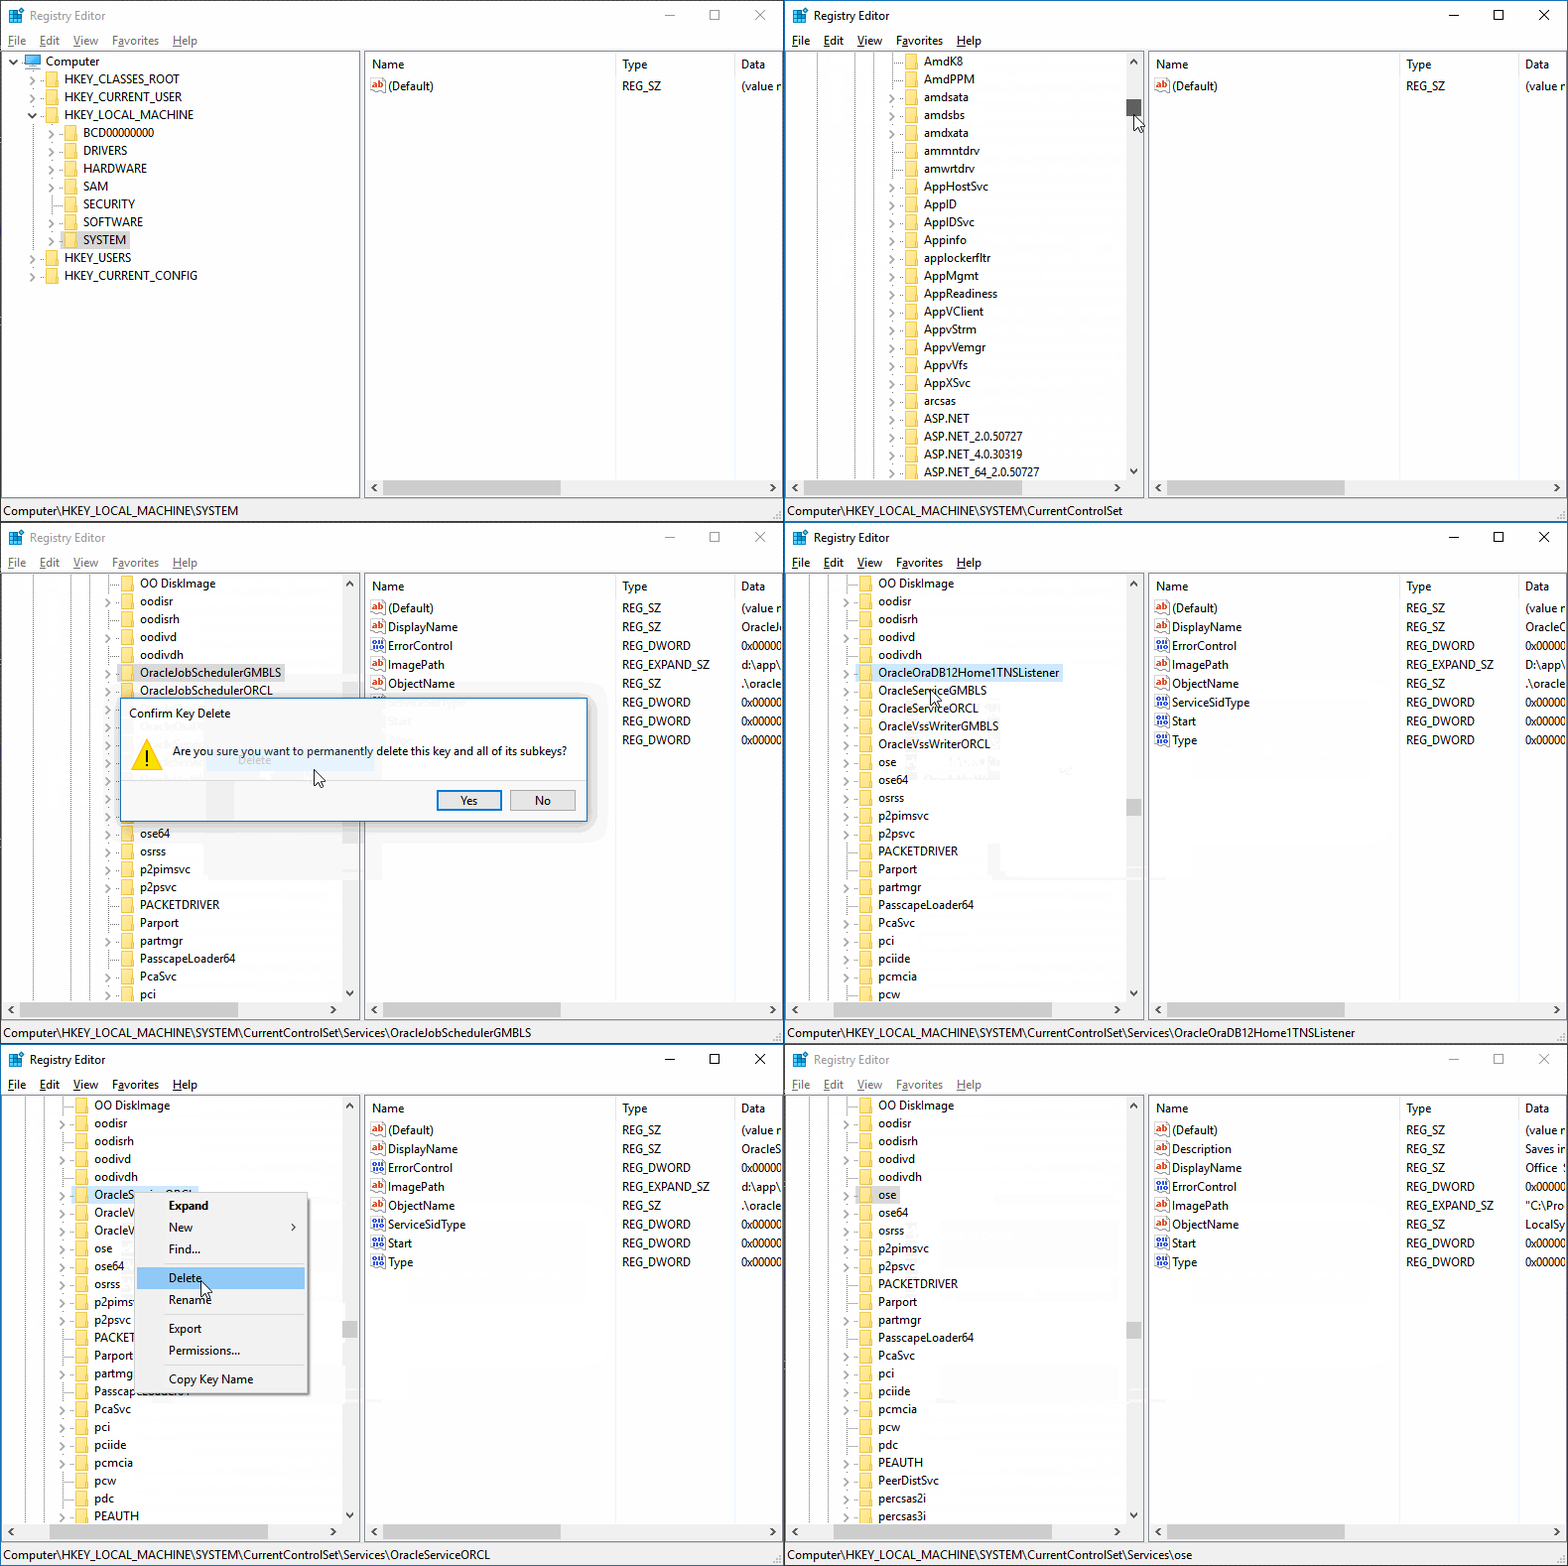
Next, still in the Registry Editor, expand the System directory | Current Control Set | Services. Under the Services, delete all entries which start with Oracle.
Now close the Registry Editor and restart Windows 10 so it can blend with all settings we just altered.

Leave a Reply