In the previous article, we learned how to enable GPU passthrough on Proxmox. GPU passthrough is a great way to improve virtual machine performance in Proxmox. Now, we will pass through a physical disk to a virtual machine in Proxmox. So, the virtual machine will have full and direct access to a disk connected to the Proxmox host. To pass through a hard disk to a virtual machine, we must have an extra disk that is not used by the Proxmox host. We cannot use the existing hard disk that is currently being used by Proxmox.
Steps to Passthrough Physical Disk to Virtual Machine
Step 1. Identify Disk
First, we need to identify the disk that we will pass through to the virtual machine. We can use lshw command. But, Proxmox does not shipped with lshw. We need to install it first.
apt update
apt install lshw
Now let’s check all the storage connected to Proxmox host
lshw -class disk -class storageOutput:
Please check and make sure you choose the right hard disk, especially if there are several disks connected to the Proxmox host. In the example below, I have a 4 TB disk that I am going to pass through.
*-disk:1
          description: ATA Disk
          product: ST4000DM004-2CV1
          physical id: 1
          bus info: scsi@4:0.0.0
          logical name: /dev/sdb
          version: 0001
          serial: WFN1Z43V
          size: 3726GiB (4TB)
          capabilities: gpt-1.00 partitioned partitioned:gpt
          configuration: ansiversion=5 guid=c1a4deb0-a342-41cf-ae98-f3aa38fd4afc logicalsectorsize=512 sectorsize=4096
Make a note of the disk serial. In my case, the serial is WFN1Z43V. Next, we execute this command. Don’t forget to change the serial with your own.
ls -l /dev/disk/by-id | grep WFN1Z43VOutput:
root@proxmox:~# ls -l /dev/disk/by-id | grep WFN1Z43V
lrwxrwxrwx 1 root root  9 Dec  6 20:09 ata-ST4000DM004-2CV104_WFN1Z43V -> ../../sdb
lrwxrwxrwx 1 root root 10 Dec  6 20:09 ata-ST4000DM004-2CV104_WFN1Z43V-part1 -> ../../sdb1
lrwxrwxrwx 1 root root 10 Dec  6 20:09 ata-ST4000DM004-2CV104_WFN1Z43V-part2 -> ../../sdb2
Make a note of the first line which end with (sdb) “ata-ST4000DM004-2CV104_WFN1Z43V”. We will use this information on the next step.
Step 2. Assign Disk to Virtual Machine
Now we can assign this hard disk to a virtual machine. In this example, I will assign this hard disk to virtual machine with ID 102 with this command. Please be sure to modify the command to match yours.
qm set 102 -scsi2 /dev/disk/by-id/ata-ST4000DM004-2CV104_WFN1Z43VOutput:
root@proxmox:~# qm set  102  -scsi2 /dev/disk/by-id/ata-ST4000DM004-2CV104_WFN1Z43V
update VM 102: -scsi2 /dev/disk/by-id/ata-ST4000DM004-2CV104_WFN1Z43V
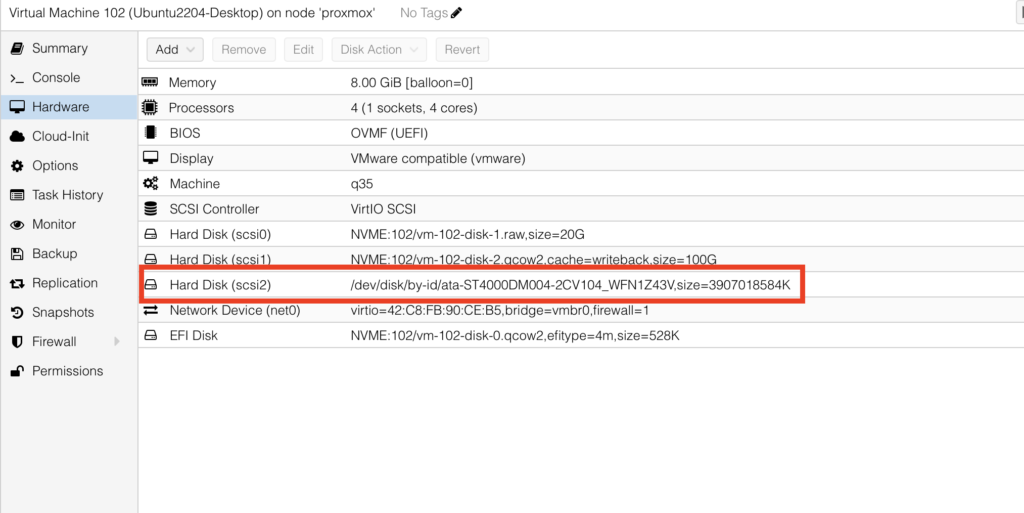
Now open the Hardware tab of the virtual machine. You should see the new scsi2 hard disk there.

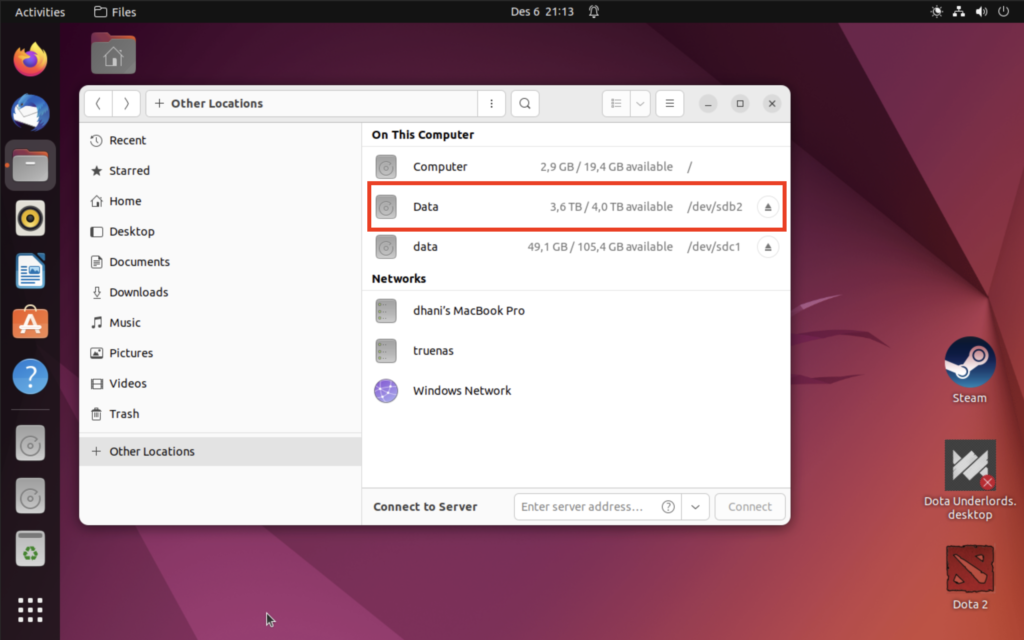
Now start the virtual machine and then you should see this new disk in the virtual machine.

For more information, please visit the official Proxmox website below.
https://pve.proxmox.com/wiki/Passthrough_Physical_Disk_to_Virtual_Machine_(VM)

Leave a Reply