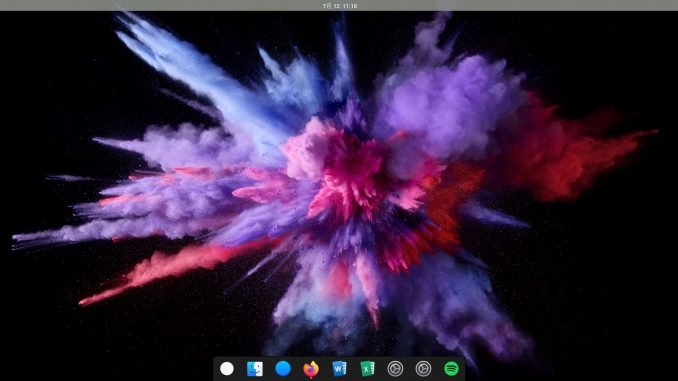
If you like Mac OS Mojave but you are using Ubuntu 19.04, you came to the right place. Personally, I love to make my Ubuntu 19.04 looks like Mac OS Mojave. Thanks to Gnome-look community that provides resources to easily make over our Ubuntu. With few efforts, we can turn the Ubuntu 19.04 into something like Mac OS Mojave. I know Ubuntu is not Mac and this transformation is not perfect though.

So basically, this modification was done manually. I don’t have time to create an automated script for this Mac Mojave transformation. Here are the steps to make your Ubuntu 19.04 looks like Mac OS Mojave.
Steps to Make Ubuntu 19.04 Looks Like Mac OS Mojave
Step 1. Download and Install Ubuntu 19.04 Gnome Edition
Even though any other desktop environment can be used, I would recommend using the Ubuntu 19.04 Gnome edition. You can get the ISO from this link.
Step 2. Update Ubuntu 19.04
It is recommended to update your system. Simply use the Ubuntu updater or this command also works
sudo apt update && sudo apt upgrade
Step 3. Install Gnome Tweaks and Other Packages
Gnome Tweaks is a great tool to help us modify the Ubuntu appearance. You can install this program with this command
sudo apt install gnome-tweak-tool chrome-gnome-shell
Chrome-gnome-shell package is required to enable the Gnome Extension Tool. We will need this tool later.
Step 4. Download Mac style GTK3 Theme and Mac Icon Theme
To get the best result, I would recommend the following GTK3 theme and icon theme.
- GTK3 Theme: McOS-Theme, file name: McOS-MJV-Gn3.32-v2.2.tar.xz
- Icon Theme: Mojave CT Icons, file name: Mojave-CT-Classic_2.tar.xz
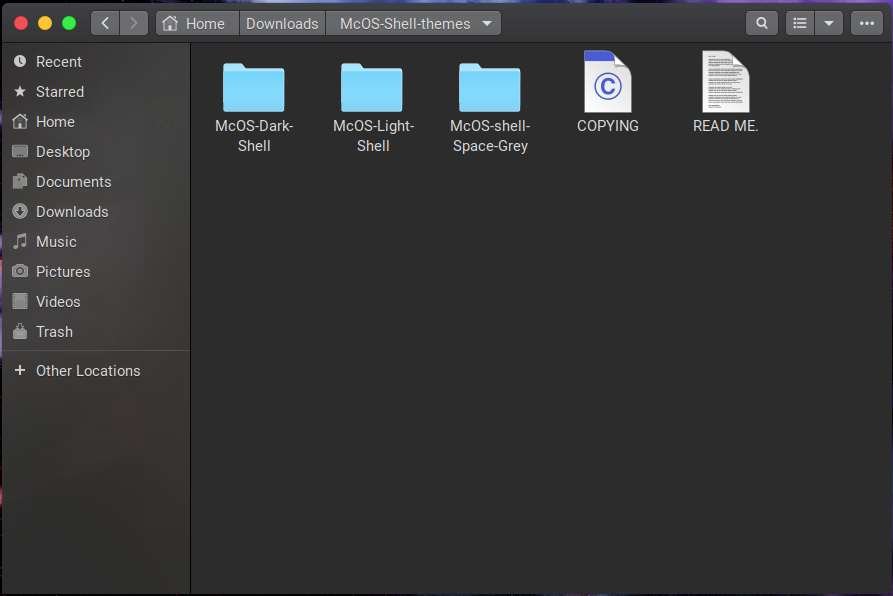
- Shell Theme: McOS-Shell, file name: McOS-Shell-themes.tar.xz
So basically, you should have those three files already. Let’s continue.

Install GTK3 theme and Icon Theme
To install the GTK3 theme, first, extract the file McOS-MJV-Gn3.32-v2.2.tar.xz. It will create a new directory called McOS-MJV-Gn3.32-v2.2. Open the folder and there is another folder inside it: McOS-MJV-Gn3.32-v2.1. We need to move or copy this folder to /usr/share/themes directory.
sudo mv McOS-MJV-Gn3.32-v2.1 /usr/share/themes
Next, do the same for the icon theme. Extract the file Mojave-CT-Classic_2.tar.xz and move the content to /usr/share/icons.
sudo mv Mojave-CT-Dark-Mode /usr/share/icons
Finally, extract and move the McOS-Shell-themes.tar.xz shell theme. There are three themes inside. You can move them all to /usr/share/themes.

sudo mv McOS* /usr/share/themes
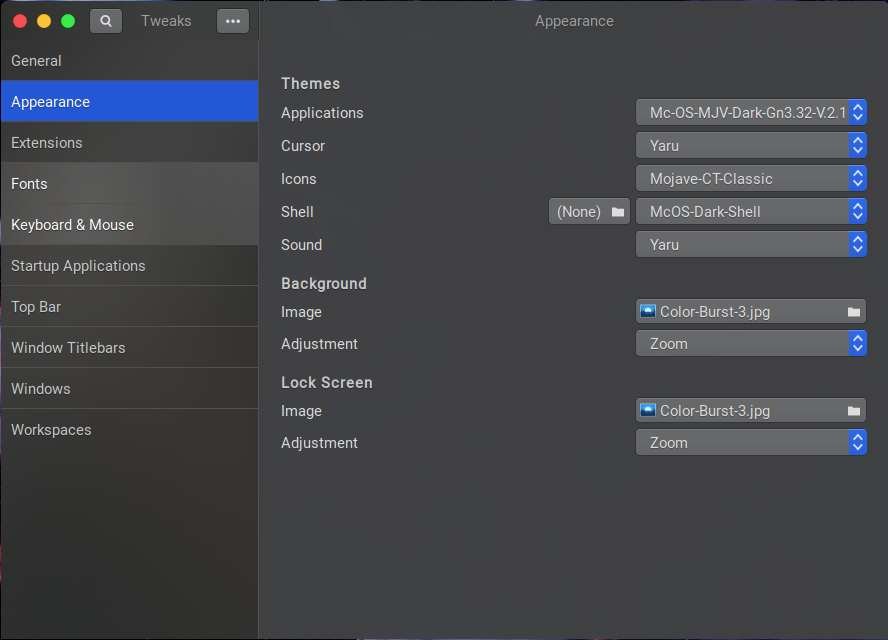
Apply Themes
Use Gnome Tweaks to apply this new Theme and Icon theme.

Move Dock to Bottom
Mac OS X comes with a beautiful dock at the bottom of the screen. You can install Plank, Docky or Cairo Dock to simulate the Mac OS X dock. But here, I am not using those three. The following set of commands will move your Ubuntu dock to the bottom of your screen and it will looks like this:

Commands:
gsettings set org.gnome.shell.extensions.dash-to-dock show-apps-at-top true
gsettings set org.gnome.shell.extensions.dash-to-dock running-indicator-style DEFAULT
gsettings set org.gnome.shell.extensions.dash-to-dock custom-theme-customize-running-dots false
gsettings set org.gnome.shell.extensions.dash-to-dock custom-theme-shrink false
gsettings set org.gnome.shell.extensions.dash-to-dock transparency-mode DEFAULT
gsettings set org.gnome.shell.extensions.dash-to-dock extend-height false
gsettings set org.gnome.shell.extensions.dash-to-dock dock-position BOTTOM
gsettings set org.gnome.shell enable-hot-corners "true"
Change Activities with Mac Logo
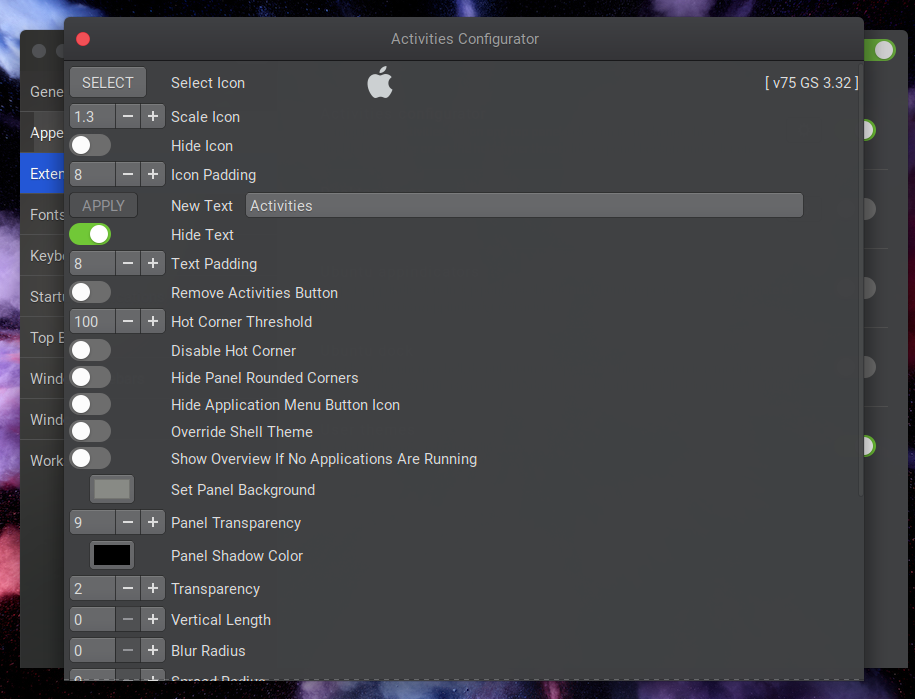
As you can see, the default Ubuntu’s “Activities” button is replaced with Mac logo at the top left of my screen. To do this, you will need to install Activities Configurator extension. And then enable and configure it from Gnome Tweaks.

You can download that nice Mac logo from this link.
Closing Words
I do love this setup and proudly share the tips on how to make your Ubuntu 19.04 looks like Mac OS Mojave. Thanks for reading this and I hope you enjoy it. See you next time. Cheers

Leave a Reply