

Hello everyone, in this article, we are going to learn how to install Nextcloud on TrueNAS 12.0 server. If you are new to TrueNAS, this is the new name of the popular FreeNAS, an all-in-one server and storage system for home and small offices. TrueNAS is stable and pretty easy to use. It is pretty handy to install additional services/plugins such as Nextcloud on top of the system. On the other hand, Nextcloud is an open-source file storage and sharing application, similar to Dropbox.
Steps to Install Nextcloud on TrueNAS 12.0
Before we go through, I assume you already have the TrueNAS server installed on your server. I will not explain the TrueNAS installation step here. I have some useful articles about TrueNAS, see if this is helpful for you.
Step 1. Install Nextcloud Plugin
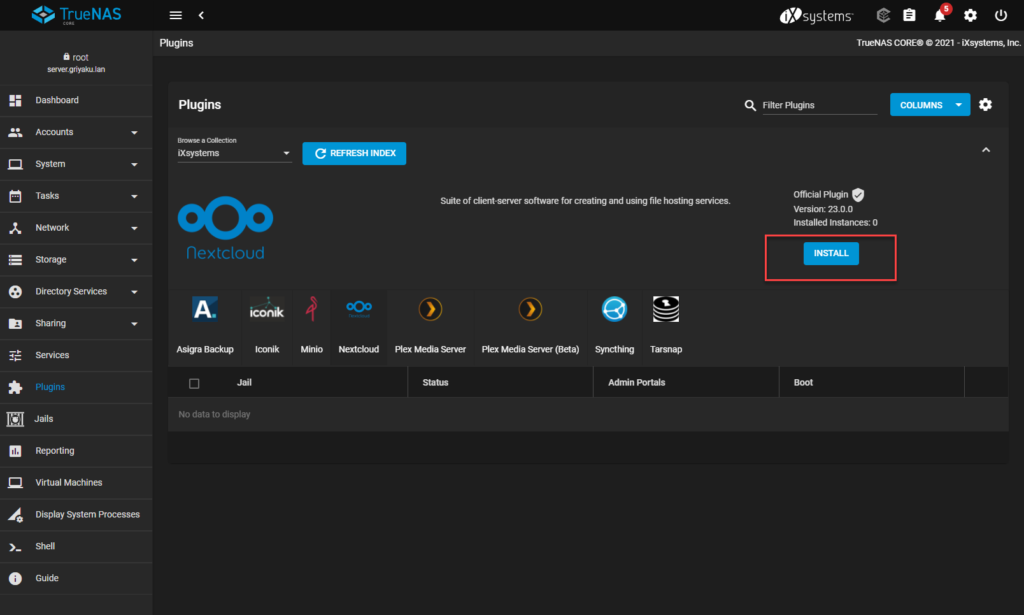
From the TrueNAS web dashboard, go to the Plugins tab. You should see the Nextcloud plugin there, but if not, you can search for it from the Filter plugins search box.

To start the installation, press the Install button
Next, specify the plugin name and jail name. In this case, I put nextcloud as the plugin name and nextcloud_jail for the jail name.
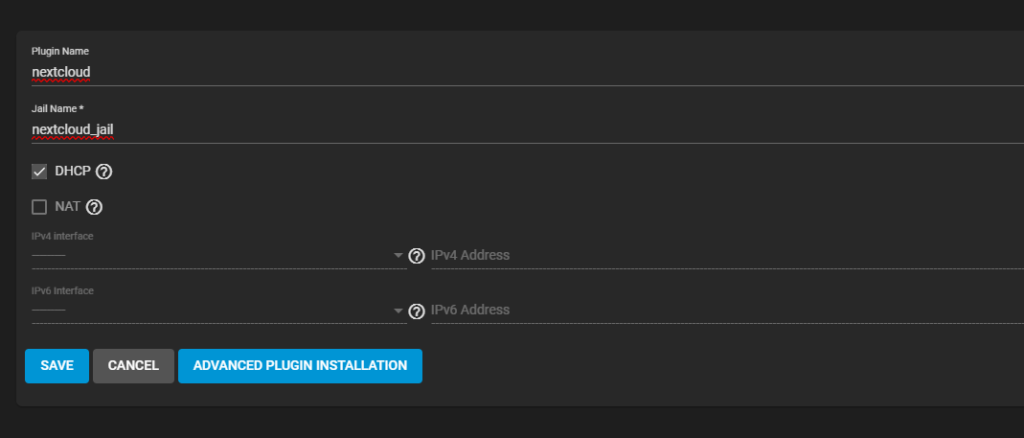
Click Save and the installation will start. It will download some files from the internet. In this example, I choose DHCP for the IP address assignment. You can choose NAT if your network does not support DHCP.

Step 2. Set up the Mount Points
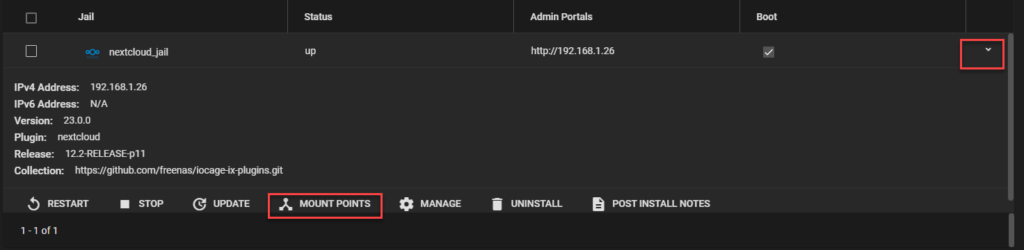
Once the installation completes, we need to set up the mount points. By default, Nextcloud won’t have access to the TrueNAS storage because the jail is isolated from the system. That’s why we need to assign or set up the mount points for the Nextcloud storage.
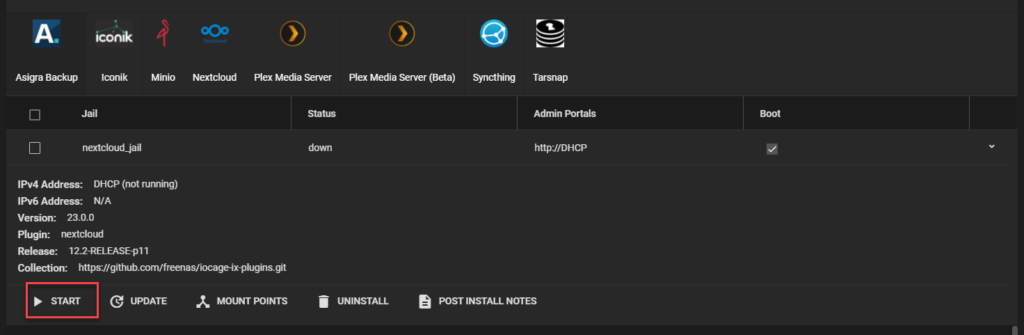
Go back to the Plugins page and then click the little arrow on the right side of the Nextcloud plugin we’ve just installed. But before that, make sure to stop the Nextcloud if it’s running.
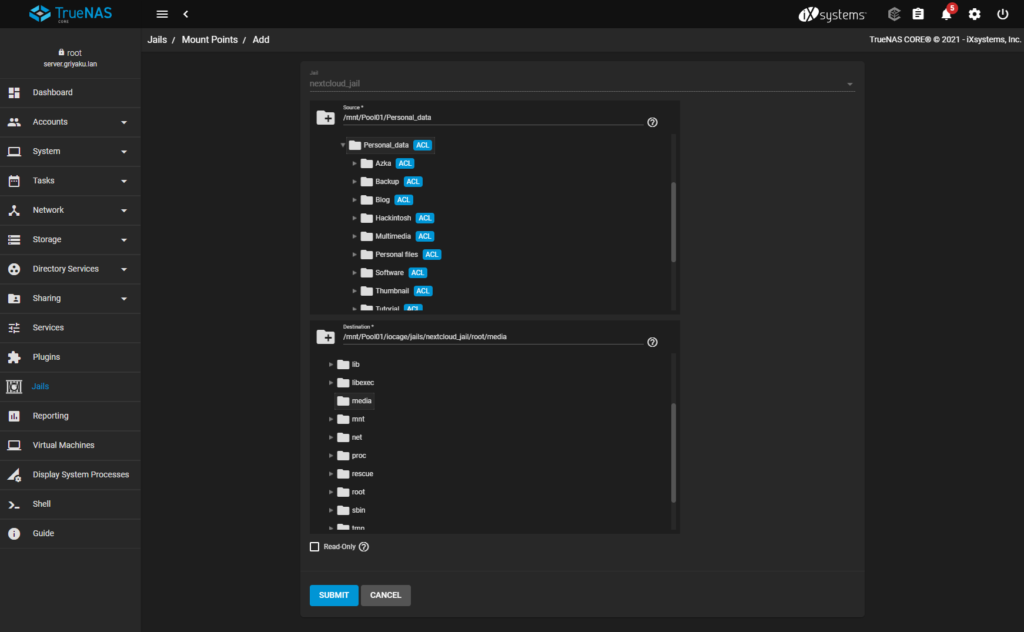
To add a new mount point, click Actions and then click Add. Choose the source and destination from the list.

And then start the Nextcloud.
Step 3. Edit Permission
We need to add or modify the permission to the storage. We need to add the www user to be able to access the share. To do this, follow these steps.
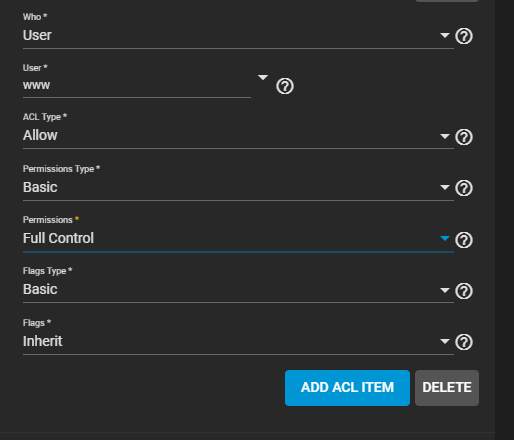
Go to Storage | Pools and then click the three dots next to the data set that we mount on the previous step and click Edit Permission. And then click Add ACL item. See the following settings.
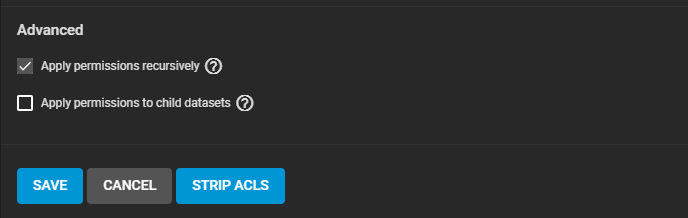
And then check the option Apply permissions recursively. Click Save.
Step 4. Configure Trusted Domains
If we open the Nextcloud address on a web browser, you should see the following error

To fix that, we need to edit the config.php for the Nextcloud.
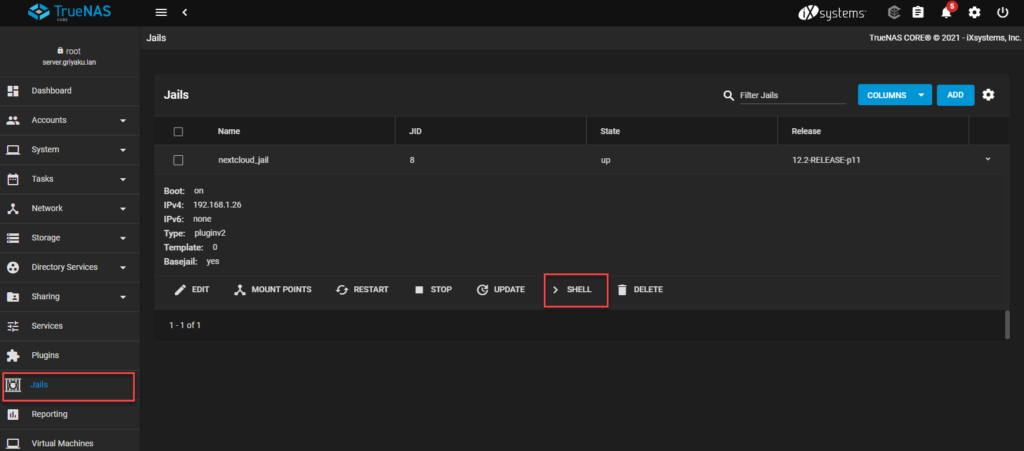
Go to Jails and then click the small arrow on the right to expand. And then click SHELL to open the Nextcloud shell command line.
On the Shell interface, type the following command to edit the config.php file
ee /usr/local/www/nextcloud/config/config.php
ee is the text editor which is pretty easy to use. Scroll down until you see the Trusted domains list as follow
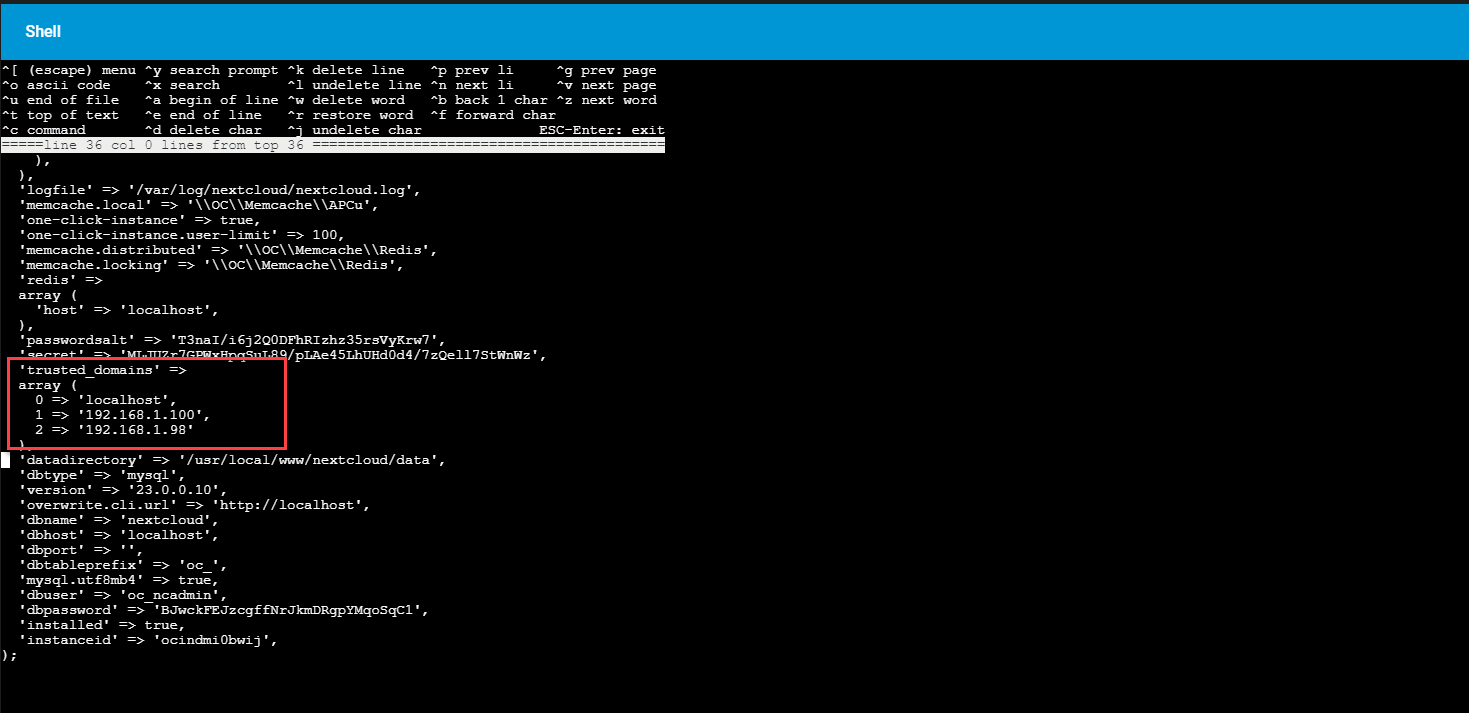
I added 192.168.1.98 to the lists as this is my Nextcloud IP address. You will need your Nextcloud IP address to this list. Now close the file using CTRL + C and then type quit.
Now you can open the Nextcloud page without issue.

Leave a Reply