

Hello everyone, in this article, we will learn how to install MySQL Server on Ubuntu 21.04. MySQL is a popular RDBMS that has been used by millions of people and organizations. With a little effort, we can get the MySQL Server up and running on our Ubuntu 21.04 server. I have a Ubuntu 21.04 server installed on my Proxmox VE. You can use this guide to install MySQL on a local server, virtual machine, or even on a cloud server.
Steps to Install MySQL Server on Ubuntu 21.04
Step 1. Update Ubuntu
It is recommended to update Ubuntu prior to the MySQL installation. Simply use this command on your Terminal to update Ubuntu
sudo apt update && sudo apt upgrade
Step 2. Install MySQL Server
Now we are ready to install the MySQL Server. Use this command
sudo apt install mysql-server
Output:
dhani@ubuntu2104server:~$ sudo apt install mysql-server
Reading package lists... Done
Building dependency tree... Done
Reading state information... Done
The following package was automatically installed and is no longer required:
  net-tools
Use 'sudo apt autoremove' to remove it.
The following additional packages will be installed:
  libcgi-fast-perl libcgi-pm-perl libclone-perl libencode-locale-perl libevent-core-2.1-7
  libevent-pthreads-2.1-7 libfcgi-bin libfcgi-perl libfcgi0ldbl libhtml-parser-perl libhtml-tagset-perl
  libhtml-template-perl libhttp-date-perl libhttp-message-perl libio-html-perl liblwp-mediatypes-perl
  libmecab2 libprotobuf-lite23 libtimedate-perl liburi-perl mecab-ipadic mecab-ipadic-utf8 mecab-utils
  mysql-client-8.0 mysql-client-core-8.0 mysql-common mysql-server-8.0 mysql-server-core-8.0
Suggested packages:
  libdata-dump-perl libipc-sharedcache-perl libwww-perl mailx tinyca
The following NEW packages will be installed:
  libcgi-fast-perl libcgi-pm-perl libclone-perl libencode-locale-perl libevent-core-2.1-7
  libevent-pthreads-2.1-7 libfcgi-bin libfcgi-perl libfcgi0ldbl libhtml-parser-perl libhtml-tagset-perl
  libhtml-template-perl libhttp-date-perl libhttp-message-perl libio-html-perl liblwp-mediatypes-perl
  libmecab2 libprotobuf-lite23 libtimedate-perl liburi-perl mecab-ipadic mecab-ipadic-utf8 mecab-utils
  mysql-client-8.0 mysql-client-core-8.0 mysql-common mysql-server mysql-server-8.0 mysql-server-core-8.0
0 upgraded, 29 newly installed, 0 to remove and 0 not upgraded.
Need to get 29.3 MB of archives.
After this operation, 241 MB of additional disk space will be used.
Do you want to continue? [Y/n]
Simply answer y and then press Enter. The installation will now begin. During the installation process, you won’t be asked to create a new password for the MySQL root user.
Step 3. Configure MySQL
Now we need to configure MySQL. We are going to create a new password for MySQL user and some other things.
sudo mysql_secure_installation
Answer some questions shown on your screen. You will need to assign a new password here.
dhani@ubuntu2104server:~$ sudo mysql_secure_installation
[sudo] password for dhani:

Securing the MySQL server deployment.

Connecting to MySQL using a blank password.

VALIDATE PASSWORD COMPONENT can be used to test passwords
and improve security. It checks the strength of password
and allows the users to set only those passwords which are
secure enough. Would you like to setup VALIDATE PASSWORD component?

Press y|Y for Yes, any other key for No: n
Please set the password for root here.

New password:

Re-enter new password:
By default, a MySQL installation has an anonymous user,
allowing anyone to log into MySQL without having to have
a user account created for them. This is intended only for
testing, and to make the installation go a bit smoother.
You should remove them before moving into a production
environment.

Remove anonymous users? (Press y|Y for Yes, any other key for No) : y
Success.


Normally, root should only be allowed to connect from
'localhost'. This ensures that someone cannot guess at
the root password from the network.

Disallow root login remotely? (Press y|Y for Yes, any other key for No) : n

 ... skipping.
By default, MySQL comes with a database named 'test' that
anyone can access. This is also intended only for testing,
and should be removed before moving into a production
environment.


Remove test database and access to it? (Press y|Y for Yes, any other key for No) : y
 - Dropping test database...
Success.

 - Removing privileges on test database...
Success.

Reloading the privilege tables will ensure that all changes
made so far will take effect immediately.

Reload privilege tables now? (Press y|Y for Yes, any other key for No) : y
Success.

All done!
At this point, we have successfully installed and configured MySQL Server on Ubuntu 21.04.
Step 4. Create a New Database
Now let’s try to create a new database. Log in to MySQL console and then use the following command
CREATE DATABASE ‘gis’;
Step 4. Create a new MySQL user
If you want, we can now create a new MySQL user and assign privileges to it. We need to log in to the MySQL console first and then create a new user.
sudo mysql
or
sudo mysql -u root -p
Now let’s create a new user. For example, I will create a new user called dhani with password 12345. This command must be executed inside the MySQL console.
CREATE USER 'dhani'@'localhost' IDENTIFIED BY '12345';
Or, you can also use the following syntax to create a new user with older authentication system prior to caching_sha2_password.
CREATE USER 'dhani'@'localhost' IDENTIFIED WITH mysql_native_password BY '12345';
Now let’s grant some privileges to the new user. For example:
GRANT ALL PRIVILEGES ON gis.* to 'dhani'@'localhost' WITH GRANT OPTION;
Step 5. Enable Remote access to the MySQL Server
If we want to be able to connect to the MySQL Server from a remote PC, then we need to enable remote access to the server. In order to be able to connect to the MySQL server remotely, we need to do several things.
First, open the mysqld.cnf,
nano /etc/mysql/mysql.conf.d/mysqld.cnf
Now you should see something like this.
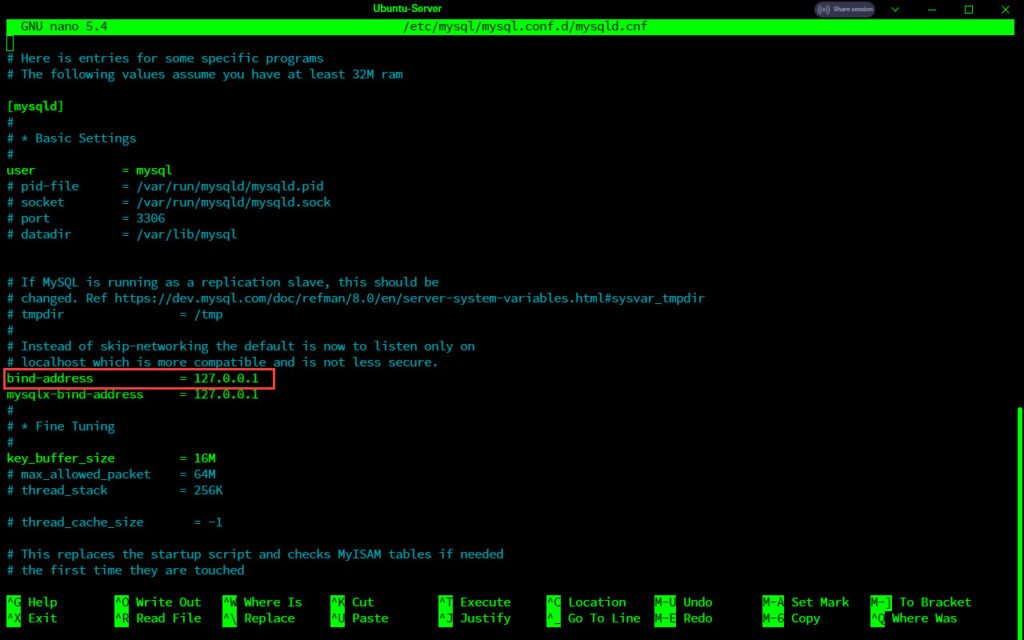
As you can see on the red rectangle, the value of the bind-address is 127.0.0.1 which is the localhost. This means the MySQL server is only accessible from the local host. To enable remote access, we will change the 127.0.0.1 into 0.0.0.0. Now it should look like this
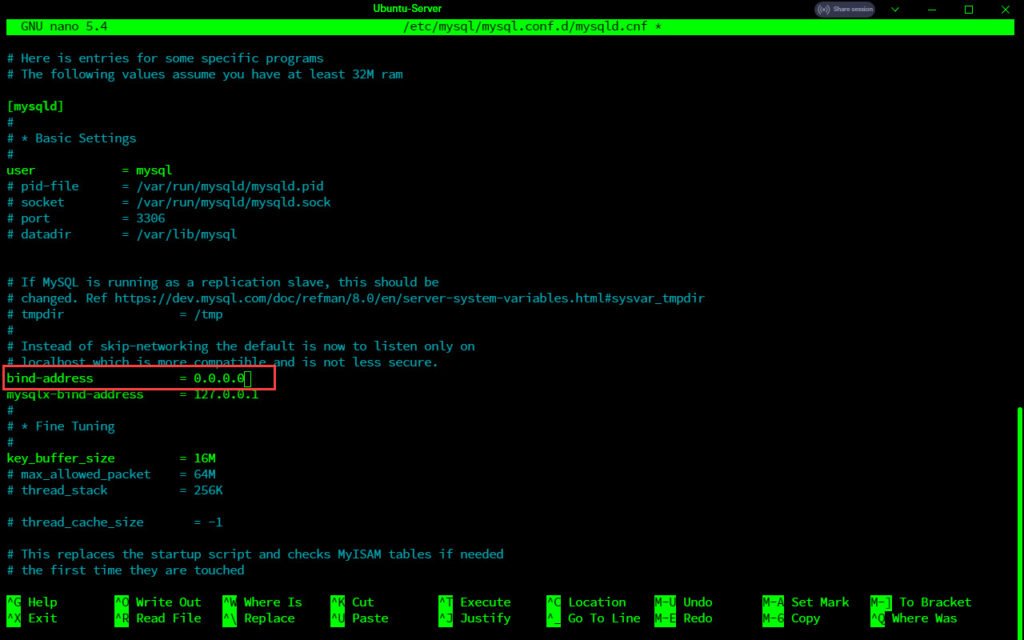
Now close and save the file. Now restart MySQL service
sudo systemctl restart mysql
Now our server is set for remote access. But, we need to make sure that the user has access to the server from a remote PC.
Create or alter remote users. For example, I will alter user dhani so he can access the MySQL server from a remote computer.
ALTER USER ‘dhani’@’%’ IDENTIFIED WITH mysql_native_password BY ‘12345’;
GRANT ALL PRIVILEGES ON *.* TO ‘dhani’@’%’;
Now user dhani should be able to connect to the MySQL server from the network as well as now he has full privileges on any databases in the server.
Leave a Reply