
On my previous article, I have written the guide to install Microsoft SQL Server on Ubuntu 20.04. Now, the new Ubuntu 20.10 Groovy Gorilla is available so I want to update my tutorial. In the following post, you will see how to install Microsoft SQL Server on Ubuntu 20.10. There is not much different between installing the SQL Server on Ubuntu 20.04 and Ubuntu 20.10. We use the same repository.
Steps to Install Microsoft SQL Server on Ubuntu 20.10
Step 1. Add the Key
To add the Microsoft Public GPG key, open Terminal and then run the following command
wget -qO- https://packages.microsoft.com/keys/microsoft.asc | sudo apt-key add -
Output:
dhani@dhani-ubuntu:~$ wget -qO- https://packages.microsoft.com/keys/microsoft.asc | sudo apt-key add -
[sudo] password for dhani:
Warning: apt-key is deprecated. Manage keyring files in trusted.gpg.d instead (see apt-key(8)).
OK
Don’t worry about the warning message, you can continue to the next step.
Step 2. Add the Microsoft SQL Server Repository
Now add the repository with this command
sudo add-apt-repository "$(wget -qO- https://packages.microsoft.com/config/ubuntu/18.04/mssql-server-2019.list)"
Step 3. Install Microsoft SQL Server
Now we are ready to install the SQL Server on Ubuntu 20.10. Simply use this command below:
sudo apt update
sudo apt install mssql-server
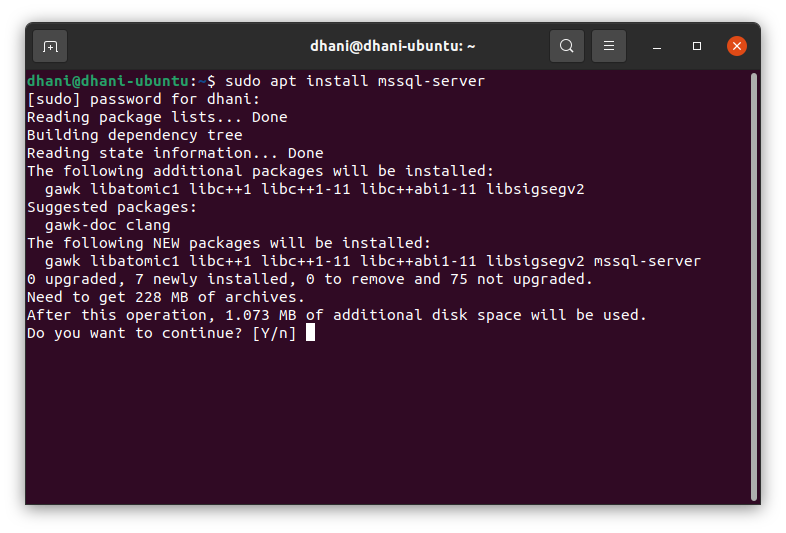
Make sure there is no error
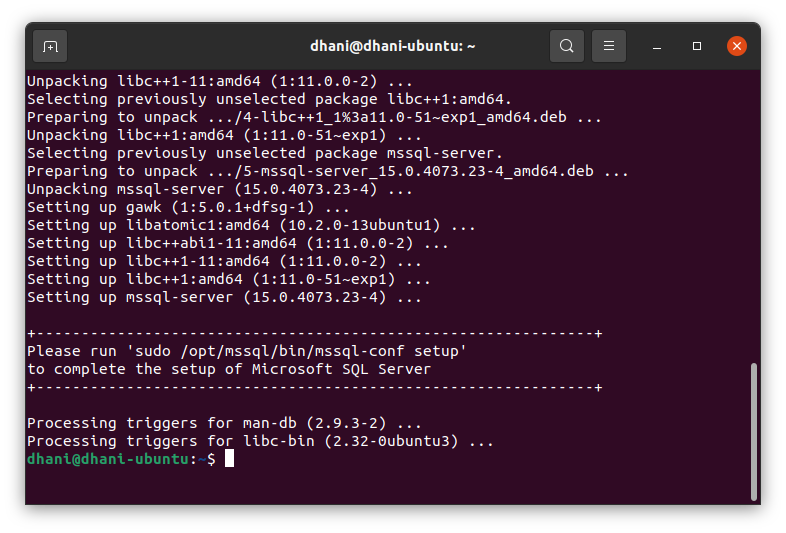
Now, continue with this command to configure the SQL Server
sudo /opt/mssql/bin/mssql-conf setup
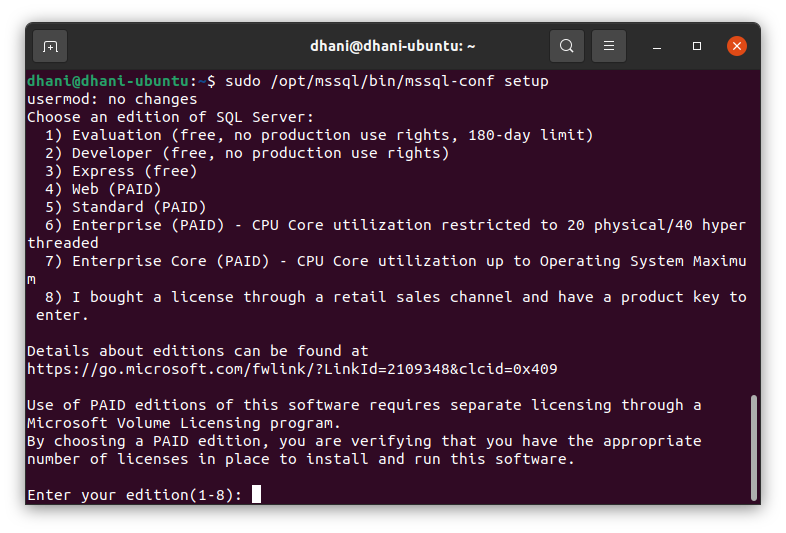
You will need to select the edition of SQL Server. In this case, I choose number 1 just for this purpose. And then you will need to create a new password for the “SA” user.
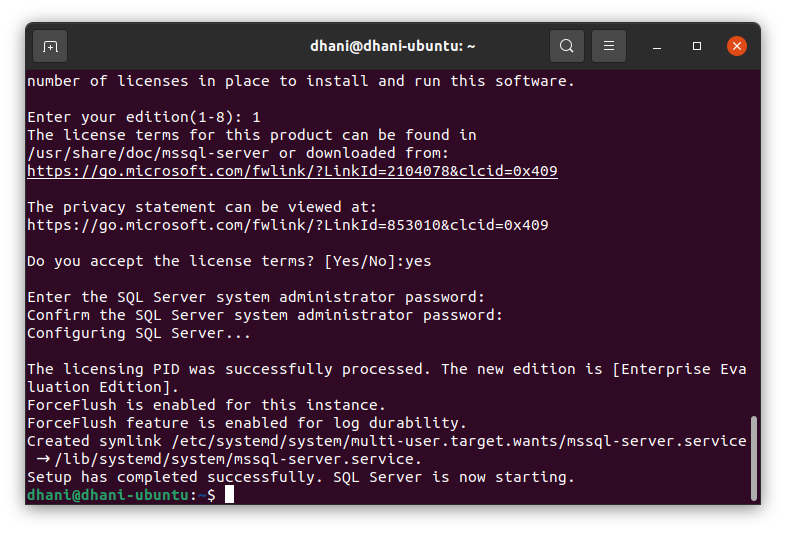
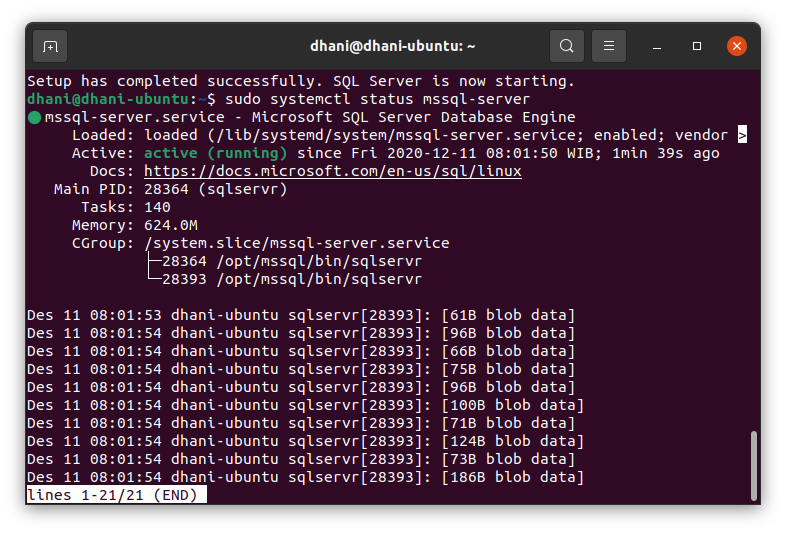
Now the Microsoft SQL Server installation is complete. Check the service status with this command
sudo systemctl status mssql-server
Done. Thanks for reading this tutorial How to install Microsoft SQL Server on Ubuntu 20.10. See you on the next tutorials.
Source:
https://docs.microsoft.com/en-us/sql/linux/quickstart-install-connect-ubuntu?view=sql-server-ver15

Leave a Reply