
In this blog, you can find many SQL Server tutorials. Most of them are showing how to install Microsoft SQL Server on Linux distribution such as Ubuntu. In this article, I will show you how to create a new SQL Server schema using Azure Data Studio. Azure Data Studio is a multi-platform software that can be used to edit, manage the SQL Server database. More than that, this software also can be used to develop or build data virtualization. I am not an Azure Data Studio expert. I only use it to manage my SQL Server database.
In this article, I am using an SQL Server 2019 installed on my Ubuntu 20.04 server. And then, I am going to create a new schema in that SQL Server using the Azure Data Studio. If you have Microsoft SQL Server Management Studio (SMSS), you can also use this program to manage your SQL Server.
Steps to create a New SQL Server Schema using Azure Data Studio
Step 1. Install Azure Data Studio
You can skip this step if you have Azure Data Studio installed on your system. Please note that ADS is available for Windows, macOS, and Linux systems. Get the installer from the link below.
Step 2. Connect your Server
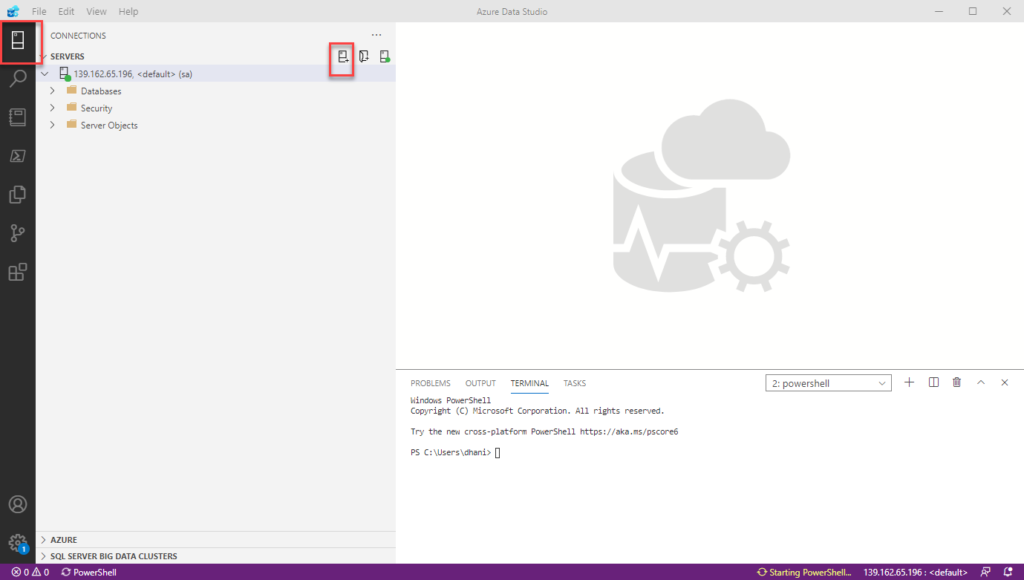
Once the ADS is installed, we need to connect our server. Click the Connections button on the left side and then click the New Connection button.
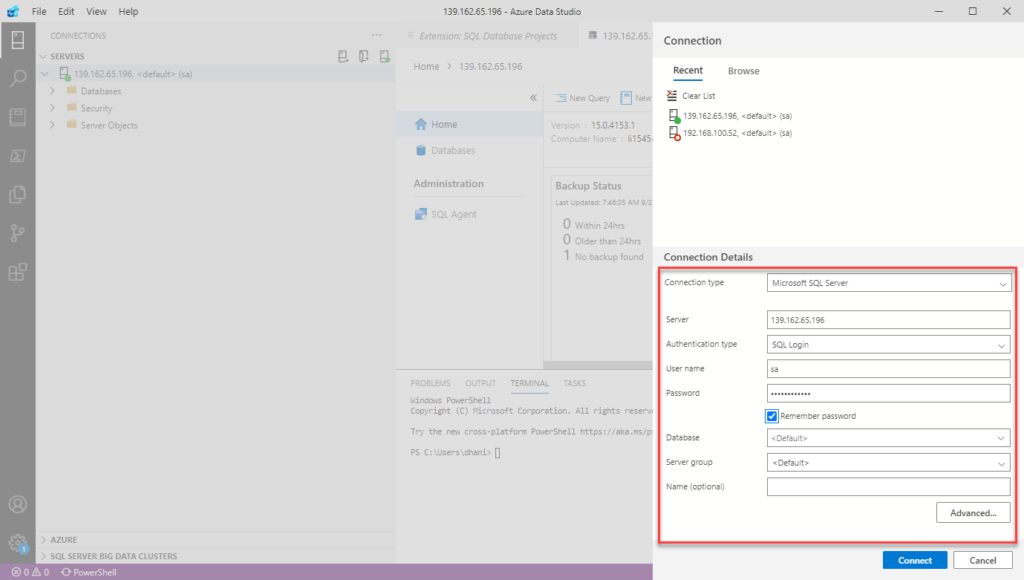
Now enter the database credentials
Once connected, you will see the server list in the connection pane.
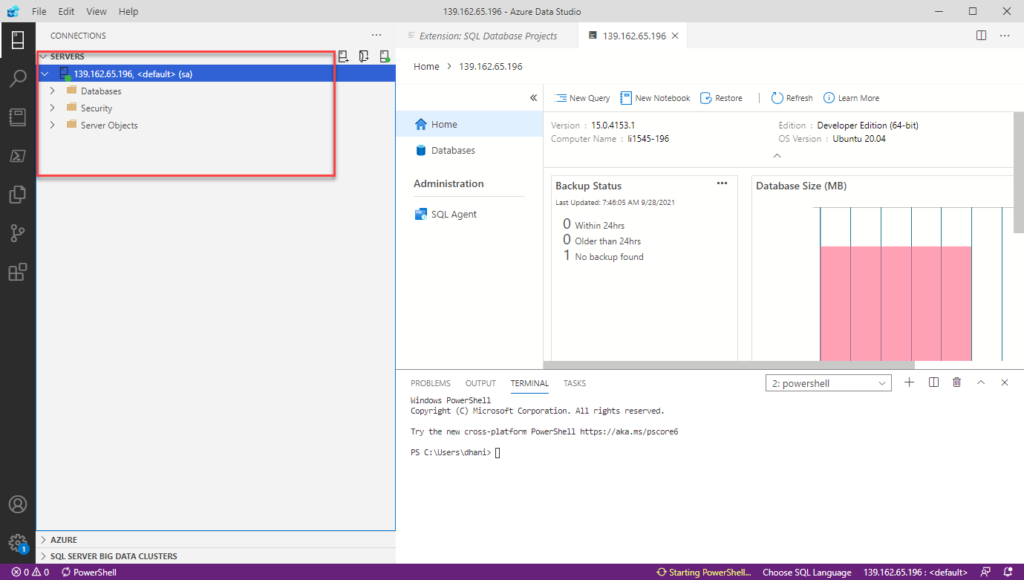
At this point, we have successfully connected our SQL Server with the Azure Data Studio.
Step 3. Install Extension
ADS is a powerful tool with so many extensions available. For this purpose, we need to install the SQL Database Project extension. To install, simply click the Extensions tab on the left and then type on the search box.
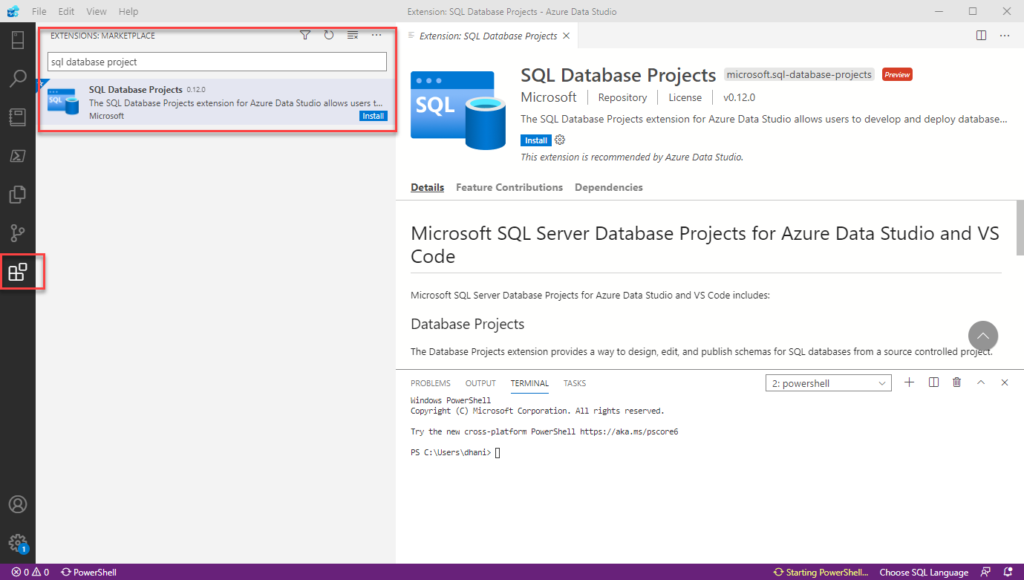
Click Install and wait until the installation process completes. The SQL Database Project extension provides a way to design, edit and publish schema to our SQL Server. In some cases, you will need to restart ADS to complete the installation.
Step 3. Create a New Schema
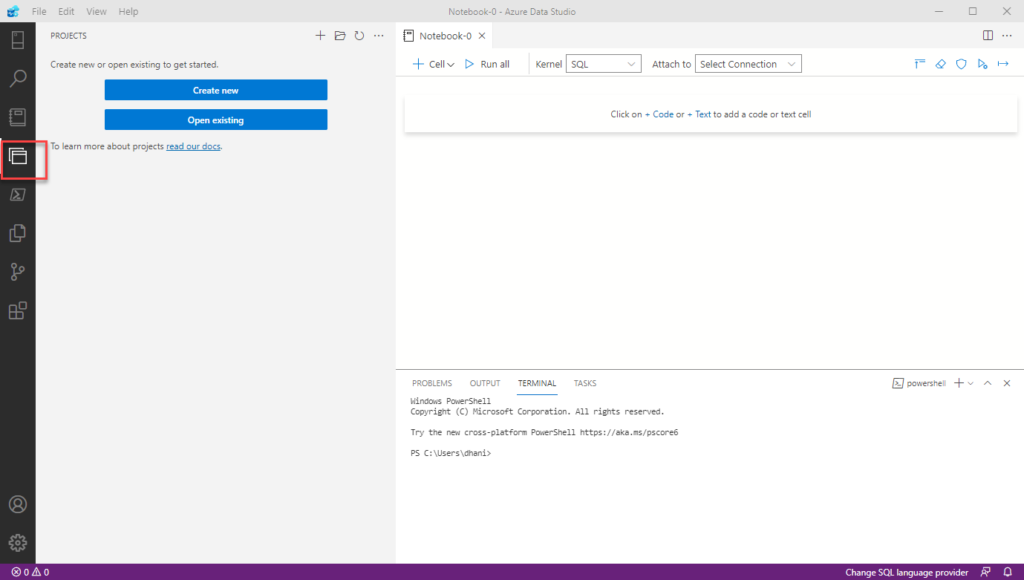
After we install SQL Database Project extension, you should see a new Project button on the left side. Click it and choose Create New
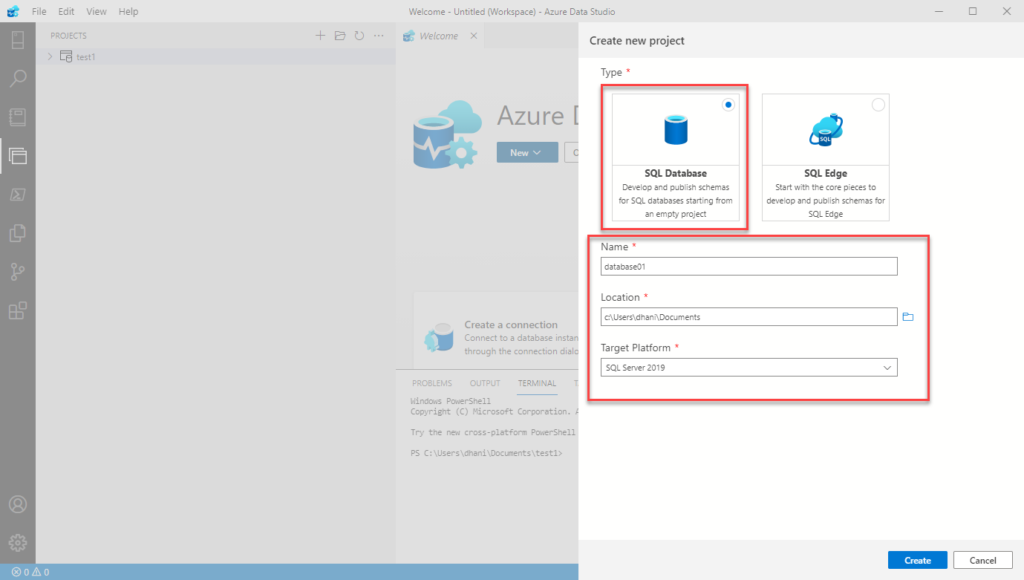
Next, choose SQL Database, and then give it a new name (database01), the location as well as the target platform. In this example, I use SQL Server 2019.
Click Create. To start publishing the database, right-click the new project we’ve just created and then click Publish. Next, you will see the following window.
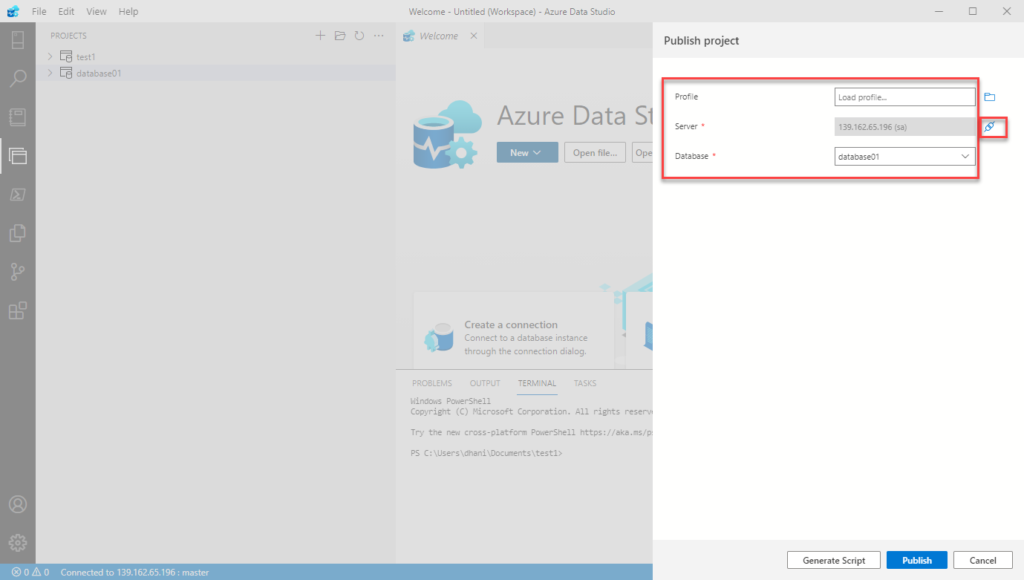
Select your sever using the connection button next to it. Click Publish to start publishing the schema.
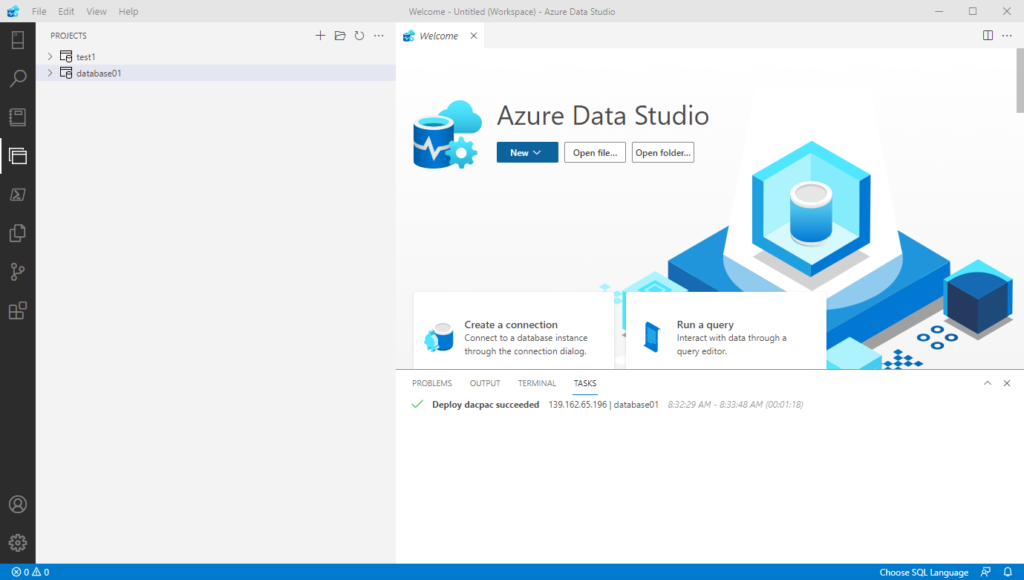
Done. Now let’s check the new schema.
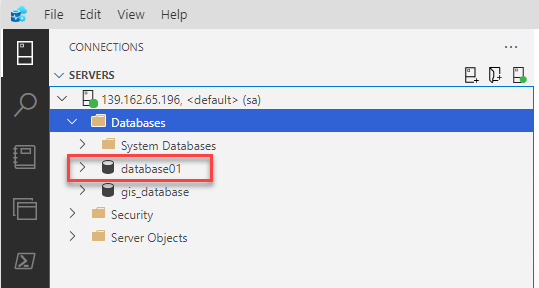
As you can see, the new database called database01 is now created. It took few steps to create a new schema using Azura Data Studio but it is doable.

Leave a Reply