

If you are planning to save the Time Machine backup on a samba shard folder, then you came to the right place. In this article, you will learn how to configure the Time Machine to Backup to Samba shared folder. Apple Time Machine is a built-in backup solution for Mac users. It comes with every macOS installation and actually it works very well. As a Hackintosh user, I do not like how the Time Machine save the backup. By default it does not supports Windows shared folder or samba share.
In this example, I am using macOS Big Sur 11.1 and I use the TrueNAS server to store the Time Machine backup. You can use your existing Windows shared folder or Samba server.
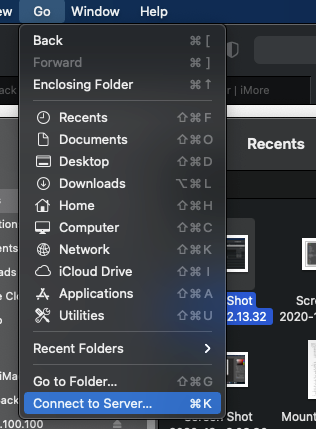
Step 1. Connect and mount the Windows shared folder or Samba share
Open Finder and then click Go >> Connect to server.
Now enter the server IP address or hostname
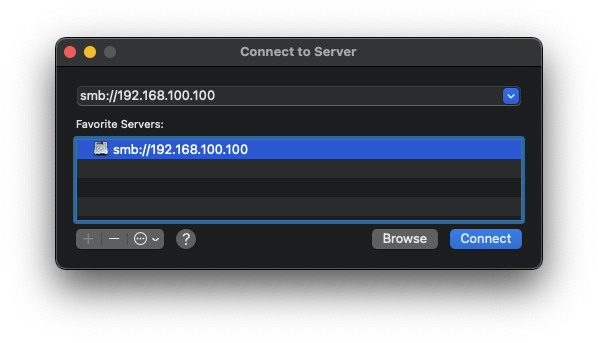
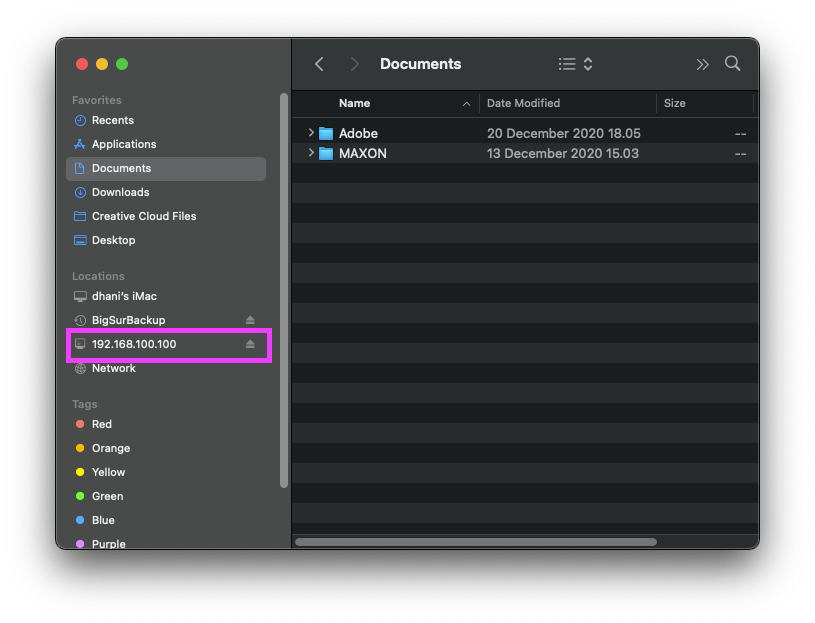
You may need to enter the username and password to connect to the server. The connected server will be visible in Finder such as:
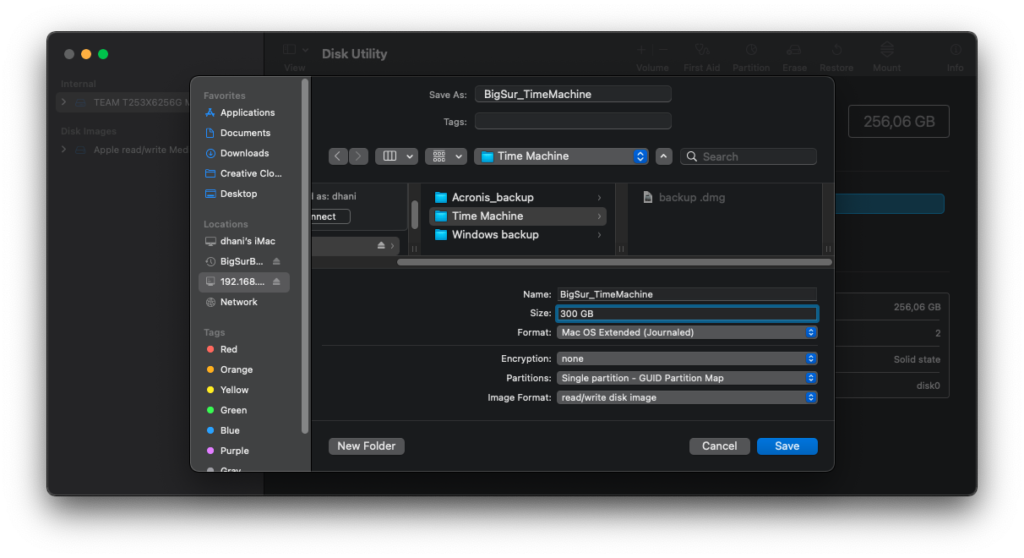
Step 2. Create a sparsebundle image
Now we need to create a new blank image file using Disk Utility. This image will pretend to be an APFS filesystem.
- Open Disk Utility
- Go to File >> New Image >> Blank Image
- Save the image in the remote shared folder. Adjust the image size at least equal to your macOS disk size. In this case, I put 300GB because my macOS has 256 GB disk. Choose Mac OS Extended (Journaled) format. Click Save.
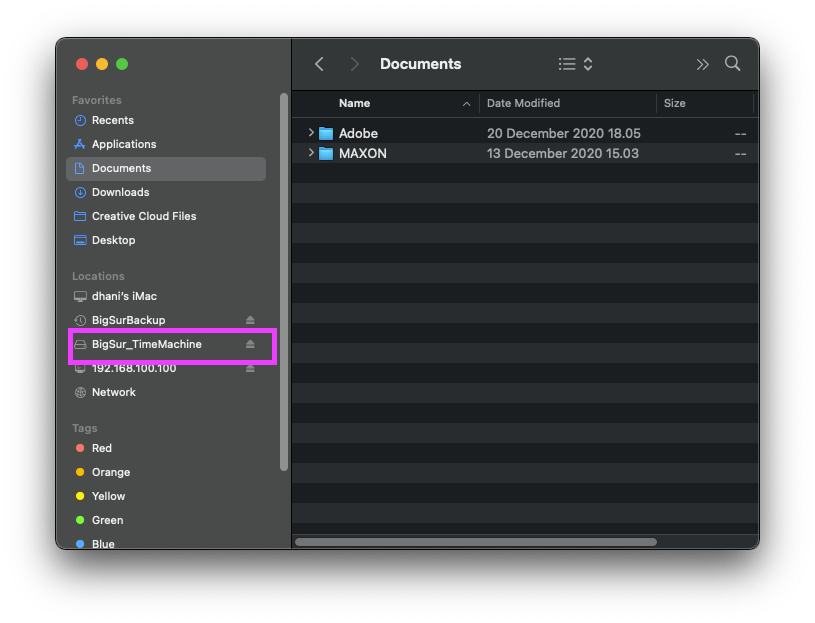
Wait a moment until the image creation process is complete. Now, you should see this new image is mounted in Finder.
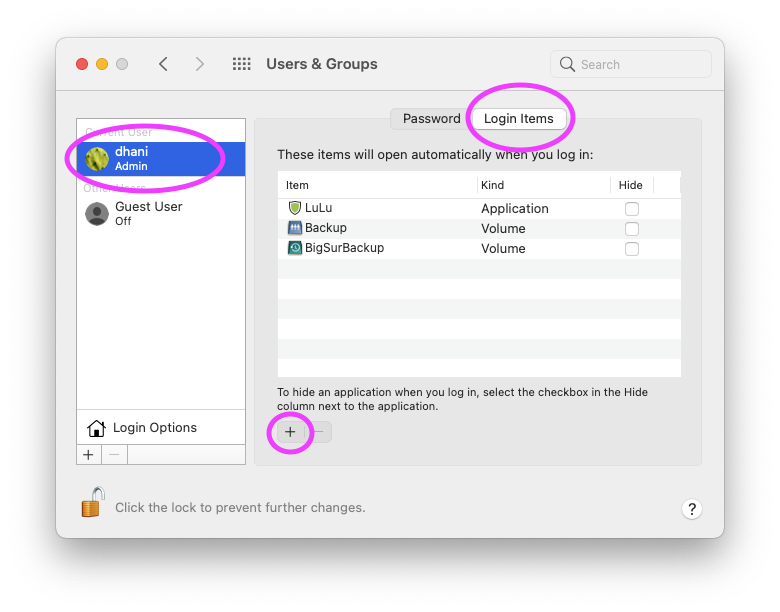
Step 3. Make the remote share automatically mounted
It is important to make the remote shared folder mounted automatically during system boot. We also need to auto mount the Time Machine image we created earlier.
- Go to System Preferences
- Click Users and Groups
- Select your user and then click Login Items
- Click the + button and then choose the blank image (.dmg) we created in step 1 above
- Repeat step 4 and choose the remote shared folder so it will be mounted automatically.
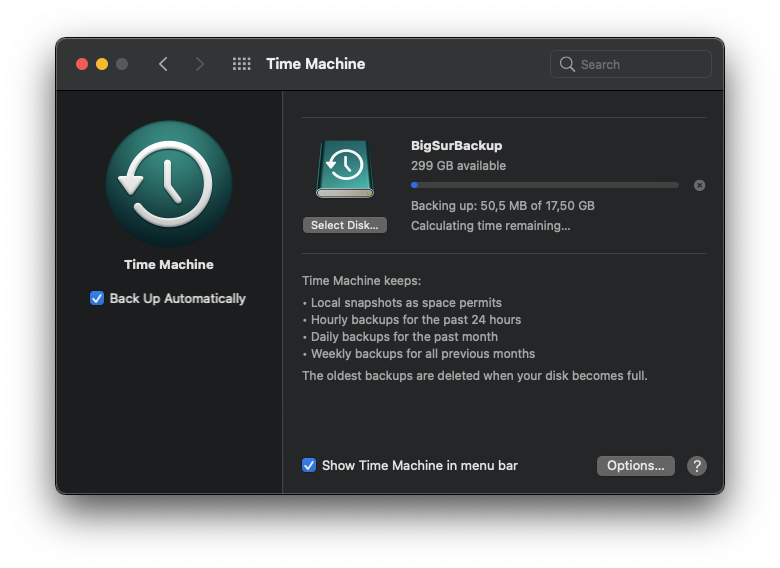
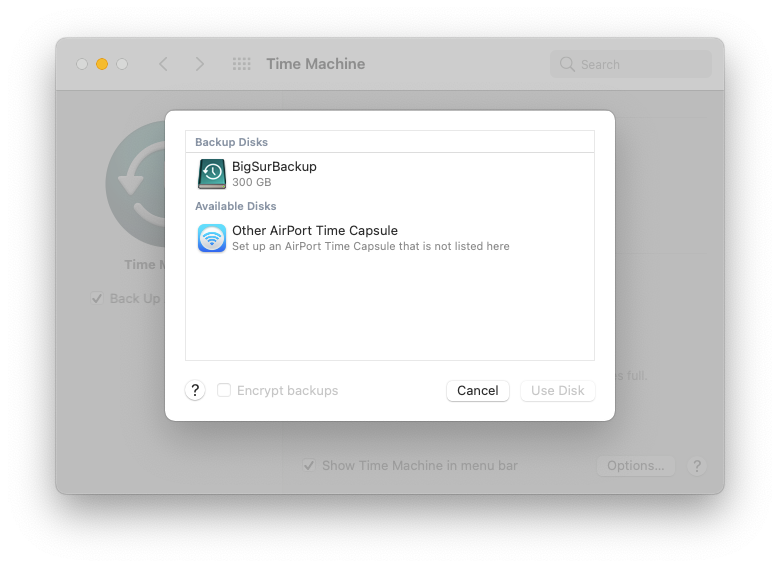
Step 4. Configure Time Machine to Use the Remote Share and Image File
Now we need to tell Time Machine to use the image file in the shared network. Open Terminal and do the following
sudo tmutil setdestination /Volumes/BigSur_TimeMachine/
Change BigSur_TimeMachine with your actual image name we created using the Disk Utility earlier. Now open System Preferences >> Time Machine >> Select Disk. Time Machine now should see the disk and use it for the backup destination.
Thank’s to iMore.com who provide the original article how to configure Time Machine to use the network shared folder as the backup destination.
Leave a Reply