

Upgrading your Fedora system ensures you have access to the latest features, security patches, and performance improvements. Transitioning from Fedora 40 to Fedora 41 can be accomplished using either the command-line interface (CLI) or the graphical user interface (GUI). This guide will walk you through both methods.
There are 2 ways to upgrade to Fedora 41 from 40 version. The Command line interface gives you a quicker way to upgrade but it requires a basic understanding about Linux terminal commands. Don’t worry, if you don’t want to touch the terminal, you can do it via GUI but it only available for Fedora Workstation.
Steps to Upgrade Fedora 40 to 41
Upgrading via Command-Line Interface (CLI):
The CLI method utilizes the dnf package manager along with the dnf-plugin-system-upgrade plugin to facilitate a smooth upgrade process.
Step 1: Update Current System
Before initiating the upgrade, ensure your current Fedora 40 system is fully updated:
sudo dnf upgrade --refreshThis command refreshes the repository metadata and installs the latest versions of all packages. Reboot Fedora after the download and update process is completed.
sudo rebootStep 2: Install the System Upgrade Plugin
If not already installed, add the dnf-plugin-system-upgrade package:
sudo dnf install dnf-plugin-system-upgradeStep 3: Download Fedora 41 Packages
Initiate the download of the Fedora 41 release packages:
sudo dnf system-upgrade download --releasever=41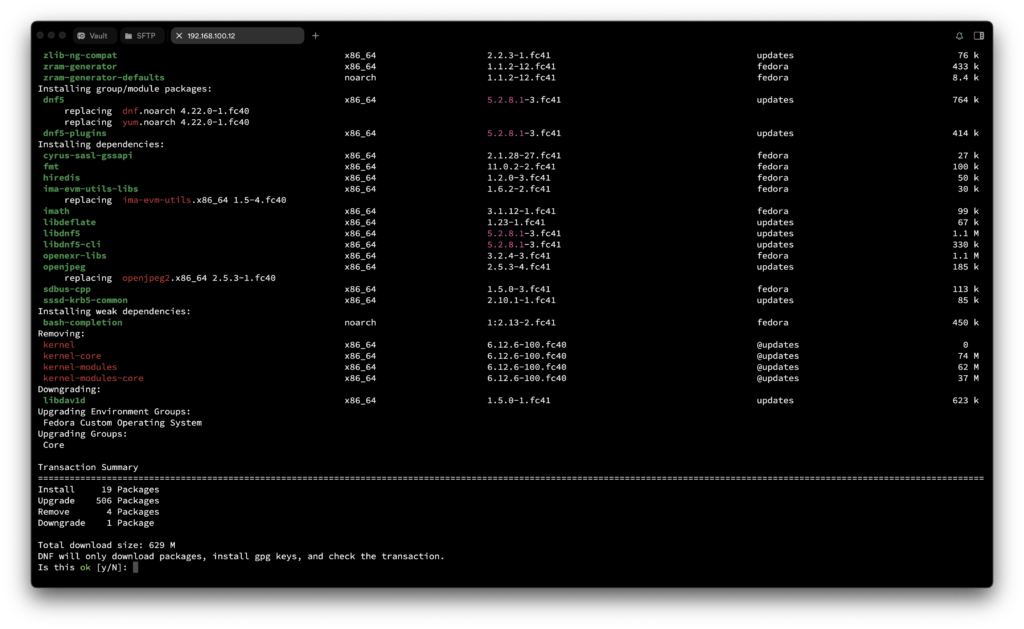
Wait until the download process completes. It will take a while depends on your internet speed. Make sure there is no error during this process.
If you encounter any package conflicts during this process, you can allow the system to remove conflicting packages by adding the --allowerasing flag:
sudo dnf system-upgrade download --releasever=41 --allowerasingStep 4: Start the Upgrade Process
Once all packages are downloaded, proceed with the upgrade:
sudo dnf system-upgrade rebootThe system will reboot and commence the upgrade. This process may take some time, depending on your hardware and the number of packages being upgraded.
Step 5: Verify the Upgrade
After the system restarts, confirm the upgrade by checking the Fedora release version:
cat /etc/fedora-releaseYou should see output indicating Fedora 41.
Upgrading via Graphical User Interface (GUI):
For users who prefer a graphical approach, Fedora offers an upgrade path through the GNOME Software application.
Step 1: Open GNOME Software
Launch the GNOME Software application from your applications menu.
Step 2: Check for Updates
Click on the “Updates” tab and refresh to ensure you have the latest information.
Step 3: Apply Pending Updates
If there are any pending updates for Fedora 40, apply them first by clicking “Download” and then “Restart & Update” if prompted.
Step 4: Upgrade to Fedora 41
After applying all updates, you should see an option to upgrade to Fedora 41. Click “Download” to begin the process.
Step 5: Restart and Upgrade
Once the download is complete, a “Restart & Upgrade” button will appear. Click it to reboot your system and start the upgrade process.
Post-Upgrade Recommendations:
- Backup Important Data: Before starting the upgrade, it’s advisable to back up important files to prevent data loss in case of unforeseen issues.
- Review Release Notes: Familiarize yourself with the Fedora 41 release notes to understand new features and any potential issues.
- Check for Third-Party Repository Compatibility: If you use third-party repositories, ensure they are compatible with Fedora 41 to prevent conflicts.
By following these steps, you can smoothly transition from Fedora 40 to Fedora 41, ensuring your system remains up-to-date with the latest enhancements and security updates.
Leave a Reply