At the time this article is written, the macOS Big Sur Beta is available for the Public. This means we can easily download the macOS Big Sur Beta without the needs of the developer account. Hackintosh is fun stuff that allows us to turn a supported PC to run the macOS operating system. I have been testing several times to install Hackintosh on my builds. But personally, I haven’t tried to install the macOS Big Sur on my PC.
So what I am going to do here is to make a macOS Big Sur Beta USB installer. I am on a macOS Catalina Hackintosh PC and I will need the GibMacOS software to do this. So, let’s get started.
Steps to Create macOS Big Sur Beta 11 Installer
Before we go through the installation, we will need to following:
- 16 GB or more USB flash disk
- GibMacOS Software
Download GibMacOS software and save it to a directory. We need to extract the ZIP file and it will produce a new folder called gibmacOS-master:

Step 1. Download macOS Big Sur Recovery Package
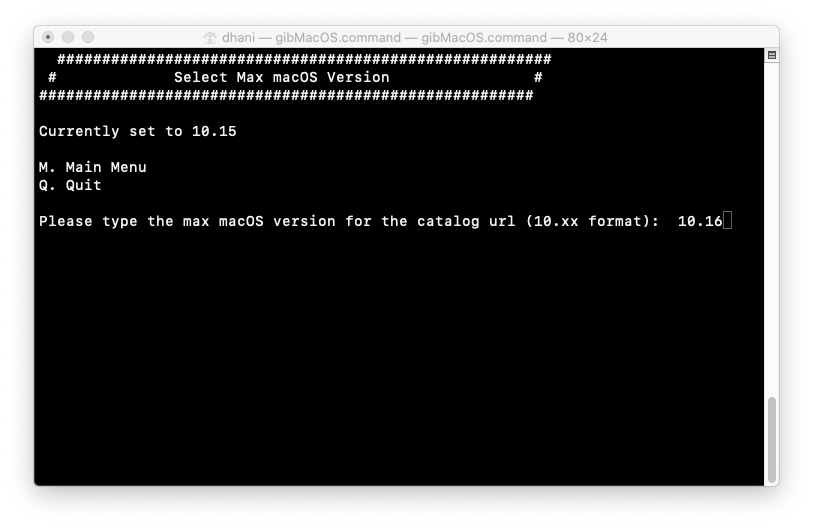
Right-click the gibMacOS.command file and then choose Open. It will open the Terminal window. You should see the following on your Terminal window.

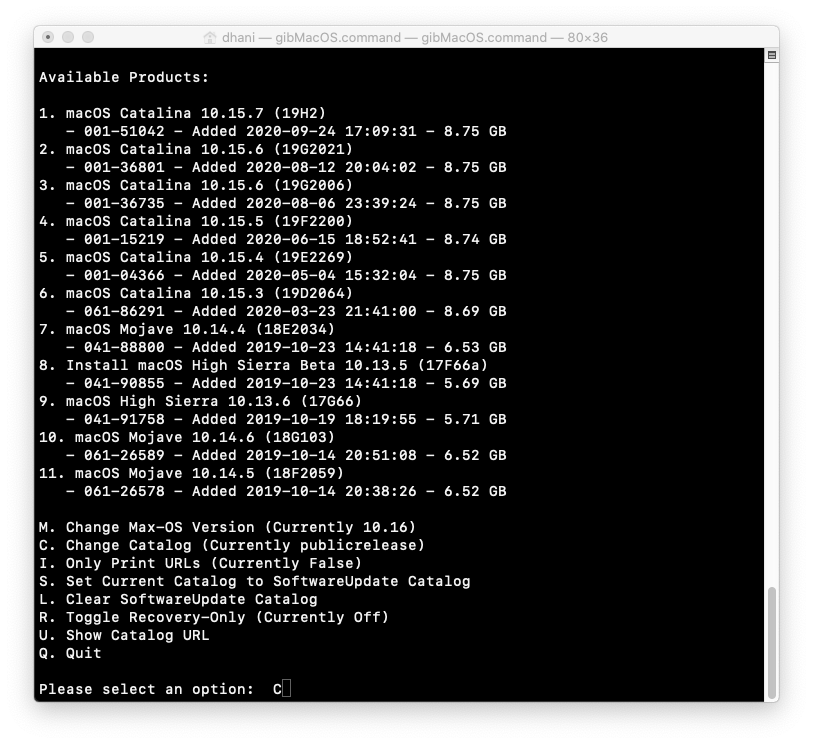
As you can see, there is no macOS Big Sur on the list. Don’t worry, we will get into it soon. Type M and then type 10.16 and press Enter. This will change the max macOS version.

The program will re-scanning and then it will return to the previous menu. We need to change the catalog. Type C and press enter on the following menu.

Type 4 on the next window to enable the developer catalog

Next, you should see the macOS Big Sur Beta in the list. In my case, its in the first number. So, type 1 to select it.

After that, the actual download process will start. Please note that this will download around 12 GB from the internet.

Once finished, you should see the following message.

Step 2. Install InstantAssistant.pkg
Now, we need to install the file InstantAssistant.pkg to our macOS hard drive. The file is located inside the gibMacOS-master >> macOS Downloads>>developer>>001-51046 – 11.0 macOS Big Sur Beta folder.

Right-click the file and choose Open. The installer should start immediately. It will be installed on your current boot disk of your macOS.


Once finished, you will see a new file called Install macOS Big Sur Beta inside your Applications folder.

Step 3. Creating the USB Installer
Now, plug in your USB drive and format it as macOS Journaled. Use the Disk Utility to do this. Click the USB drive and then click Erase.

Make sure you choose the macOS Extended (Journaled) and GUIS Partition Map scheme as shown above. Name it Installer or anything you like.


Now open the Terminal and paste this command line to create the macOS Big Sur Beta USB installer.
sudo /Applications/Install\ macOS\ Big\ Sur\ Beta.app/Contents/Resources/createinstallmedia --volume /Volumes/Installer
Change Installer with the name of your USB drive you created on the previous step. This process will take some time to complete. Please be patient. When finished, you will see the following

At this point, we have successfully created the macOS Big Sur Beta USB installation drive. But, you will need to configure the OpenCore boot loader before you can actually installed it on your PC. So stay tuned and I will write a guide showing how to install macOS Big Sur on AMD Ryzen and AMD FX.

Leave a Reply