

Debian Tutorial – Owncloud 10 has been released a while ago with many interesting features, bug fixes and improvements. Today, I am going to show you how to install Owncloud 10 on Debian 8 server. Owncloud is an open source web application that lets us to create our own cloud storage and sharing services. Its pretty similar features to Dropbox in some sections. Its great to have our Owncloud server running on our own system, and Debian is a great OS to get start with.
Steps to install Owncloud 10 on Debian 8
Step 1. Install LAMP Server
In order to install Owncloud, you will need a working LAMP server on your Debian. Please read my previous post to install LAMP Server on Debian 8 Jessie. If you have installed LAMP Server on Debian 8, please jump to next steps. Owncloud needs additional modules to work properly.
apt install php5-gd php5-curl
systemctl restart apache2
Step 2. Download Owncloud package
apt install unzip
cd /tmp
wget https://download.owncloud.org/community/owncloud-10.0.0.zip
Extract the package
unzip owncloud-10.0.0.zip
It will produce a new directory called owncloud. Now move this owncloud directory to /var/www/html
mv owncloud /var/www/html/
Change the permission
chown -R www-data:www-data /var/www/html/owncloud
Step 3. Create a new Database
Now we need to create a new database and new user for owncloud. You may change the database name and user with your own.
#login to mysql. You will need root password for mysql server
mysql -u root -p

#create a new user for owncloud
CREATE USER 'owncloud'@'localhost' IDENTIFIED BY '12345678';

#create new database
CREATE DATABASE owncloud;

#grant privileges
GRANT ALL ON OWNCLOUD.* TO 'owncloud'@'localhost' IDENTIFIED BY '12345678';
FLUSH PRIVILEGES;
EXIT;
Step 3. Prepare the virtual host
On this example, I would like to install Owncloud under my root domain (theplanetfootball.com). It should be accessible via the following address: http://theplanetfootball.com/owncloud.
Create a new virtual host
Copy the 000-default.conf to something such as owncloud.conf
cp /etc/apache2/sites-available/000-default.conf /etc/apache2/sites-available/owncloud.conf
Now edit the new copied file
nano /etc/apache2/sites-available/owncloud.conf
Now change the lines inside owncloud.conf. Attached is the example of mine. You may modified them to match your settings.
<VirtualHost *:80>
        ServerAdmin admin@theplanetfootball.com
        DocumentRoot /var/www/html/owncloud
        ServerName theplanetfootball.com/owncloud
        ServerAlias www.theplanetfootball.com/owncloud
        ErrorLog ${APACHE_LOG_DIR}/error.log
        CustomLog ${APACHE_LOG_DIR}/access.log combined
</VirtualHost>
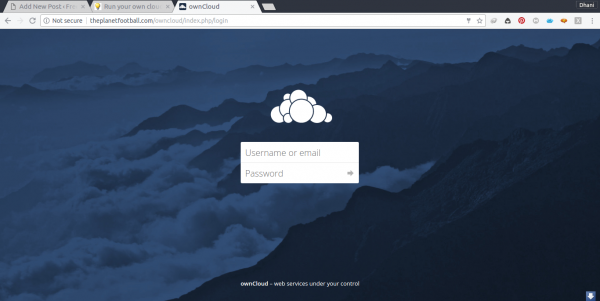
Step 4. Configure Owncloud
Now we are ready to configure Owncloud via Web browser. Open Web browser and point to your server IP. For example: http://10.34.0.1/owncloud.
Follow on screen wizard, you will be asked to enter the database user, database name, password etc.
Leave a Reply