Oracle SQLPlus is the official command line tool for Oracle Database. With this tool, we can perform many tasks to our Oracle Database. In this tutorial, I am going to show you how to install SQLPlus on Ubuntu 18.04 and Ubuntu 18.10. The installation is not straight forward and it needs some basic understanding of Linux command line. But, I will try to explain every steps.
Steps to Install Oracle SQLPlus on Ubuntu
Step 1. Download the required packages
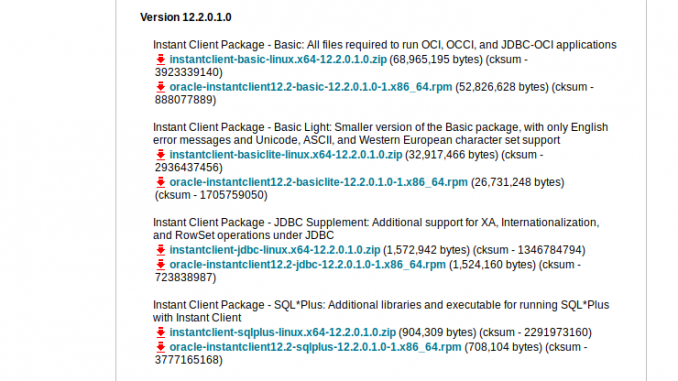
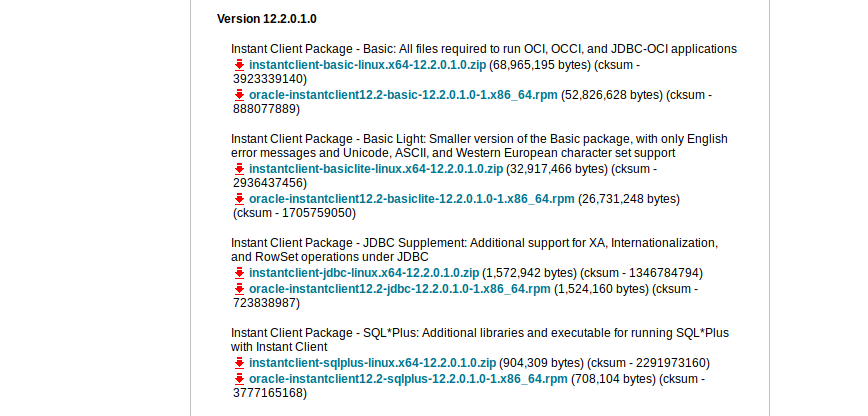
In order to run SQLPlus, we need two different packages. Go to the Oracle official download site and then select the appropriate package. If you are running Oracle Database 18.3, you should choose the 18.3 version. In this example, I use the version 12.2 because I have Oracle Database version 12.2 running on my network.
You will need to download these two files. Please note that if you are running Oracle 18.3, or any other version, you need to download the correct/match version with your Oracle Database.

You will have files as follow (This is for version 12.2)
- instantclient-basic-linux.x64-12.2.0.1.0.zip
- instantclient-sqlplus-linux.x64-12.2.0.1.0.zip
Step 2. Extract the files
After you download the zip files, extract them to a special directory, for example: /opt/oracle/. You can extract them to different folder as you like.
ubuntu@ubuntu:~/Downloads$ sudo mkdir /opt/oracle
>>> This command will move the zip files to /opt/oracle directory <<<
ubuntu@ubuntu:~/Downloads$ sudo mv instantclient-* /opt/oracle
>>> change directory to /opt/oracle >>>
ubuntu@ubuntu:~/Downloads$ cd /opt/oracle
>>> Extract the zip files >>>
ubuntu@ubuntu:/opt/oracle$ sudo unzip instantclient-basic-linux.x64-12.2.0.1.0.zip
ubuntu@ubuntu:/opt/oracle$ sudo unzip instantclient-sqlplus-linux.x64-12.2.0.1.0.zip
After unzipping those two files, you should have a new directory under /opt/oracle/ called instantclient_12_2
Step 3. Configure SQLPlus
Prior to version 18.3, we need to create symbolic links for some files.
cd /opt/oracle/instantclient_12_2
ln -s libclntsh.so.12.1 libclntsh.so
ln -s libocci.so.12.1 libocci.so
Install libaio
sudo apt install libaio1
Set the LD_LIBRARY_PATH environment variable with this command:
export LD_LIBRARY_PATH=/opt/oracle/instantclient_12_2:$LD_LIBRARY_PATH
Next, add the the instantclient directory to system PATH with this command
export PATH=/opt/oracle/instantclient_12_2:$PATH
To make it permanent, edit your .profile file.
nano ~/.profile
Add these two lines to the end of the file
export PATH="$PATH:/opt/oracle/instantclient_12_2"
export LD_LIBRARY_PATH="$LD_LIBRARY_PATH:/opt/oracle/instantclient_12_2"
And then execute
source ~/.profile
Step 4. Connect to the Oracle Database using SQLPlus
Now you can start using SQLPlus. Usually, I use the following syntax to connect to my Oracle Database
sqlplus dhani/mypassword@//192.168.100.51:1521/mydb01
Where:
- dhani is the database username
- mypassword is the password
- 192.168.100.51 is the IP address of the Oracle database server
- 1521 is the default Oracle port
- mydb01 is my database
ubuntu@ubuntu:~$ sqlplus dhani/mypassword@//192.168.100.51:1521/mydb01
SQL*Plus: Release 12.2.0.1.0 Production on Thu Jan 10 15:03:33 2019
Copyright (c) 1982, 2016, Oracle.  All rights reserved.
Last Successful login time: Thu Jan 10 2019 13:58:26 +00:00
Connected to:
Oracle Database 12c Enterprise Edition Release 12.2.0.1.0 - 64bit Production
SQL>
Thank you for reading this article. I hope you enjoy it and cheers.

Great tutorial, it worked for me.
It didnt worked for me, I have errors (ORA-12545), can you help me please?
I got segmentation fault(core dumped)
Worked for me also, running Ubuntu 18.04.1 LTS (bionic) on WSL2. Well laid out. Thank you!
ln: failed to create symbolic link ‘libocci.so’: Permission denied
i’m facing these problem can pls give the solution
Hi there, make sure to run the command as root or sudo
Great, it worked for me.