Installing Oracle’s Instant Client on an Apple Silicon Mac (M1, M2, M3) has become more straightforward with the release of a native ARM64 version. This guide will walk you through the installation process, ensuring you can seamlessly connect to Oracle databases from your macOS device. I am using a Macbook Pro M1 and if you have different version of Apple Silicon Mac device, this guide should work.
Oracle Instant Client is a lightweight, free set of Oracle Database libraries and tools that enable applications to connect to local or remote Oracle Databases. It provides the necessary network connectivity and advanced data features for applications developed in various programming languages, including Python, Node.js, Go, PHP, and Ruby. Additionally, it offers tools like SQLPlus, SQLLoader, and Oracle Data Pump for efficient data access and management.
Steps to Install Oracle Instant Client on Apple Silicon Mac
Step 1. Download the Oracle Instant Client
Oracle provides the Instant Client for macOS ARM64, compatible with Apple Silicon processors. You can download the latest version from the Oracle Instant Client Downloads for macOS (ARM64). Ensure you download both the Basic Package and the SDK Package if you plan to develop applications.
Step 2. Install the Instant Client
After downloading, follow these steps to install:
- Mount the Disk Image: Double-click the downloaded
.dmgfiles to mount them. - Copy Files to the Desired Location: Open Terminal and create a directory for the Instant Client:
In this example, I created a new folder /opt/oracle/instantclient
Open Terminal and execute this command to create the new folder
sudo mkdir -p /opt/oracle/instantclientNow let’s copy the content of the Oracle Instant Client that we downloaded previously
sudo cp -R /Volumes/instantclient-basic-macos.arm64-23.3.0.23.09/* /opt/oracle/instantclientIn some cases, you will need to change instantclient-basic-macos.arm64-23.3.0.23.09 with the version that you have.
Step 3. Configure Environment Variables
To ensure your system recognizes the Instant Client, set up the necessary environment variables:
- Open or Create the Profile File: Depending on your shell, this could be
~/.zshrcor~/.bash_profile.
To check if you are using zsh or bash, you can run this command on Terminal
ps -p $$In my case, I got this which means I have zsh
16341 ttys000 0:00.12 -zshNow we need to edit the file .zshrc
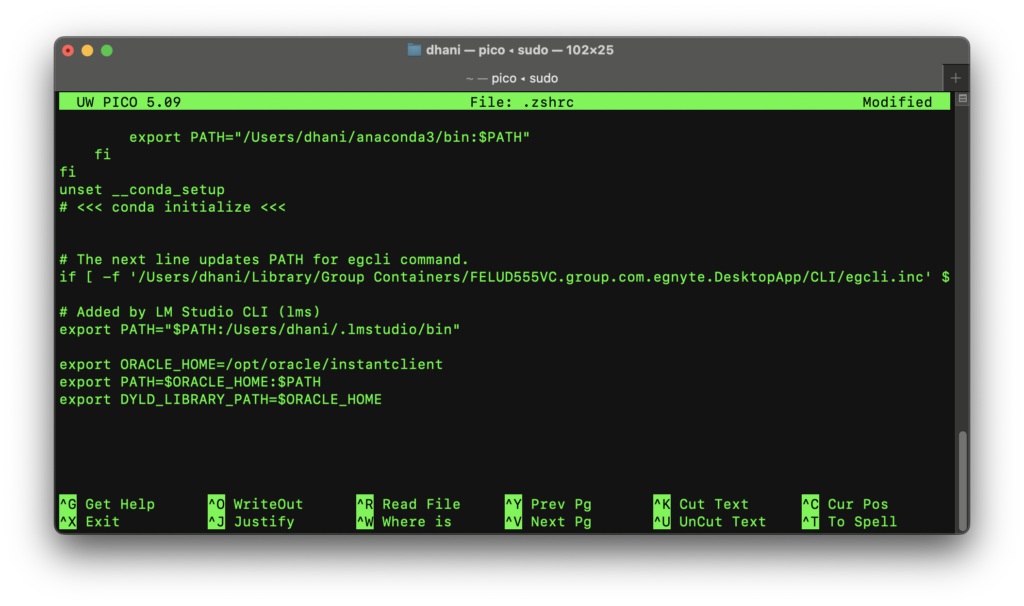
sudo nano ~/.zshrcAnd then append these lines:
export ORACLE_HOME=/opt/oracle/instantclient
export PATH=$ORACLE_HOME:$PATH
export DYLD_LIBRARY_PATH=$ORACLE_HOME
It should looks like this

Close and save the file and then execute this command on Terminal
source ~/.zshrcOr if you are using bash, it should be like this
source ~/.bash_profileStep 4. Additional Settings
So if you have an Oracle autonomous database hosted in the Oracle Cloud, you will need to do the following.
Download Wallet
Download your Wallet and then extract the content to the folder /opt/oracle/instantclient/network/admin. This to ensure that the application that we use to connect to the database can use the TNS (Oracle’s Transparent Network) connection.
Ok, now all the installation process of Oracle Instant Client on Apple Silicon Mac is completed.
Step 5. Connect to the Oracle Database
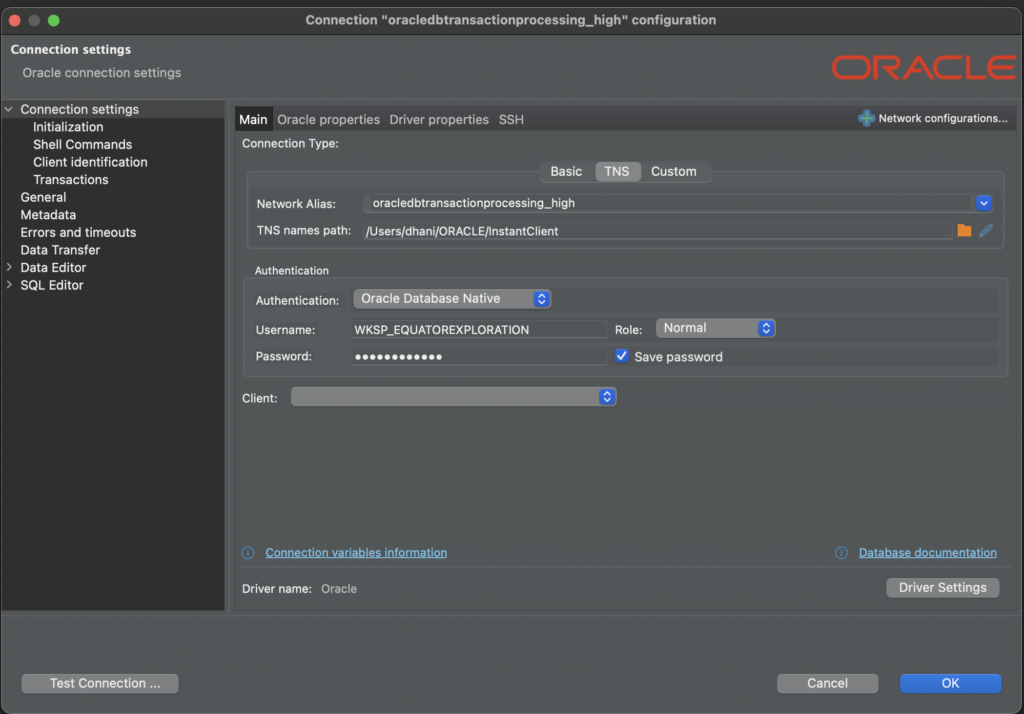
Now we can try to connect our software to the Oracle Database. I am using Oracle Autonomous Database and DBeaver software in this example.
Use the TNS connection and then provide the TNS names path (the InstantClient folder we created before.


Leave a Reply