

Hello everyone, the new macOS Monterey is now in Beta version. It’s not available for public testing yet, but with a little trick, we can actually download the macOS Monterey Beta. In this article, I am going to show you how I install macOS 12 Monterey Beta on my old PC with Intel Core i5 4590 (Haswell). I am using the latest OpenCore 0.7.0. Everything seems to work fine. But, since this is the Beta version, I am pretty sure that the bugs are exist. So, use it carefully.
All the steps shown below is using macOS Big Sur Hackintosh. You can use a real Mac if you have. So please do not get confused. At the end of this page, you can download my entire EFI folder that I use for this build. If you have the same hardware as mine, it should works.

Hardware Specification:
- Intel Core i5 4590 Haswell generation
- Motherboard Gigabyte H81M
- MSI Radeon RX 570 graphics card 8 GB
- DDR3 RAM 12 GB
- SSD 250 GB
Steps to Install macOS 12 Monterey Beta on Intel Core i5 4590
Step 1. Make macOS 12 Monterey Beta USB Installer
To create the USB installer, you will need a real Mac or a Hackintosh. At the moment, there is no way to download macOS 12 Beta using Windows 10 or Linux yet. I will update this article when there is an update for it. Please visit the article below for more detail about how to create macOS 12 Monterey Beta USB Installer. I also created a video for this purpose.
https://manjaro.site/how-to-create-macos-monterey-usb-installer-for-hackintosh/
At this point, I assume you already have a macOS Monterey Beta USB installer. Next, we are going to prepare the EFI boot loader using OpenCore 0.7.0.
Step 2. Mount the EFI Partition in the USB Installer
First of all, I hope you already read the official OpenCore guide in Dortania page. There are a lot of things that we need to take care of when it comes to boot loader configuration. But don’t worry, I will try to guide you.
Mount EFI Partition in the USB installer
We need to mount the EFI Partition in the USB installer we created on the step 1 above. Use the Clover Configurator to mount the EFI Partition on the USB drive. It should be empty and we are going to put our EFI folder into that partition.

Step 3. Download the EFI Folder
If you have the same hardware as mine above, you can try to use my EFI folder. But please note that I do recommend you to create your own EFI for your hardware. In most cases, the EFI folder will not work on other/different hardware configuration.
Download EFI 0.7.0 for Intel Core i5 Haswell Hackintosh
Extract the folder and then copy the EFI folder to the EFI partition of the USB installer.

Step 4. Update the SMBIOS
Next, I would recommend you to update the SMBIOS. This will update the serial number and so on. To update the SMBIOS, use the GenSMBIOS software. You can watch how to update the SMBIOS from this video below. Do not use iMac15,1 as this SMBIOS is not supported on macOS Monterey. I suggest you to use MacPro7,1 instead.
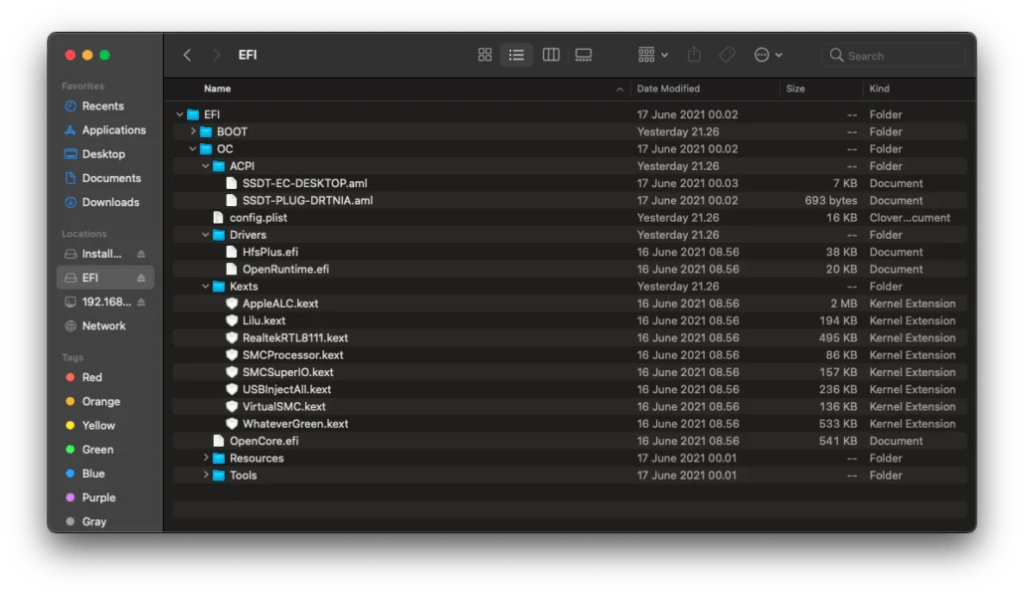
EFI Content
Below I will show you the content of the EFI folder, just a brief
Final Thought
It is interesting to know that this new macOS Monterey can be installed on my old Intel Core i5 4590. Overall, it runs pretty smooth. Well, there are some bugs but I am pretty sure that in the final release version, those bugs will be fixed by Apple.
Leave a Reply