Hello everyone, I just installed Proxmox 6.3 on my new machine. I had a problem with my previous Proxmox system due to SSD failure. Now I have to start everything from the scratch. But fortunately, I have all my virtual machine disks on a separate hard drive. It’s only the virtual machine disk image, not a complete VM configuration. In this article, I am going to show you how to Create a New Virtual Machine from an Existing Disk Image in Proxmox.

As you can see, I have a bunch of unused VM disk images from the previous Proxmox installation. These disks are located in a separate hard disk. Now I will install this hard drive to my new Proxmox installation. I use this guide to install an extra hard disk to Proxmox VE. So now my new Proxmox system is up and running and I want to reuse the disk images from my previous Proxmox’s virtual machines.
Steps to Create a New Virtual Machine from an Existing Disk Image in Proxmox
In Proxmox, we cannot use the existing disk image for the new virtual machine. But don’t worry, we will need to create a new dummy VM, and then change the configuration of this new VM to use the existing disk image.
Step 1. Attach the Disk to Proxmox
You can skip this step if you have done it already. In this example, my second disk is mounted under /mnt/disk1. And then my old disk images are in the following path: /mnt/disk1/vm_disk/images. And it is loaded from the Proxmox web management as disk1. It is important to make a note of this. We will need it later.
Step 2. Create a New VM
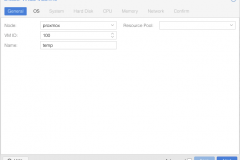
Open Proxmox web dashboard and create a new virtual machine. Create a new VM as usual. The idea is that we will replace the disk on the new virtual machine with the existing disk image we have.
My new VM id is 100 and we will need to change this to match our disk image at the end of the process.
Step 3. Change the VM configuration
Now we need to change the new VM config. Log in to the Proxmox server and edit the config file of our new VM. In this case, my config file for my new VM is 100.conf. It’s located under the following folder: /etc/pve/qemu-server.
nano /etc/pve/qemu-server/100.conf
Above is the default 100.conf file for my new VM. We are going to modify this. In this example, I am going to use my existing disk called: vm-106-disk0.raw. So let’c change the following line on the config file from this one
sata0: disk1:100/vm-100-disk-2.qcow2,cache=writeback,size=32G,ssd=1
To this
sata0: disk1:106/vm-106-disk-0.raw,cache=writeback,size=80G,ssd=1
If you are using UEFI, then you will also need to change the uefidisk0 line and configure it to use your existing EFI disk. In my case I change the line to this one
efidisk0: disk1:106/vm-106-disk-1.raw,size=128K
Now let’s rename our VM config file from 100.conf to 106.conf. I am not sure if this is necessary but I always change my virtual machine ID to match the disk image ID.
/etc/pve/qemu-server/
mv /etc/pve/qemu-server/100.conf 106.conf
By doing this, the VM id in the Proxmox web will also reflex this change.

Finally, start the VM and now my new VM is using the existing disk image from the previous Proxmox system.


Leave a Reply