

In this article, I will show you how to connect to iSCSI Target on Windows 11. iSCSI Target is a way to share storage across the network. For more information about iSCSI, I would recommend you to read this article. Here I will guide you on how to set up a Windows 11 so it can connect to a remote iSCSI Target and use the iSCSI Target as a drive in Windows 11. Not only Windows but a Mac or Linux machine can also connect to an iSCSI drive.
By default, Microsoft iSCSI service is not running.

First, open the iSCSI Initiator. This tool is located under Control Panel\All Control Panel Items\Windows Tools. Click Yes if you see the message as shown above.
On the iSCSI Initiator Properties window, click Discovery and then click Discover Portal. Type the iSCSI Target server IP address and port. The default port is 3260.

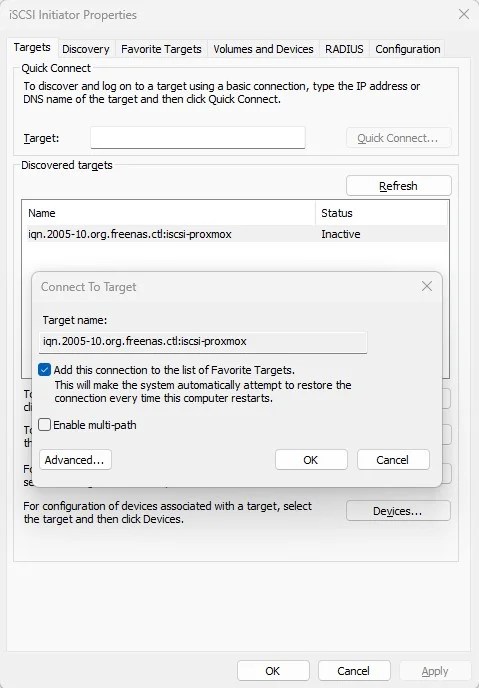
And then, click Targets to see the available Targets on the server.

Select the target and then connect.
Now you should see the status of the target is Connected.

Mount the iSCSI Target Disk
After connecting to Target, Windows 11 will not do anything. You might not notice anything. Now we need to open Disk Management. Right-click the Windows logo and choose Disk Management. Here you should see your iSCSI target disk.

We can simply format it or assign it as a new drive in Windows 11.
Leave a Reply