

Backup is very important which everyone should consider it as a priority. Cloud storage is getting popular and many people are encouraged to have cloud backup. There are many benefits to have this type of Backup. Cloud Backup or often called as online backup uses Cloud storage to store the backup data. The advantage of having important data off-site, away from your office is that it’s safe from theft, safe from fire, flood and way more secure. There are many application or software that can help us to perform cloud backup. In Linux, you can use Cloudberry Backup for Linux, Crashplan, Duplicati and many others. On this article we are going to discuss about How to Backup Linux to The Cloud Using Crashplan.
Backup Linux to the Cloud Using CrashPlan
Crashplan is a popular cloud backup providers for last few years. Thousands of users (if not millions) have been using this cloud backup software. Crashplan offers unlimited cloud storage at pretty low cost (about $10 per month per device). Another good thing is that Linux users can get this benefit as well. Crashplan is available for Linux operating system.

Crashplan for Linux Features
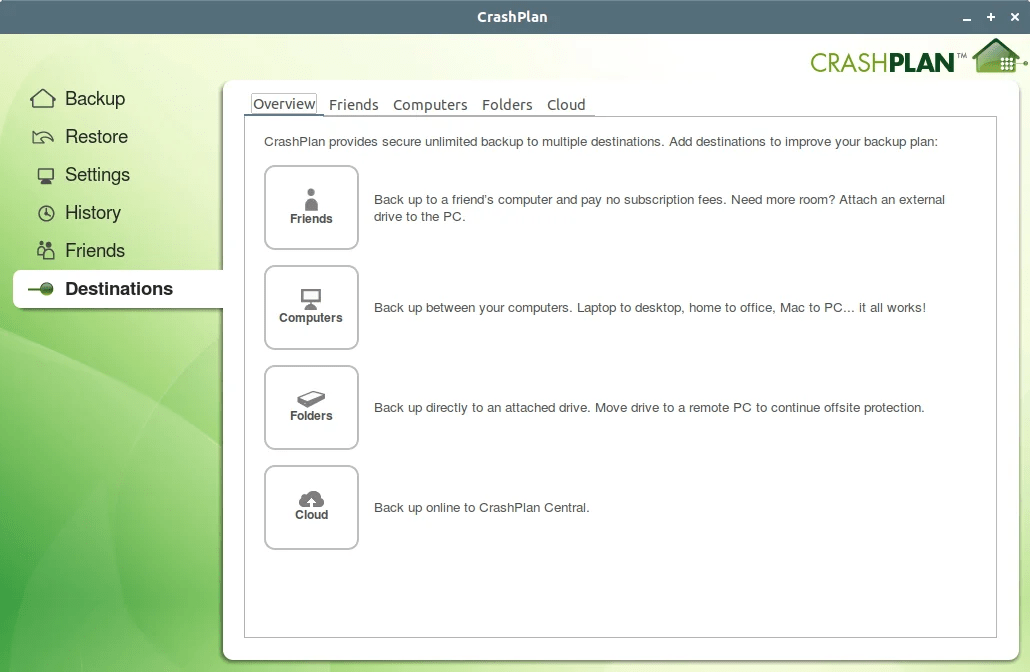
Crashplan for Linux comes with a simple, easy to use graphical interface. By default, it will scan and prepare user’s home directory for backup. But you can easily add more folders or files to include in the backup. Crashplan supports the following backup destinations:
- Cloud backup (Crashplan Central) – Paid
- Friend (Backup to other Crashplan users) – Free
- Another Computer (Backup to another computer with the same account) – Free
- Folder (Backup to any local folder, USB drives etc) – Free
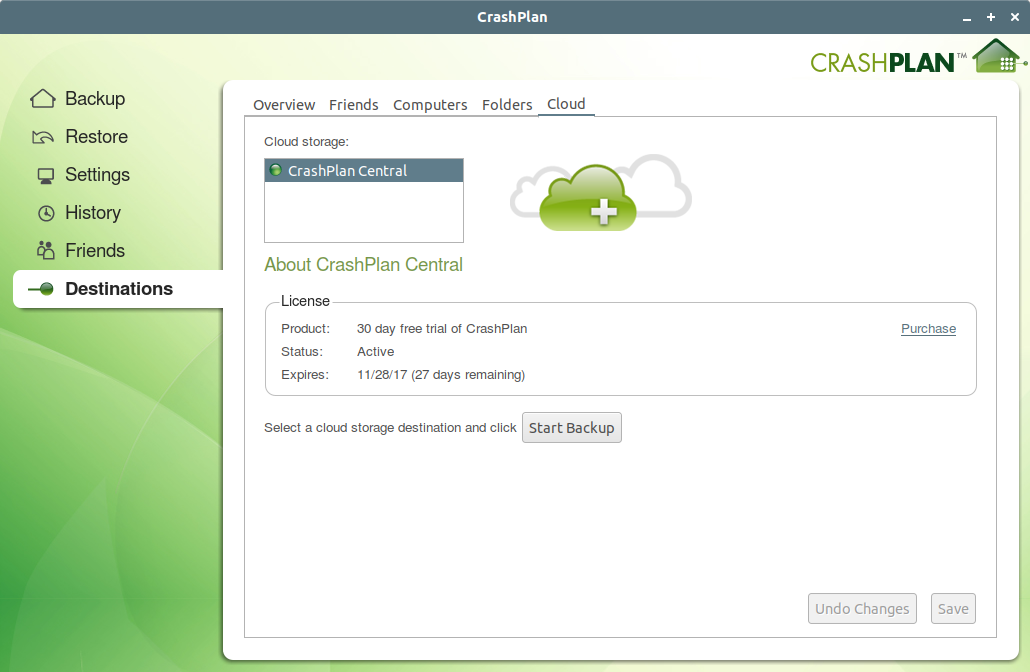
If you want to store your backup in the cloud, Crashplan offers their own Cloud Storage called Crashplan Central. With $10 per device, you will get unlimited backup storage. You can obtain free 30 days trial as well.

Security Feature
By default, your archive is encrypted. You can choose from three available archive encryption options: Standard, Custom key password and custom key. The default is standard. You can also enable password to open the Crashplan application if you want.

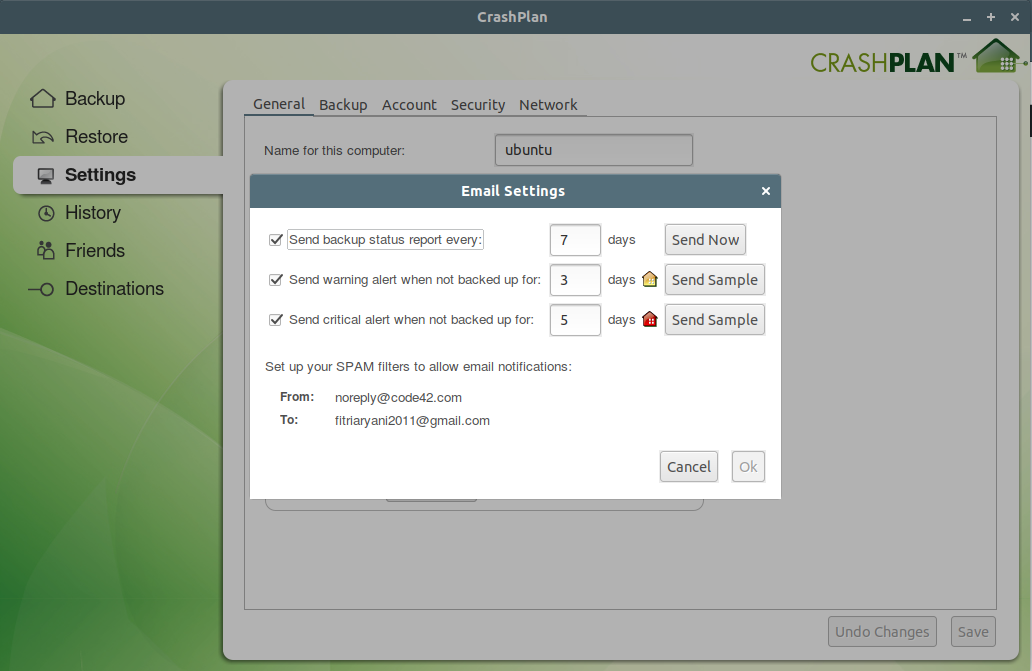
Notification
You can enable the email notification for any backup status. But, you cannot change or add other email to the list instead of your email used for Crashplan registration.

Backup Schedule and file exclusion
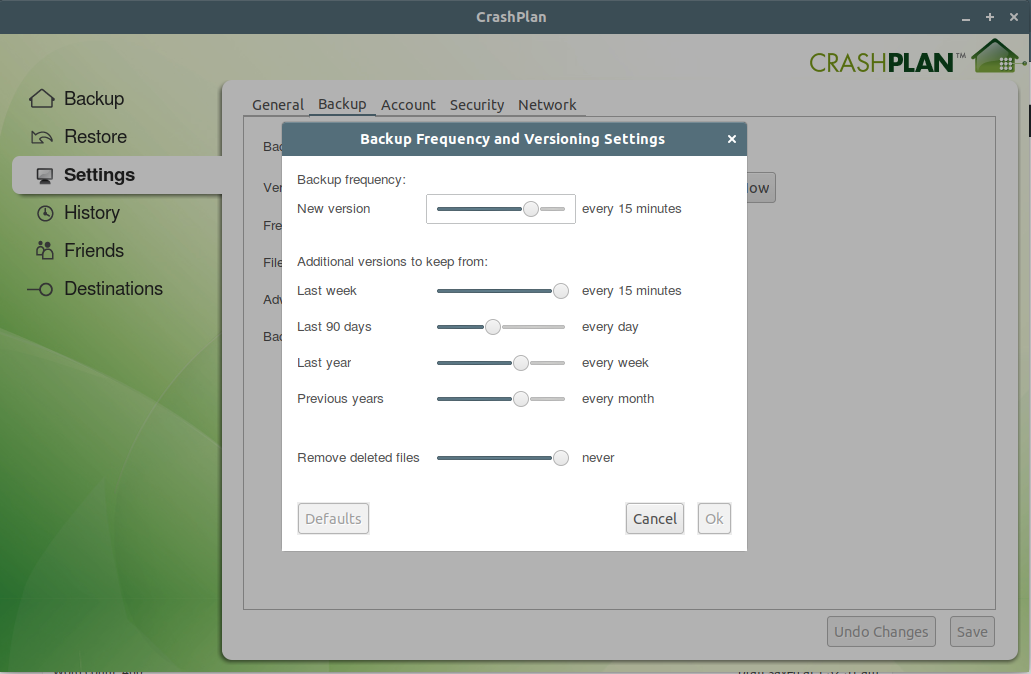
Crashplan Backup for Linux supports filename exclusion, advance backup frequency and versioning settings. You can specify the backup frequency manually. The default value is 15 minutes. It will check the backup source every 15 minutes.
Another great feature that we love is the versioning system. We can specify how Crashplan handle the file versions we may have. By default, we can keep any files forever. It will never remove any deleted files. But you are free to change this.

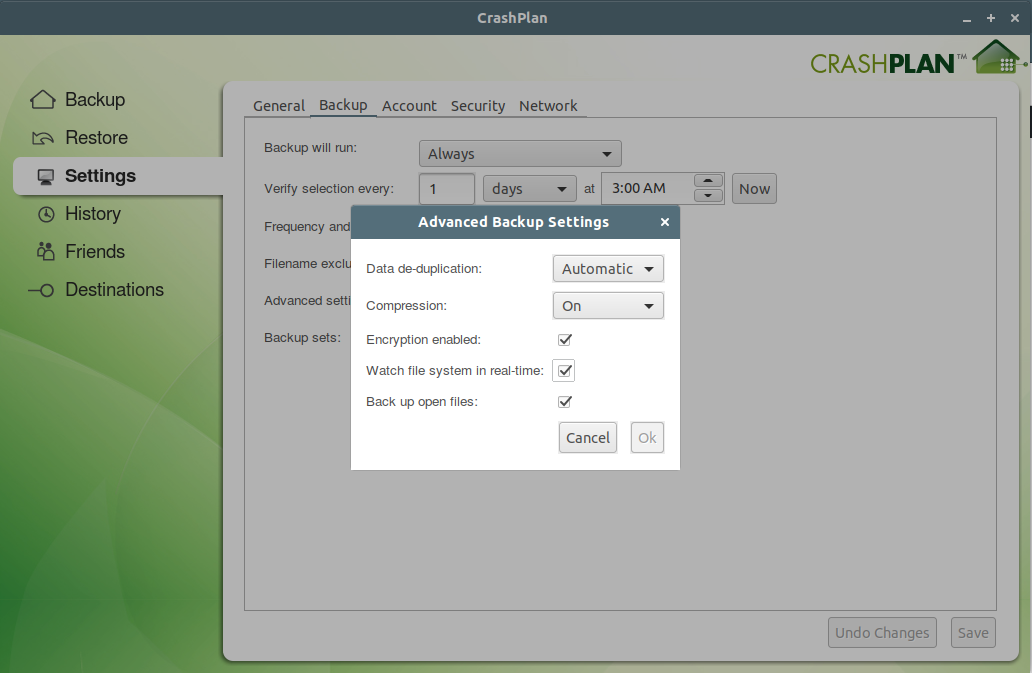
Advanced Backup Settings
The Advanced Backup Settings provide access to some key features such as data de-duplication, compression, encryption etc. By default, the Data De-Duplication is set to Automatic, file compression and encryption is enabled. Basically we don’t have to touch this area because it’s already set to maximum security.

How to Backup using CrashPlan
If you are new to CrashPlan, you will need to create new account first. You can do it by visiting this link. Next, you will need to download CrashPlan for Linux.
Install CrashPlan Backup for Linux
After you download, you will have a file for example : CrashPlan_4.8.3_Linux.tgz. Extract the file and it will create a new directory: crashplan-install. Now open Terminal and cd to the crashplan-install directory.
cd crashplan-install
sudo ./install.sh
The command will start the installation in text mode. Answer few questions during installation. In most cases, you will simply need to press the Enter button to continue. Make sure you are connected to the internet since this will download packages from the internet.
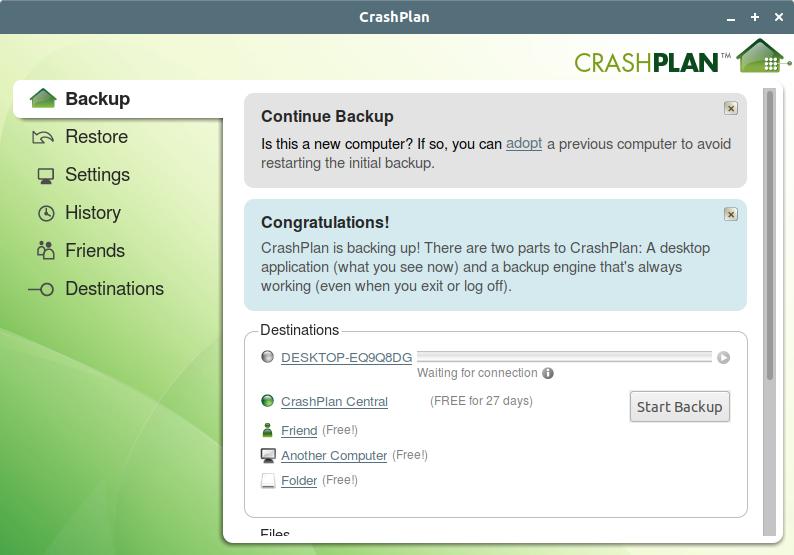
After the installation is finish, open CrashPlan from application menu from your desktop. On the first run, you will need to enter your Crashplan account details.
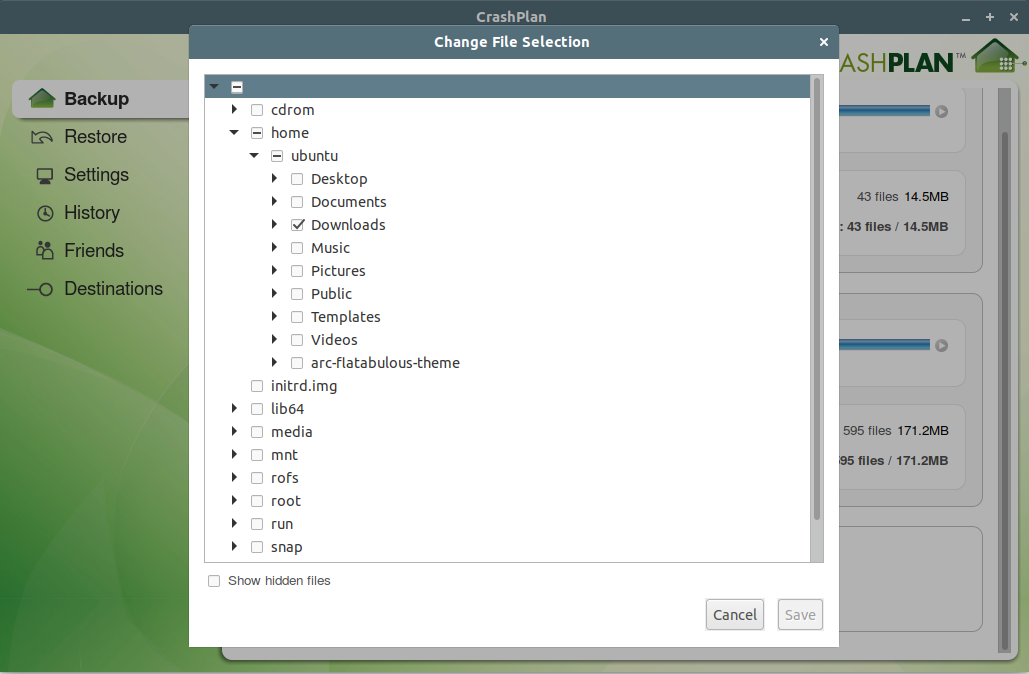
Configure the Backup Sources
By default, Crashplan will create a new backup plan for you. It will backup the user’s data inside user’s home directory. Click Change button to select which folders to backup. You can pick more than one folders.

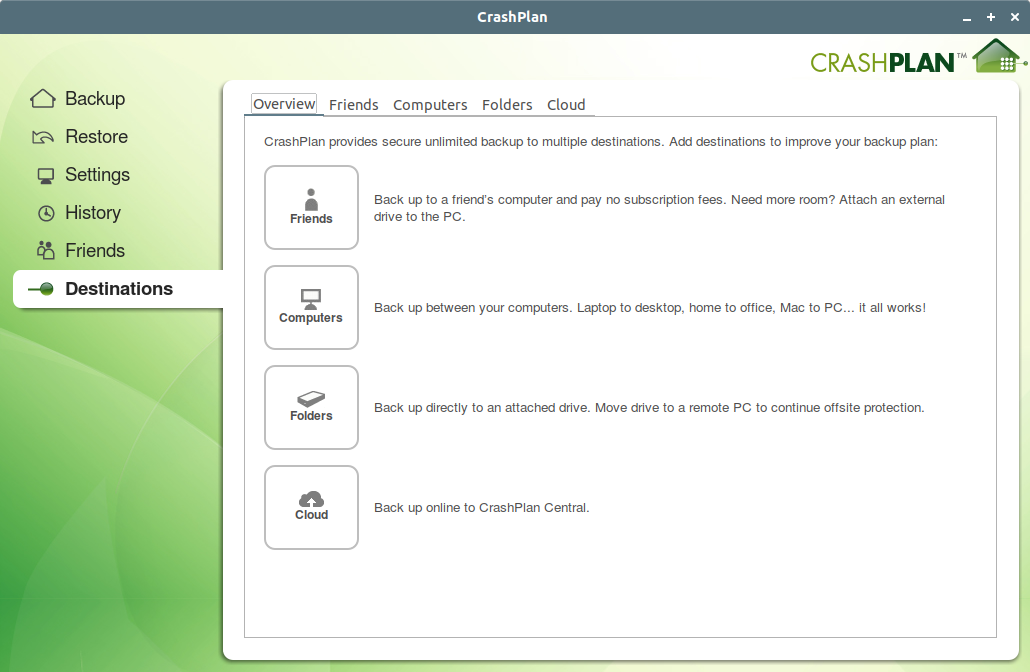
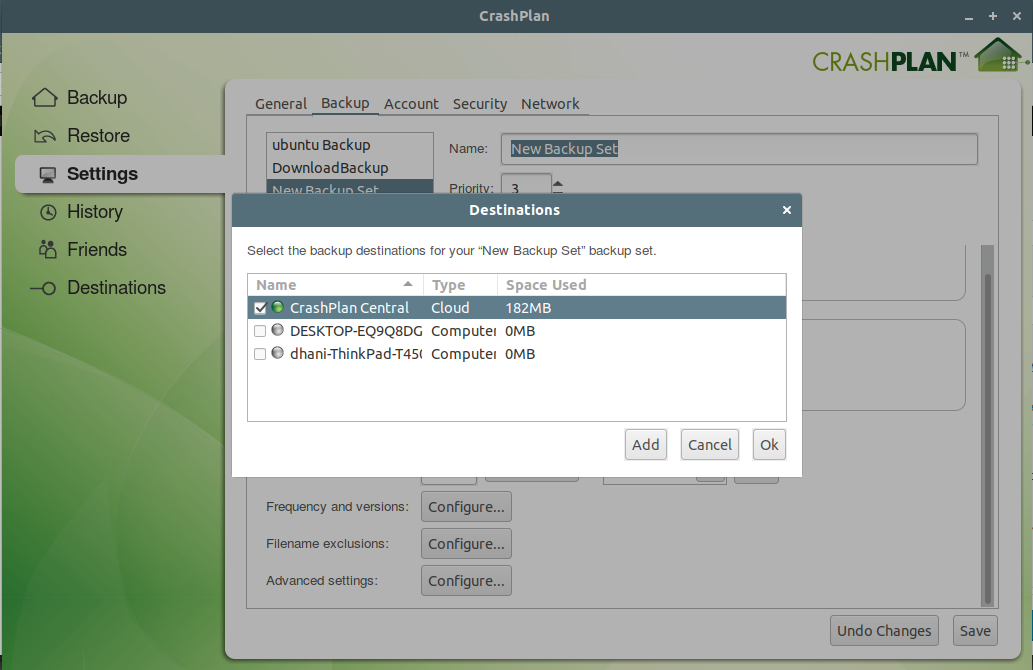
Configure Backup Destinations
Now we need to configure the backup destination. Click Destinations and then click Cloud.
You can also put your backup on other supported locations such as folders, computers and Friends.
Add another backup set
Crashplan supports multiple backup set. Go to Settings | Backup. Then Click Add and give a new backup set a unique name for reference.

Click Files and select your backup sources
Next, click Assign to set the backup destination

Additionally, you may change the backup frequency, file name exclusions etc. Click Save to save the new backup set.
Final Thoughts
CrashPlan for Linux is a great GUI backup tool for Linux operating system. It is very easy to use and stable. The fact that the Linux edition lacks system image backup feature, but I think its a good way to start. CrashPlan only offers single cloud storage (Crashplan Central) while other backup solution such as Cloudberry has more to offers in term of cloud storage support.
Thanks for reading this how to backup Linux to the Cloud using CrashPlan. Stay tuned because we have more post like this in the future. Cheers
Leave a Reply