

The new version of Ubuntu 17.10 Server edition is now available. Today we are going to guide you to install Ubuntu 17.10 Server Edition. This is part of our Linux Ultimate Guide. Installing Ubuntu Server is pretty easy and we hope this guide can help anyone who wants to try the Ubuntu Server. I install this Ubuntu Server as a virtual machine on Proxmox Virtual Environment. It’s a great open source virtualization system based on Debian. You should give it a try. We have been using this Proxmox VE to power up our business in last few years. Please enjoy this Ubuntu 17.10 Server Installation Guide.
System Requirements
Ubuntu 17.10 Server does not requires a high specifications to run. But, we recommend you to use at least the following:
- 2 Core CPU
- 1 GB RAM
- 20 GB hard drive
Ubuntu 17.10 Server Installation Guide
Before we go through the installation, you may want to download Ubuntu 17.10 Server ISO. Next, boot your computer, server or virtual machine with the ISO file. If you are installing this server on a dedicated PC or server, you may need to create Live Bootable Flash Disk.
Step 1. Select Installation Language
The first step, we need to choose the installation language. The default language is English but you are free to change to any supported language.

Step 2. Select your country
You may need to select Other if your country is not in the list.

Step 3. Select Locale
If there is no locale based on combination between the language and country you choose, we need to select it manually. In most cases, leave it as the default value should be fine. Except, you know exactly your preferred locale.

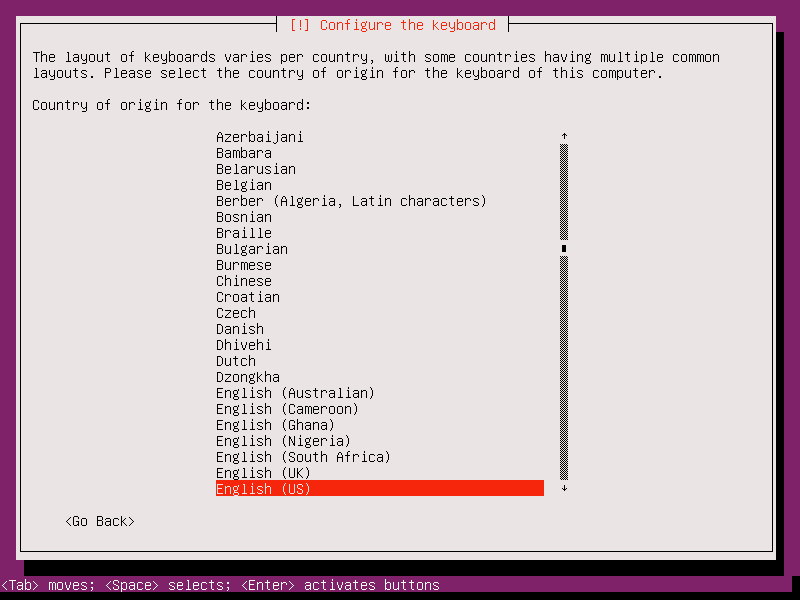
Step 4. Select Keyboard Layout
You may choose your keyboard layout from the list. If you have no idea what is your keyboard layout, leave it as is.


Step 5. Set the hostname
The following steps we need to give a new hostname to our server. The default value is “ubuntu” but you are free to change it to anything you want.

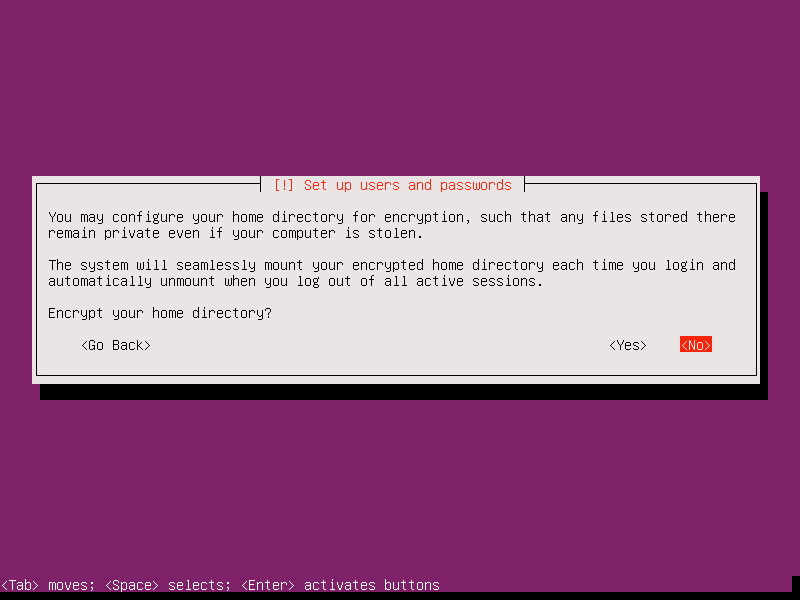
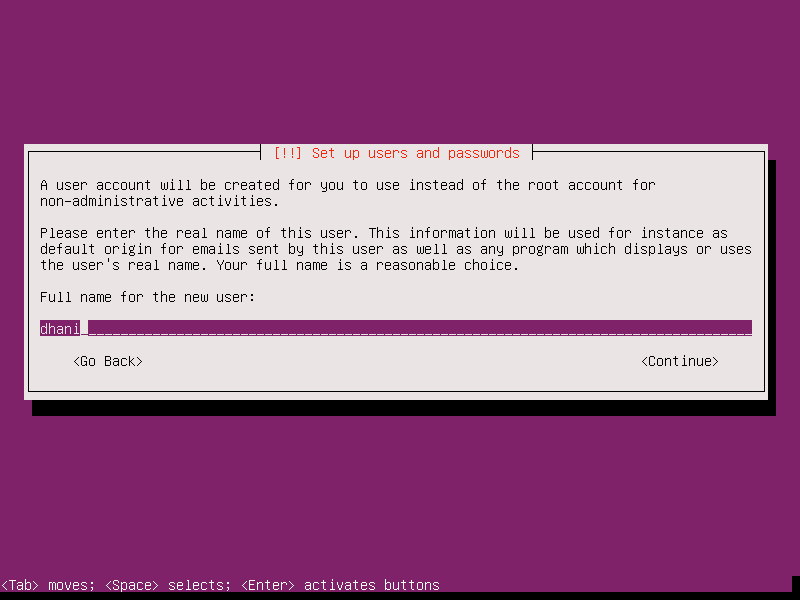
Step 6. Add new user, password and home directory
We need to add new user to our server. Also, you will need to supply password for the new user.

Step 7. Configure date time & time zone
If you are connected to the internet, usually the date and time will set to automatic. If not, you need to configure it manually.

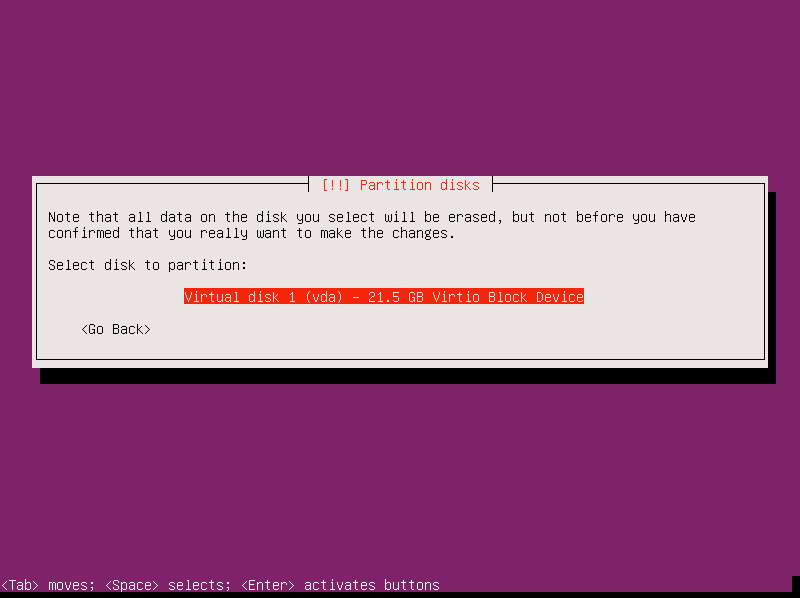
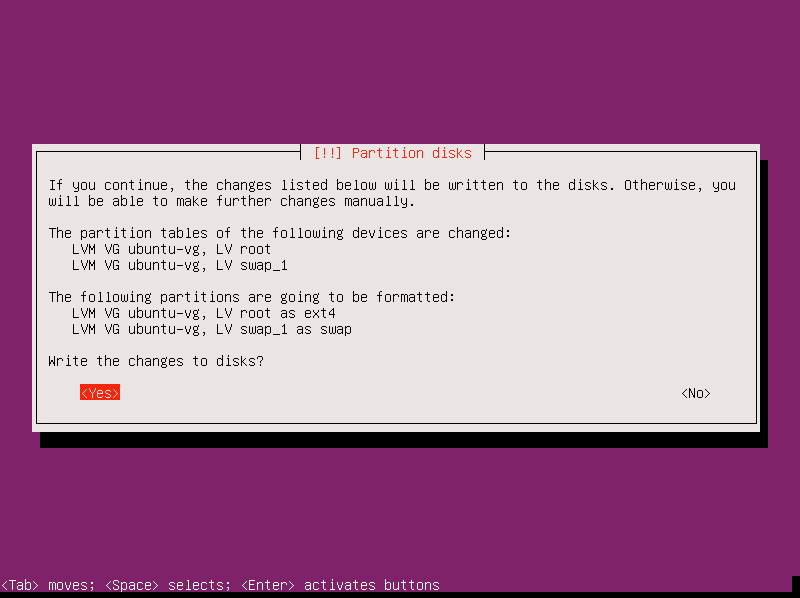
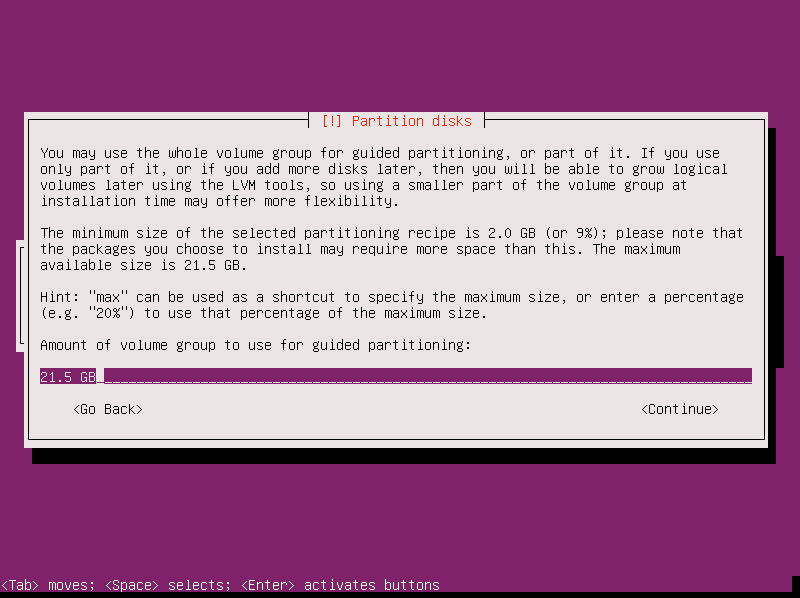
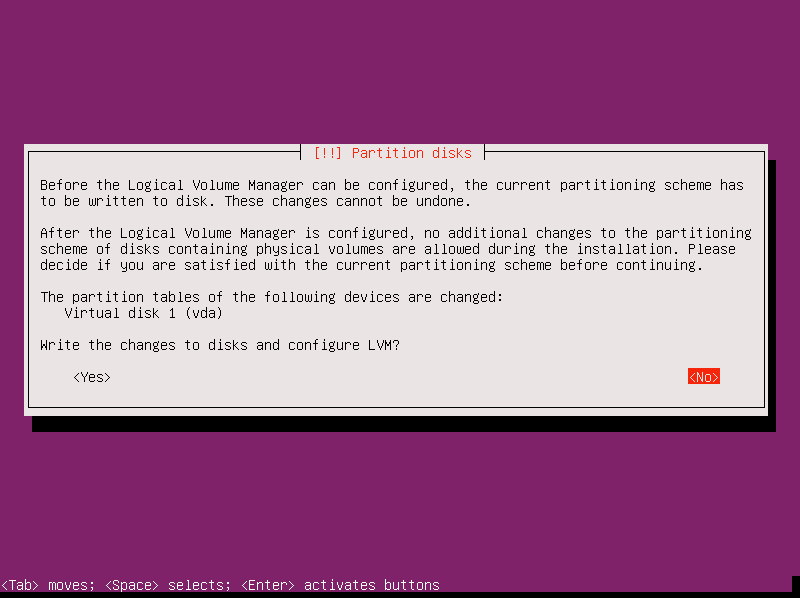
Step 8. Partition the Disk
Now we are ready to partition the disk. Select the partitioning method from the list. You can use manual setting to set the partition manually (for advanced users). For now, we use the second one.

Select your disk and confirm the partitioning steps
Finally, the installation process will start. It copies files from the ISO to your system. Wait until this process is complete.

During the installation process, it may ask for proxy configuration if exist. Leave it blank if you don’t have a proxy on your network.
Configure Update
It also will ask you to choose how the update will be delivered to your server. I recommend to choose the second option to install automatic update for security

Software Selection
On this menu, you can select which software will be installed on your server. Use spacebar to select between option. On this example, I just want to enable the OpenSSH Server only.

If you want to build a web server, enable the LAMP Server to save your time on the next tasks.
Install GRUB Boot Loader

Reboot the server once the installation is finished.

Now, the Ubuntu 17.10 Installation is completed. Log in to your new server for other administrative tasks.

Conclusion
Ubuntu 17.10 Server Installation process is pretty much easy. Almost anyone can install this OS on their PC or server or virtual machine. Please subscribe to our mailing list for more tutorial about Ubuntu and other Linux.
Leave a Reply