

This tutorial is going to show you how to install MySQL Server on Windows 10. Did you know that you can turn your Windows 10 into a powerful MySQL Server? With few simple steps you can get MySQL running on your Windows 10. MySQL is a free, open source relational database system. This database server has been used by millions of users around the world. Please read the following MySQL Server Installation Guide on Windows 10 below.
Before we go through, you will need to download the latest version of MySQL Community Server for Windows. Use the link we provided below to get started.
MySQL Community Server 5.7.19 Free Download
MySQL Server Installation Guide on Windows 10
Step 1. Open the installer
You can choose to download the web installer or the complete installer. On this tutorial, I use the web installer version. To start the installation double click the installation file. It should looks like this
mysql-installer-web-community-5.7.19.0.msi
Step 2. Update existing MySQL products
In my case, I got an update notification. Click OK to start the update process. This will update the MySQL installer tool.

Once completed, the actual installer will start it’s job.

On the first wizard, click Next to proceed. The installer will detect any other MySQL program installed on your computer.

In the next step, the installer will start downloading files required for the installation and updates. Please wait until this process is completed.
Step 3. Adding MySQL Server
Now, we need to install MySQL Server using the MySQL Installer. Click Add button to add MySQL Server.

Add MySQL Server to the install list

Click Next

Click Execute to start the download process
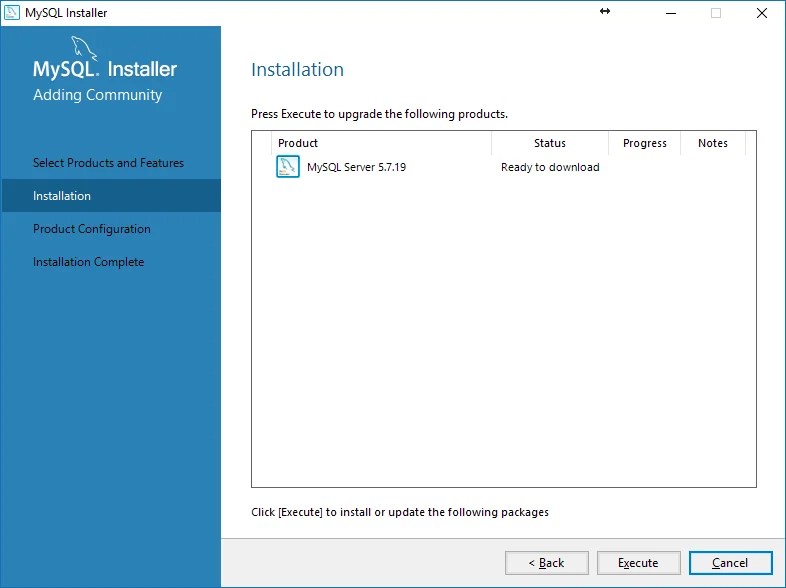
It will start downloading files from the internet for MySQL installation. Wait until it completed. Once finished, the following window will appear.

Step 5. Configure MySQL Server
This MySQL Installation Guide will continue to configure the MySQL Server. First we need to select whether it’s a Standalone MySQL Server/Classic MySQL Replication or a InnoDB Cluster Sandbox Test Setup. But the second one is for testing only.

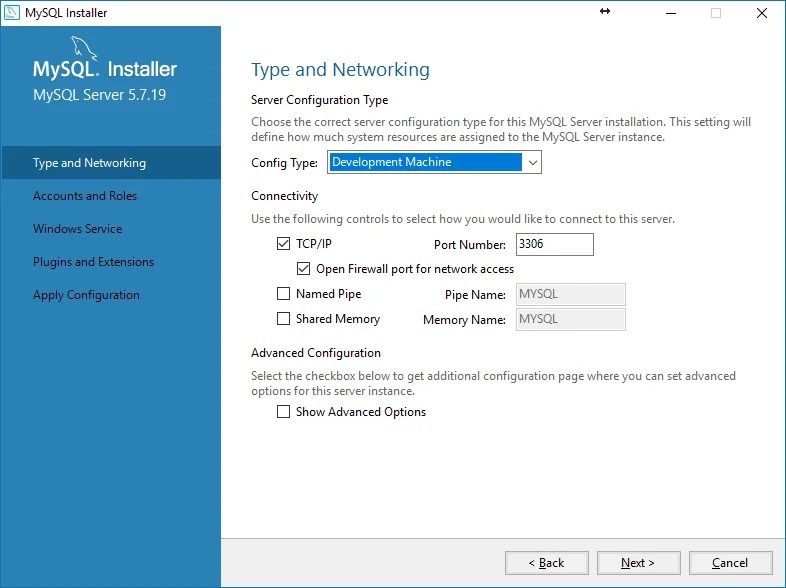
Choose MySQL Type and Networking
We need to select the server configuration type for the MySQL Installation. You can choose config type such as Development machine, Server Machine and Dedicated Machine. In this example, I use the Development machine since I am going to use my computer for another purposes. You can read the differences between these config types from this link.
Next, we need to specify the root password

You can also add user to the MySQL on this step. Next is to configure MySQL as Windows Service

Next we need to configure additional plugin

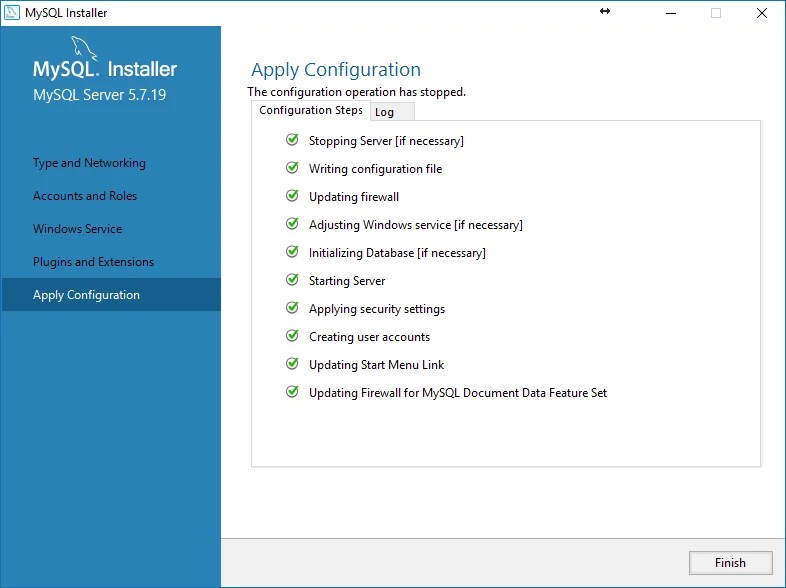
Now we are ready to install the server

In few moments, the installation is completed.
Now our MySQL Server is ready. Thanks for reading this MySQL Server Installation Guide.
Leave a Reply